I'm going to admit something: I can't keep up. I've got two kids under five, a relationship, a real job, a couple of semi-real jobs, four chickens and a big old house in need of many repairs. Before children, I worked at it but I identified as an organized person. Post kids, I spend a lot of time just getting by. There is always more laundry to fold, a sticky handprint to scrub, crumbs in the couch. Matching socks? Please. For whatever reason, the chaos seems to concentrate in a particularly overwhelming way on the section of kitchen counter where I cook. The mail. All the various electronic items that need to be charged. Toys. Office supplies. SO MANY DAMN CORDS.
One day as I was trying to chop some onions amid all the mess, I started day-dreaming about building another place for all of it. A place where phones could charge without getting food on them and mail could be organized, or at least out of sight. I wanted the equivalent of the old school telephone table, except upgraded for the iPhone world. The only problem was that our house isn't large. (See more house projects here.) A piece of furniture wouldn't really work.
Old school telephone table:

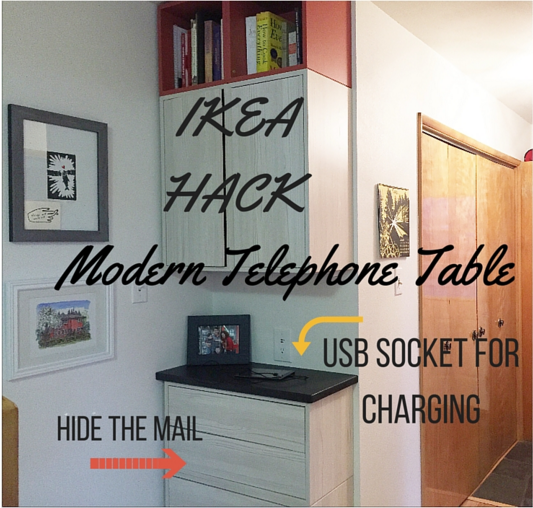
Then I noticed that there was this old, covered electrical socket high in the wall at the bottom of the stairs. It had been installed in the 1960s to power a plug-in clock. And there was kind of a roomy landing area. What if I used the socket at the bottom to build a new-school telephone table? A charging spot for phones and computers and tablets. A place to put the shopping list. A mini island of organization. A mother's control center. I liked "mother" and "control center" in the same sentence.
Here is the spot. If you look close, you can make out the socket cover on the wall:

Next step was to find some cabinets. I wanted it to be inexpensive but also cool. Over Thanksgiving, I visited IKEA in Seattle and settled upon some components of the VALJE series. The key was that the cabinets and drawers were shallow so they didn't take up too much space. (More on shipping IKEA to far-flung places like Alaska here. )
Here's what I bought:
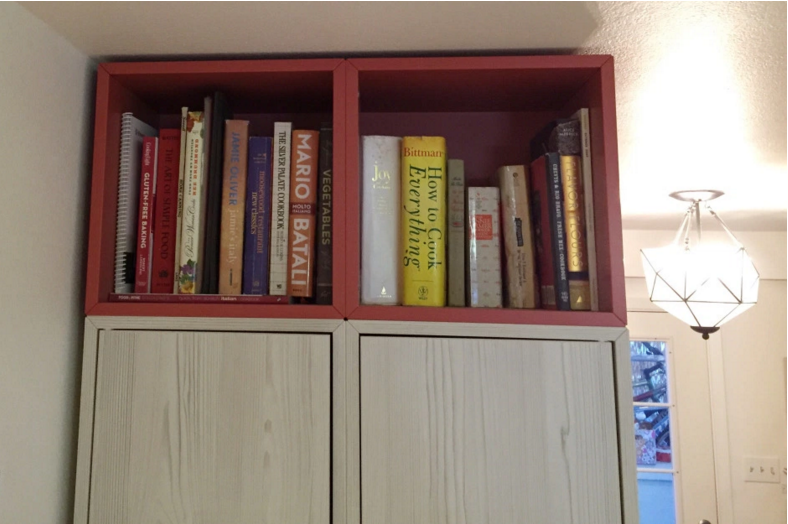
I settled on two red box shelves:

Two cabinets, in white larch: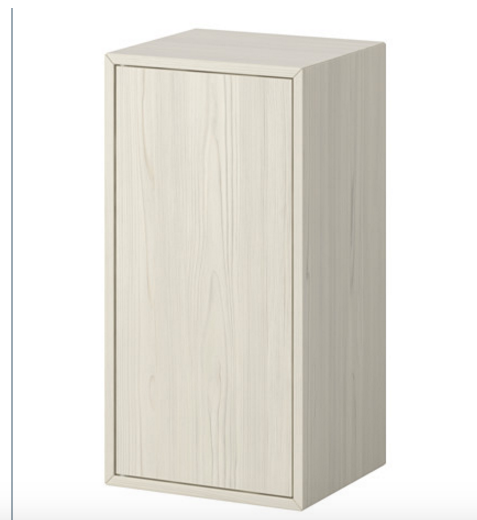
And two sets of drawers in white larch (pictured here in mocha, in case that's your style):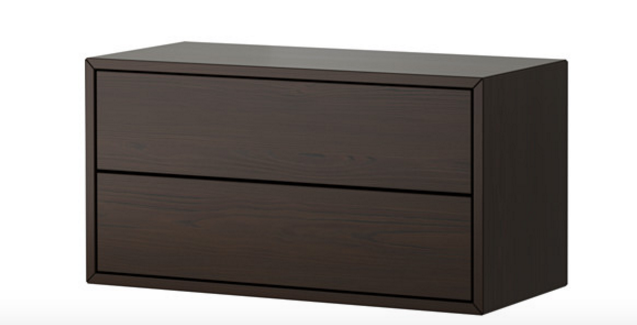
Once they arrived, it took me a couple of weeks to get the time to put them together because I had to do it sans kids. Of course it was tricky. There was one particular step involving sliding in the back panel that just kept going wrong. I was saved by googling the name of the piece furniture and the problem. (Hint: the grooves on the bottom panel and the top panels are not the same depth.) After that, it was easy-breezy. Okay, except for one tiny, missing, essential part. But I called and IKEA sent it to me.
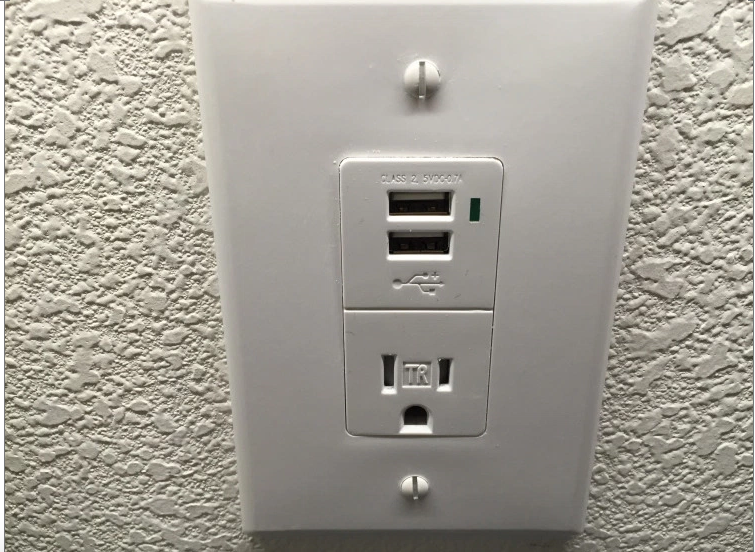
Once I got the pieces assembled, I decided to call my carpenter friend Dan to do it. I could have hung them, but I don't do electrical. I put the top of the drawers at counter height, out of reach of children. Dan fished the electricity down from the old clock outlet, wired in an LED under-counter light and put in a sweet USB socket.
Light: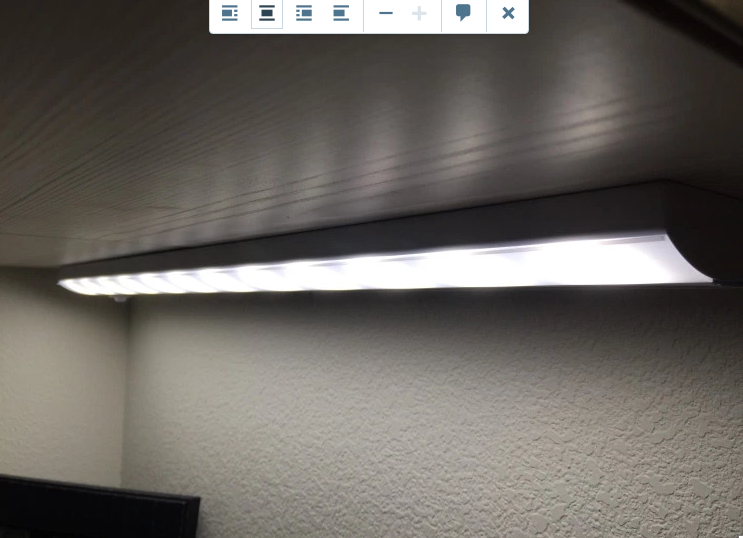
Cool USB socket. I got it at Lowes, but there are tons of them online.
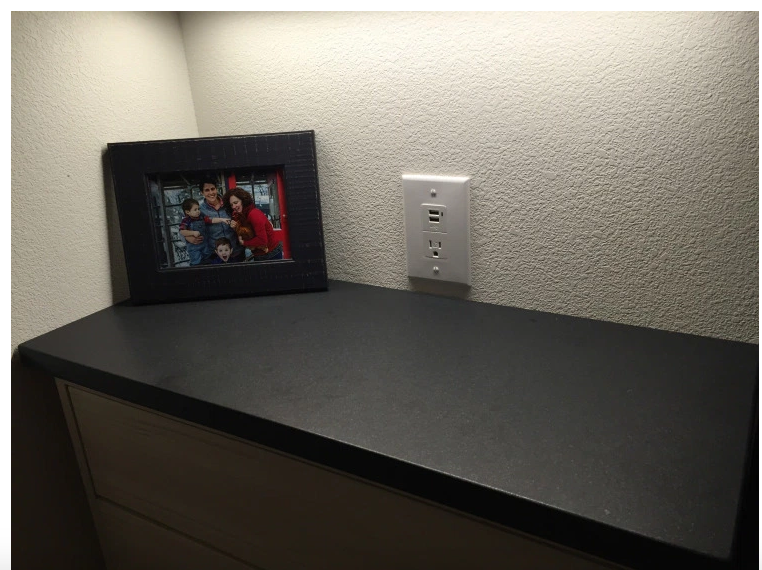
Next I shopped around at some local solid-surface places for a piece of remnant fancy counter-top. I fell in love with this sliver of dark grey quartz.
Even remnant quartz isn't cheap. A suitable substitute would be butcher block. In that case, you could situate the plug in the back of the top drawer and feed the cords through a hole. Even tidier!
The top shelves gave me a place for the cookbooks I had left once I culled them.
One of the benefits of the IKEA pieces was that I could afford drawers. The top one is where I hide all the mail.
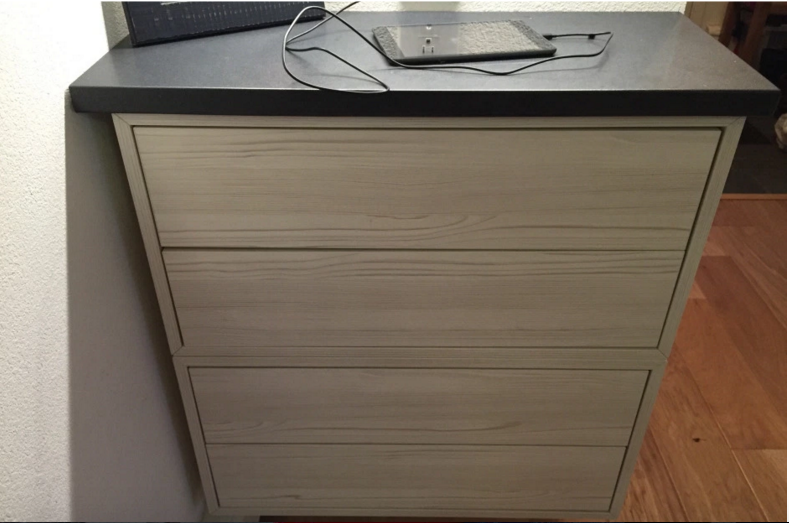
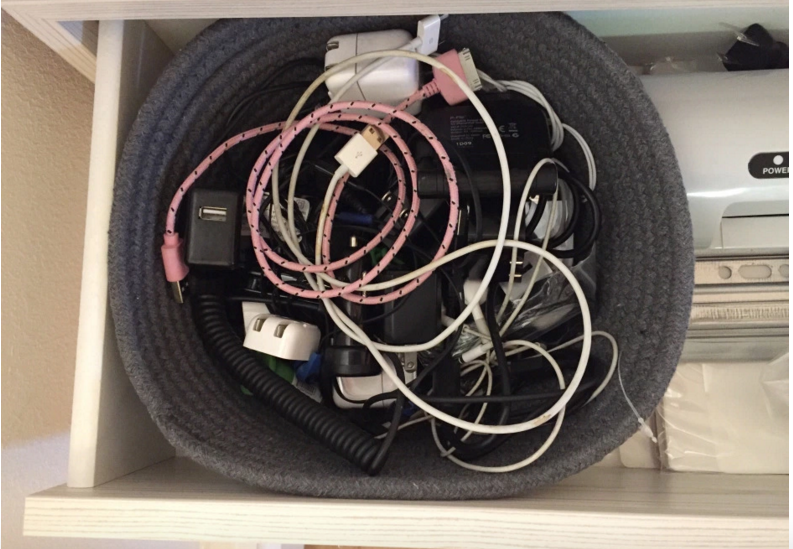
And, look at this satisfying cord situation.
And now, when I cook, there are approximately 50 percent fewer random items in the way. I'm all for simple victories.
Read more about my DIY house projects here.
Also on HuffPost:
