By: Alex Robinson
Credit: Cole Saladino/Thrillist
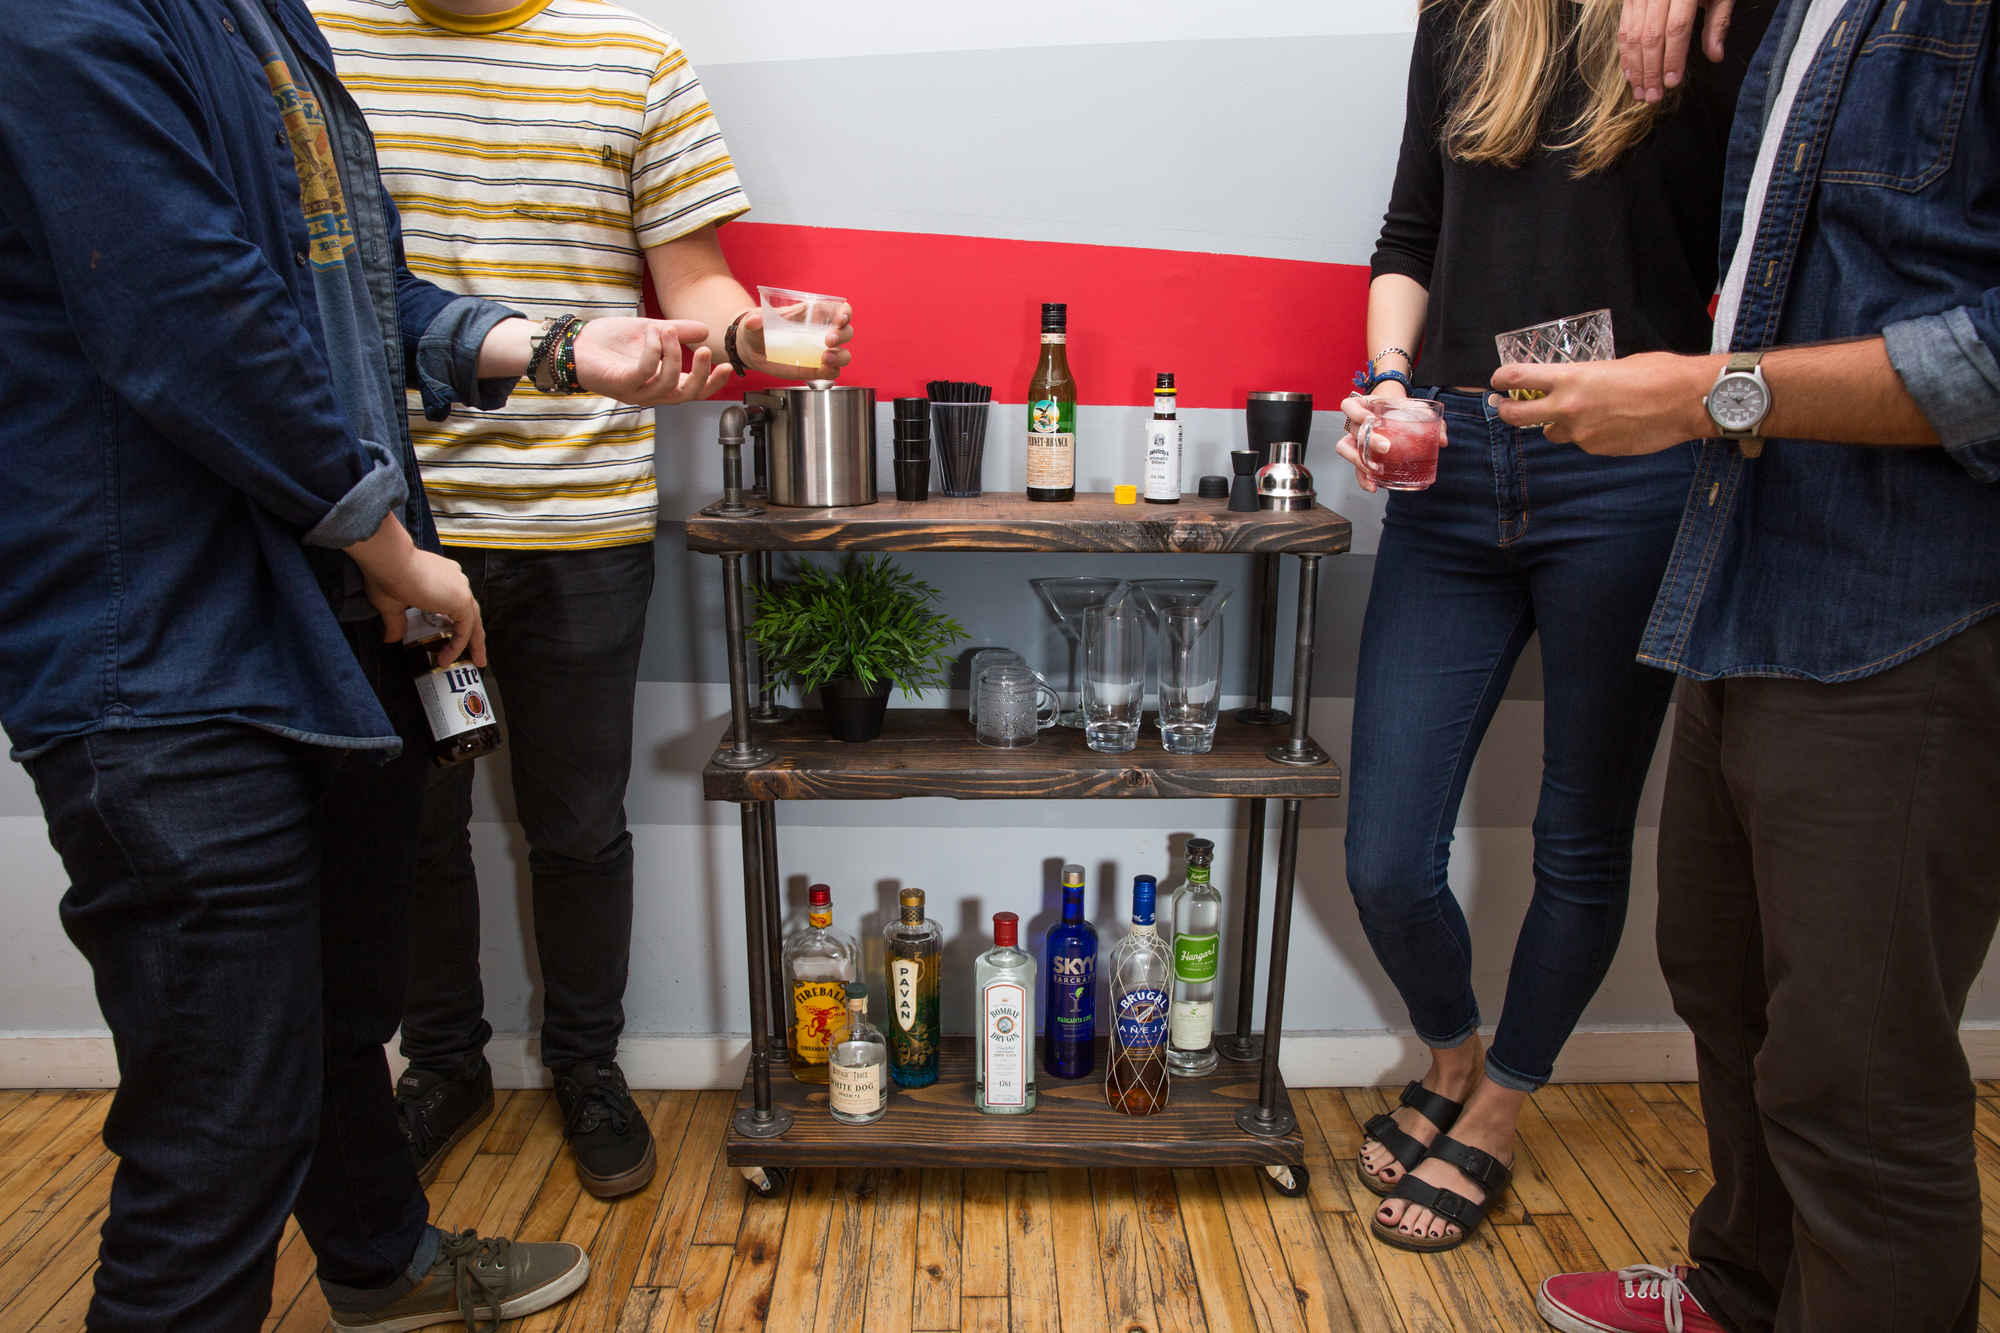
Bar carts are decidedly cool, and a requisite piece of furniture in every home. They look super classy and provide a display for your collection of fine spirits that random people have left at your place. Plus, they're mobile, so you could literally tow one to a party, thereby making you the coolest person at this hypothetical shindig. Unfortunately, they're usually very expensive... unless you decide to build one yourself.
It took me one hour and approximately $180 to make this industrial-style cart from materials I picked up at Home Depot. It's nice, right? Let me show you how it's done.
Credit: Cole Saladino/Thrillist
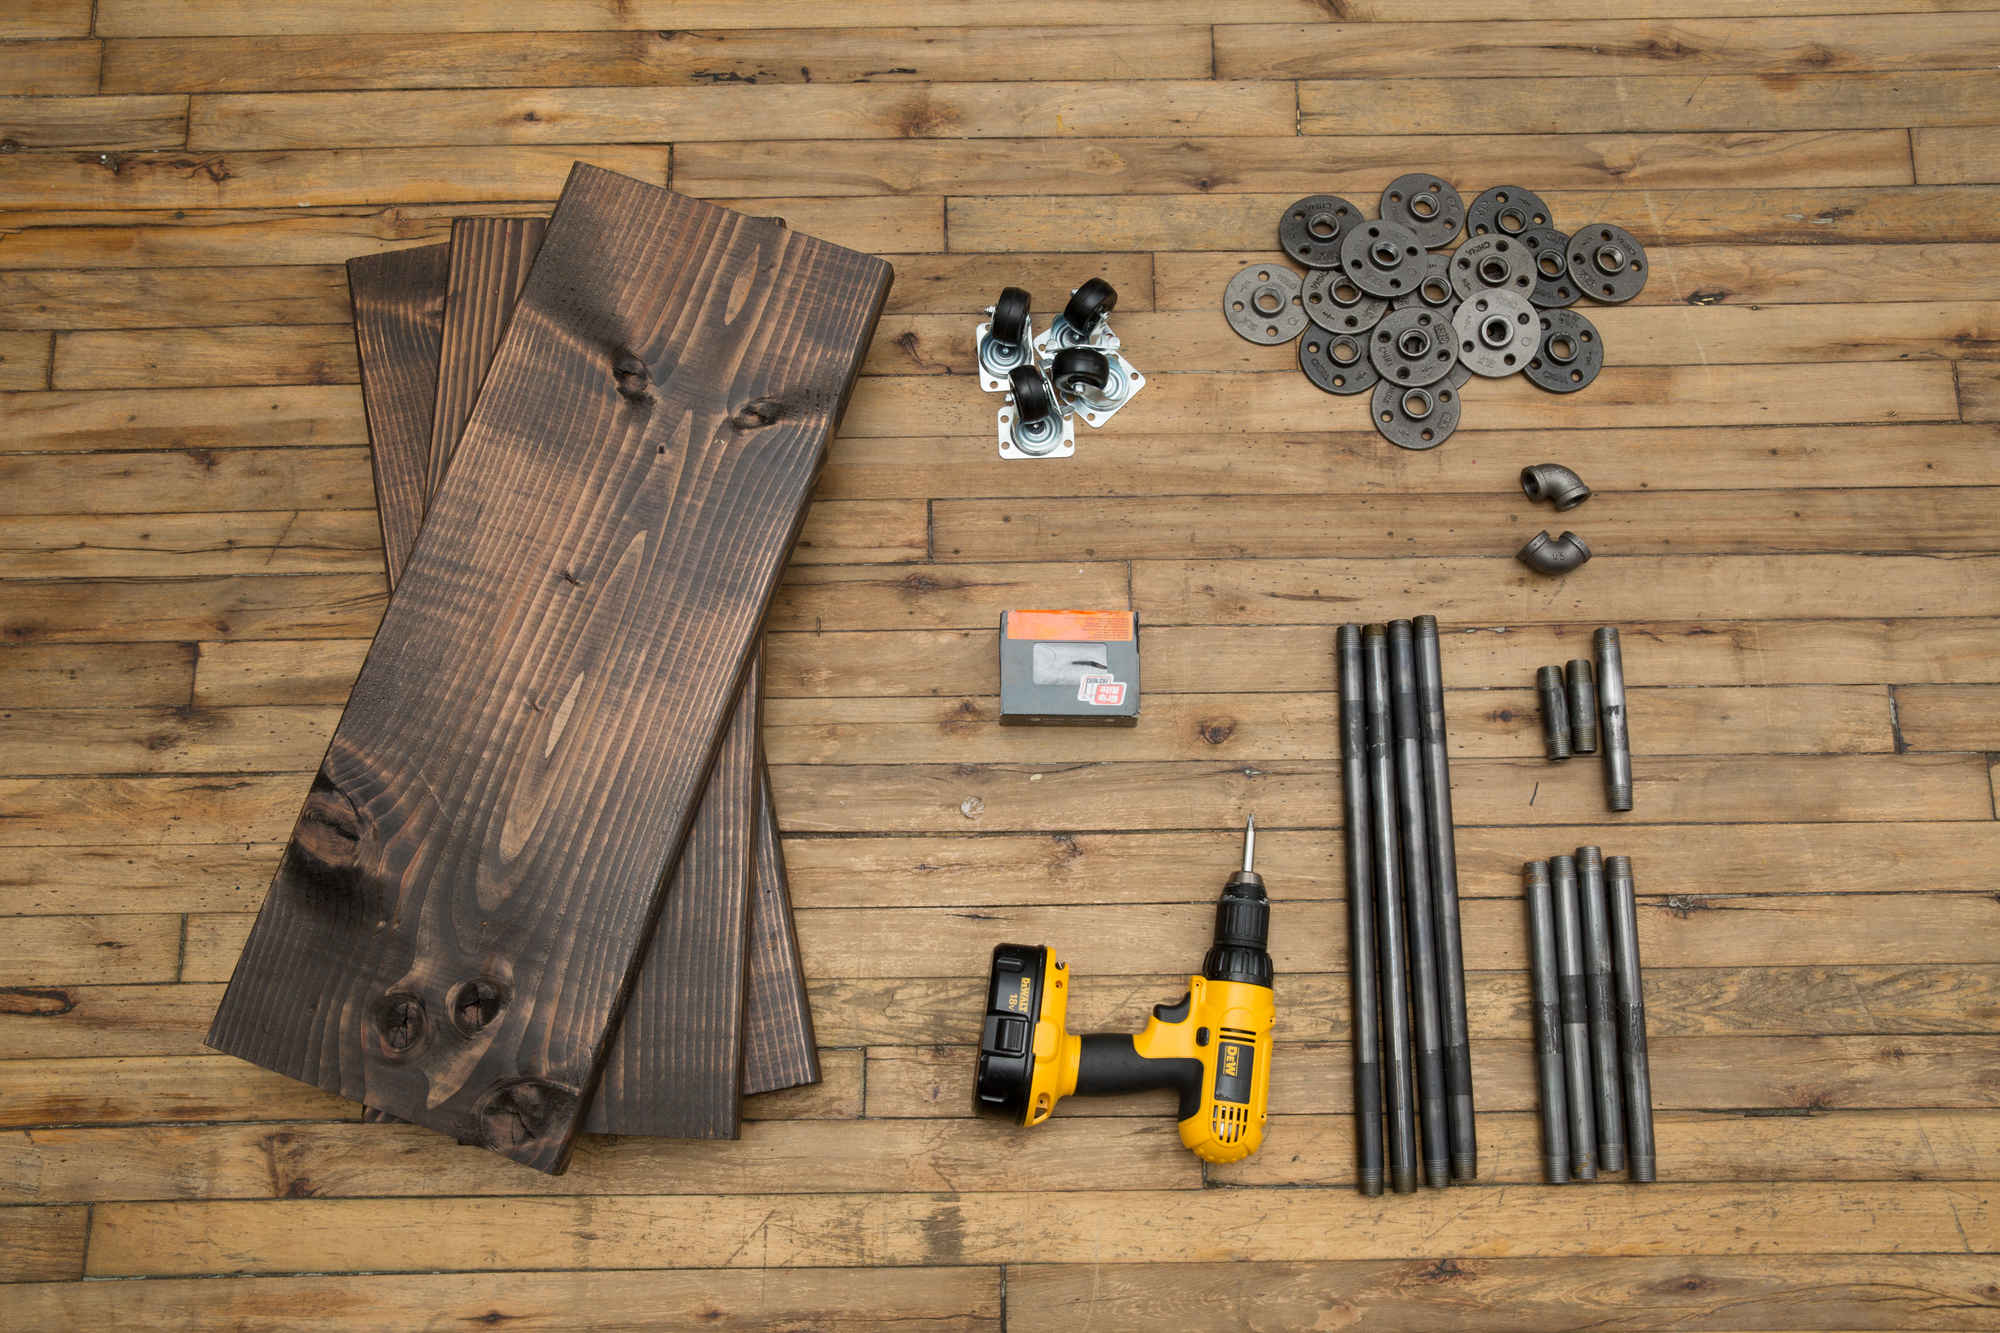
Materials
• Wood
• Drill
• 72 screws (I used 1" drywall screws)
• (18) ½" flanges
• (4) 1½" wheels (casters)
• (4) 12" steel tubes
• (4) 8" steel tubes
• (2) ½" steel elbows
• (2) 2" steel nipples
• (1) 4" steel nipple
Total cost: ~$180
Credit: Cole Saladino/Thrillist
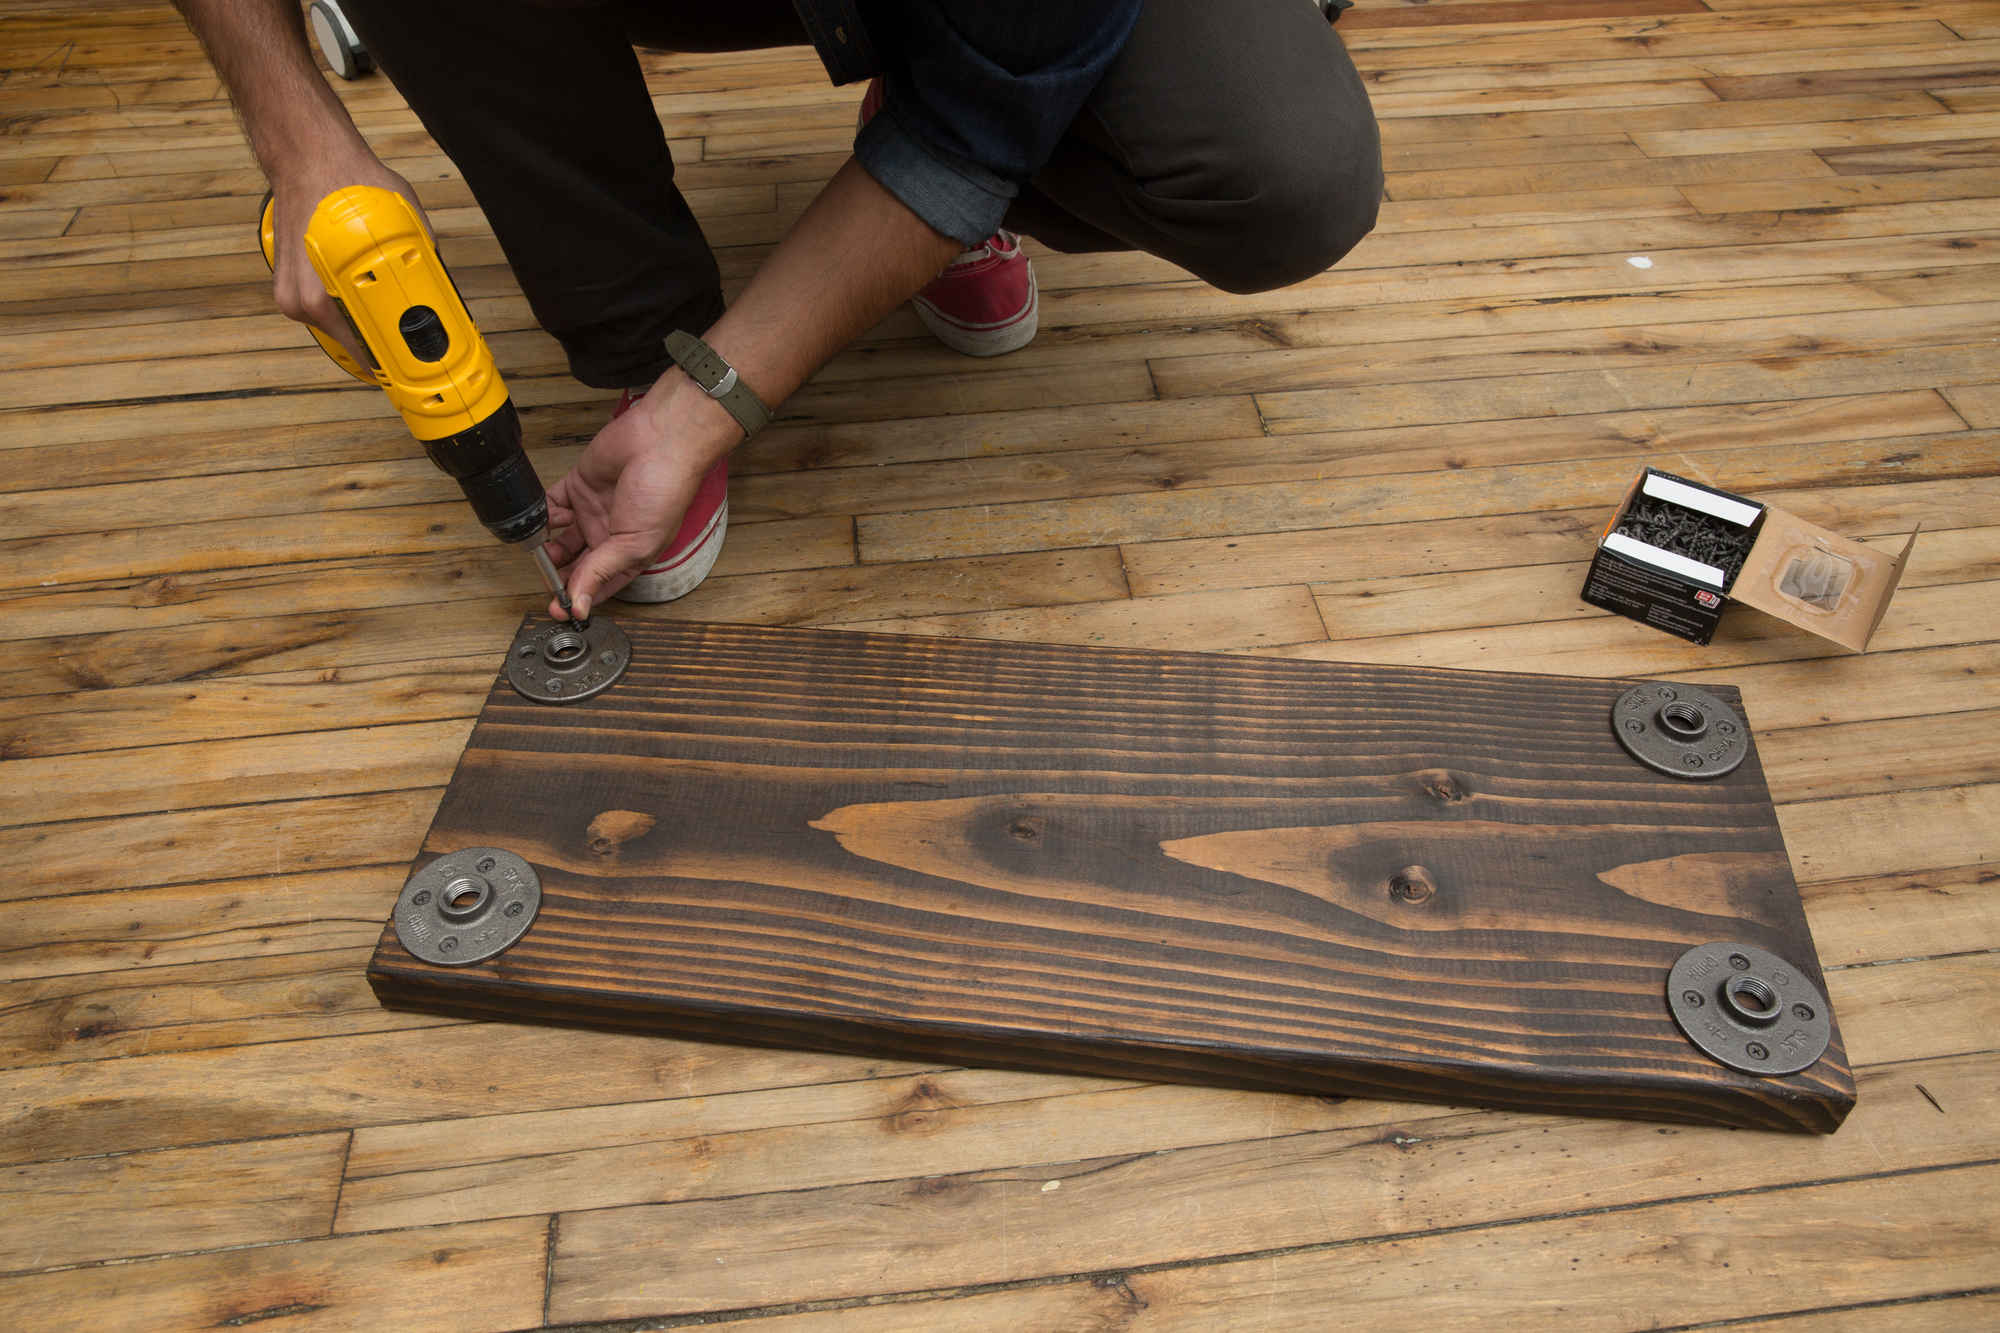
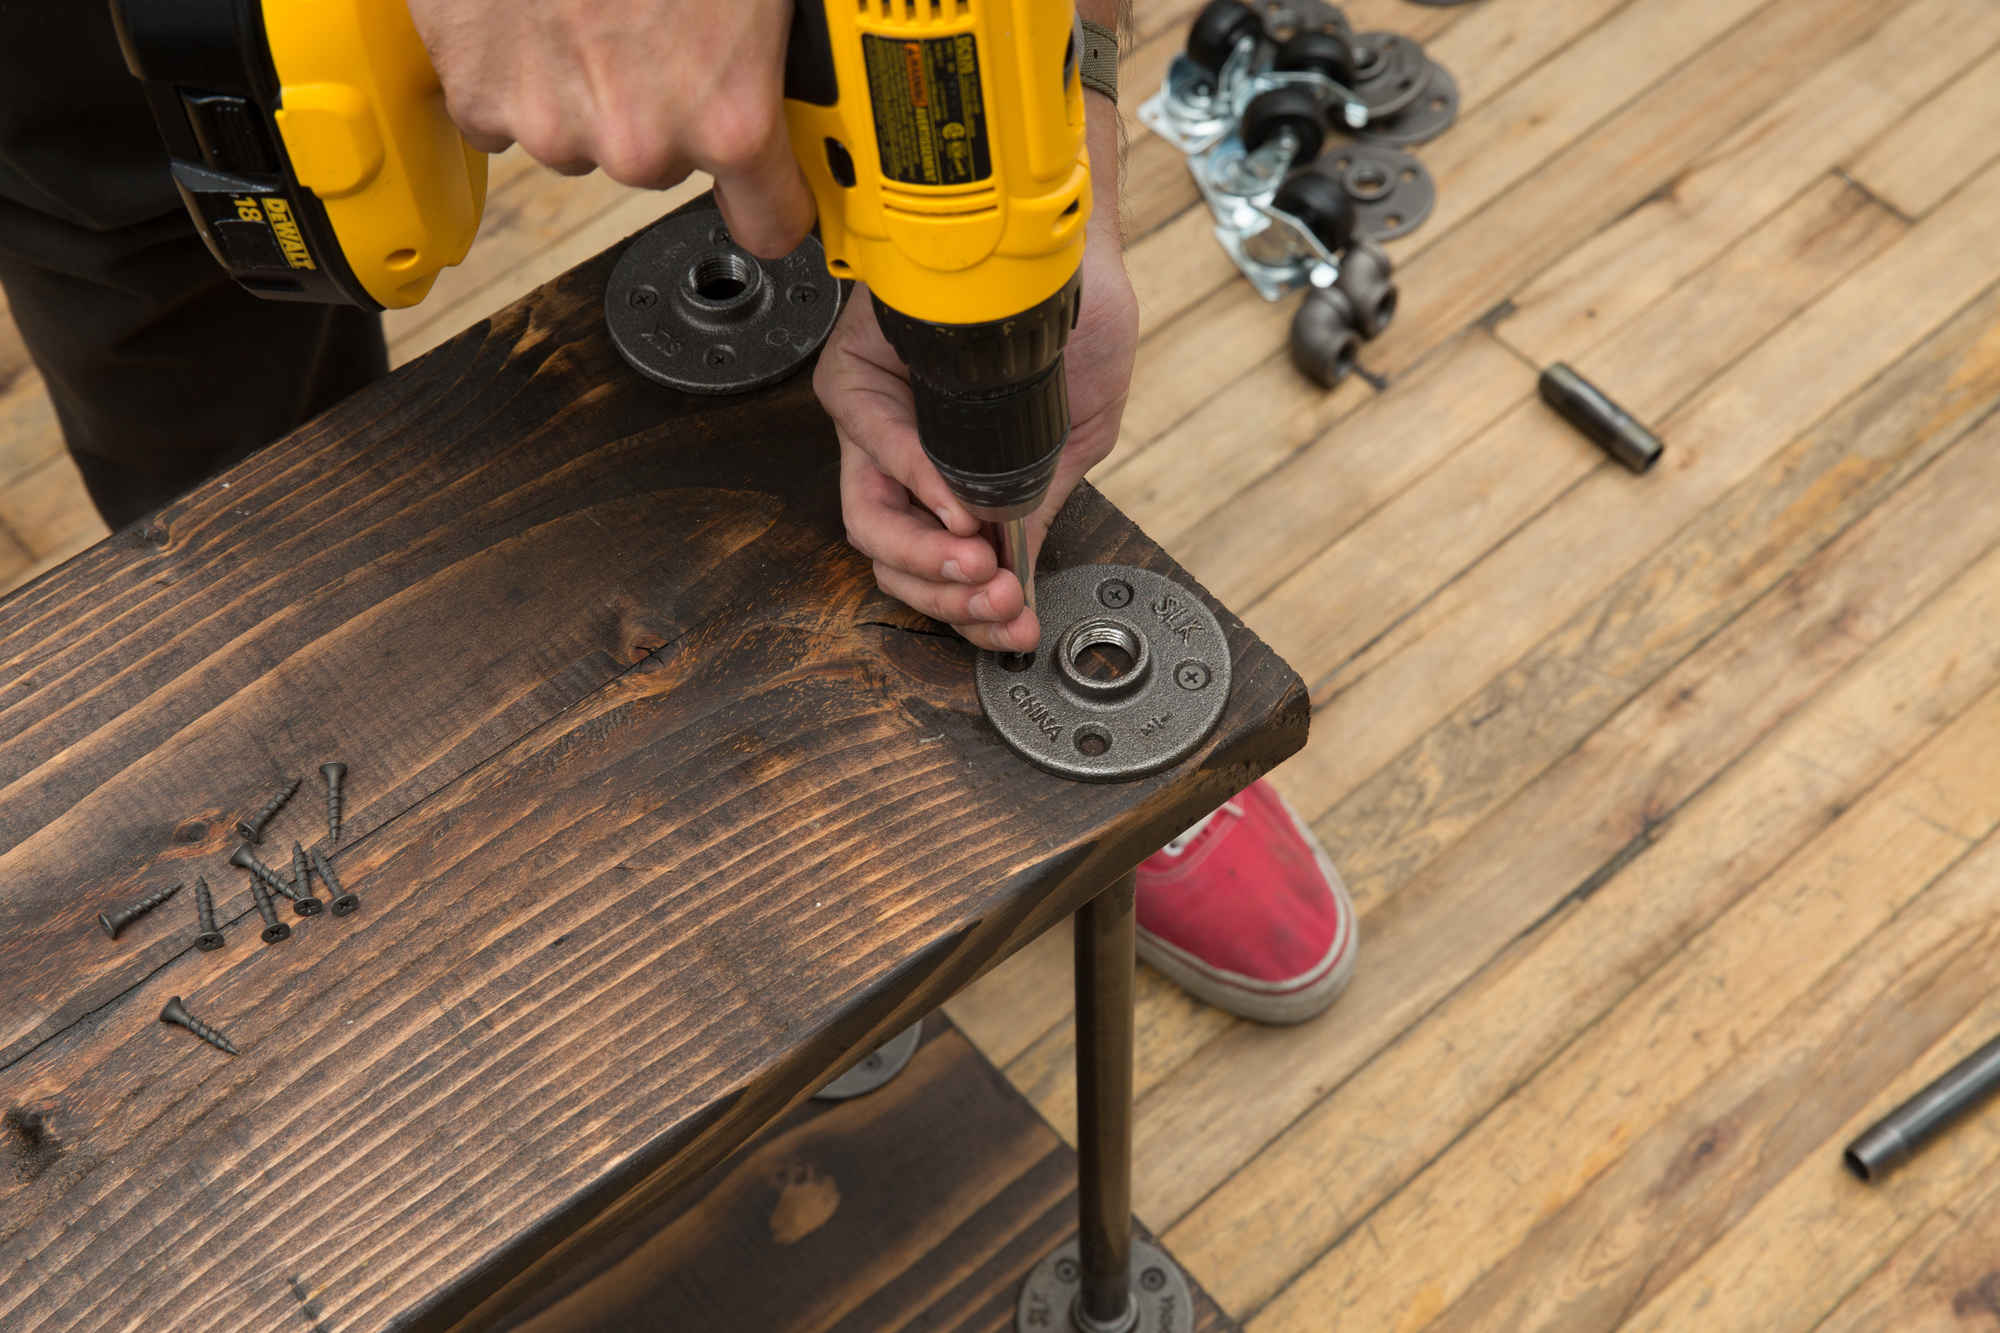
Step 1: Drill in the flanges
You'll want to start with the bottom shelf first. Grab your four wheels, and mark with a sharpie where they'll be going (but don't drill -- just mark). Then grab your flanges and align them -- one in each corner. Make sure the holes in the flange do not match up with the holes you've marked for the wheels. This is very important, because you don't want the screws you're drilling into the flange to hit the screws for the wheels on the other side, or else they'll meet and crack the wood. Once your flanges are in place, grab your screws and drill.
Credit: Cole Saladino/Thrillist
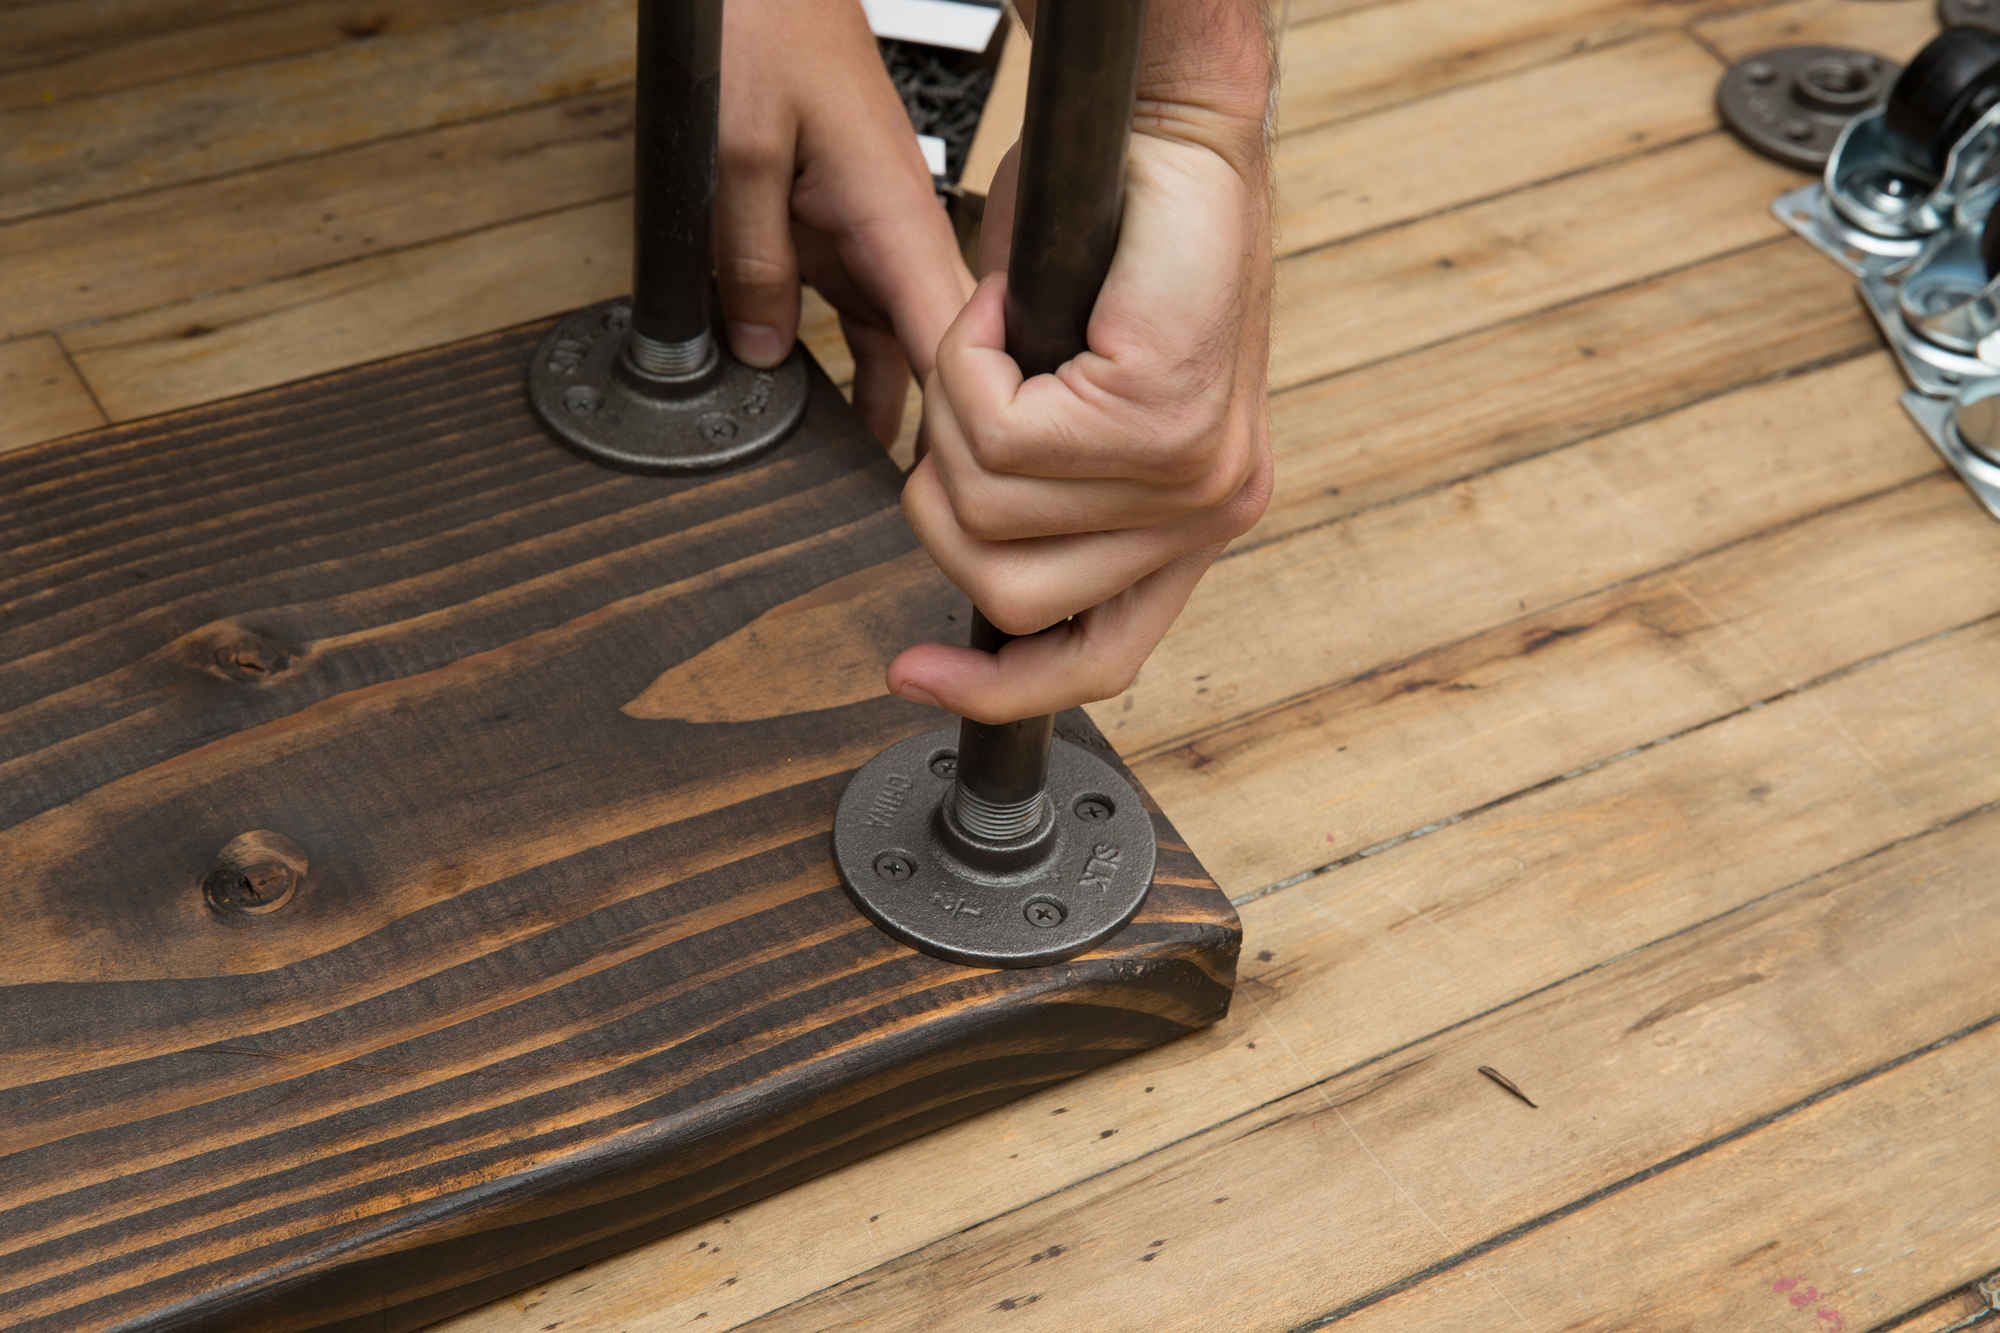
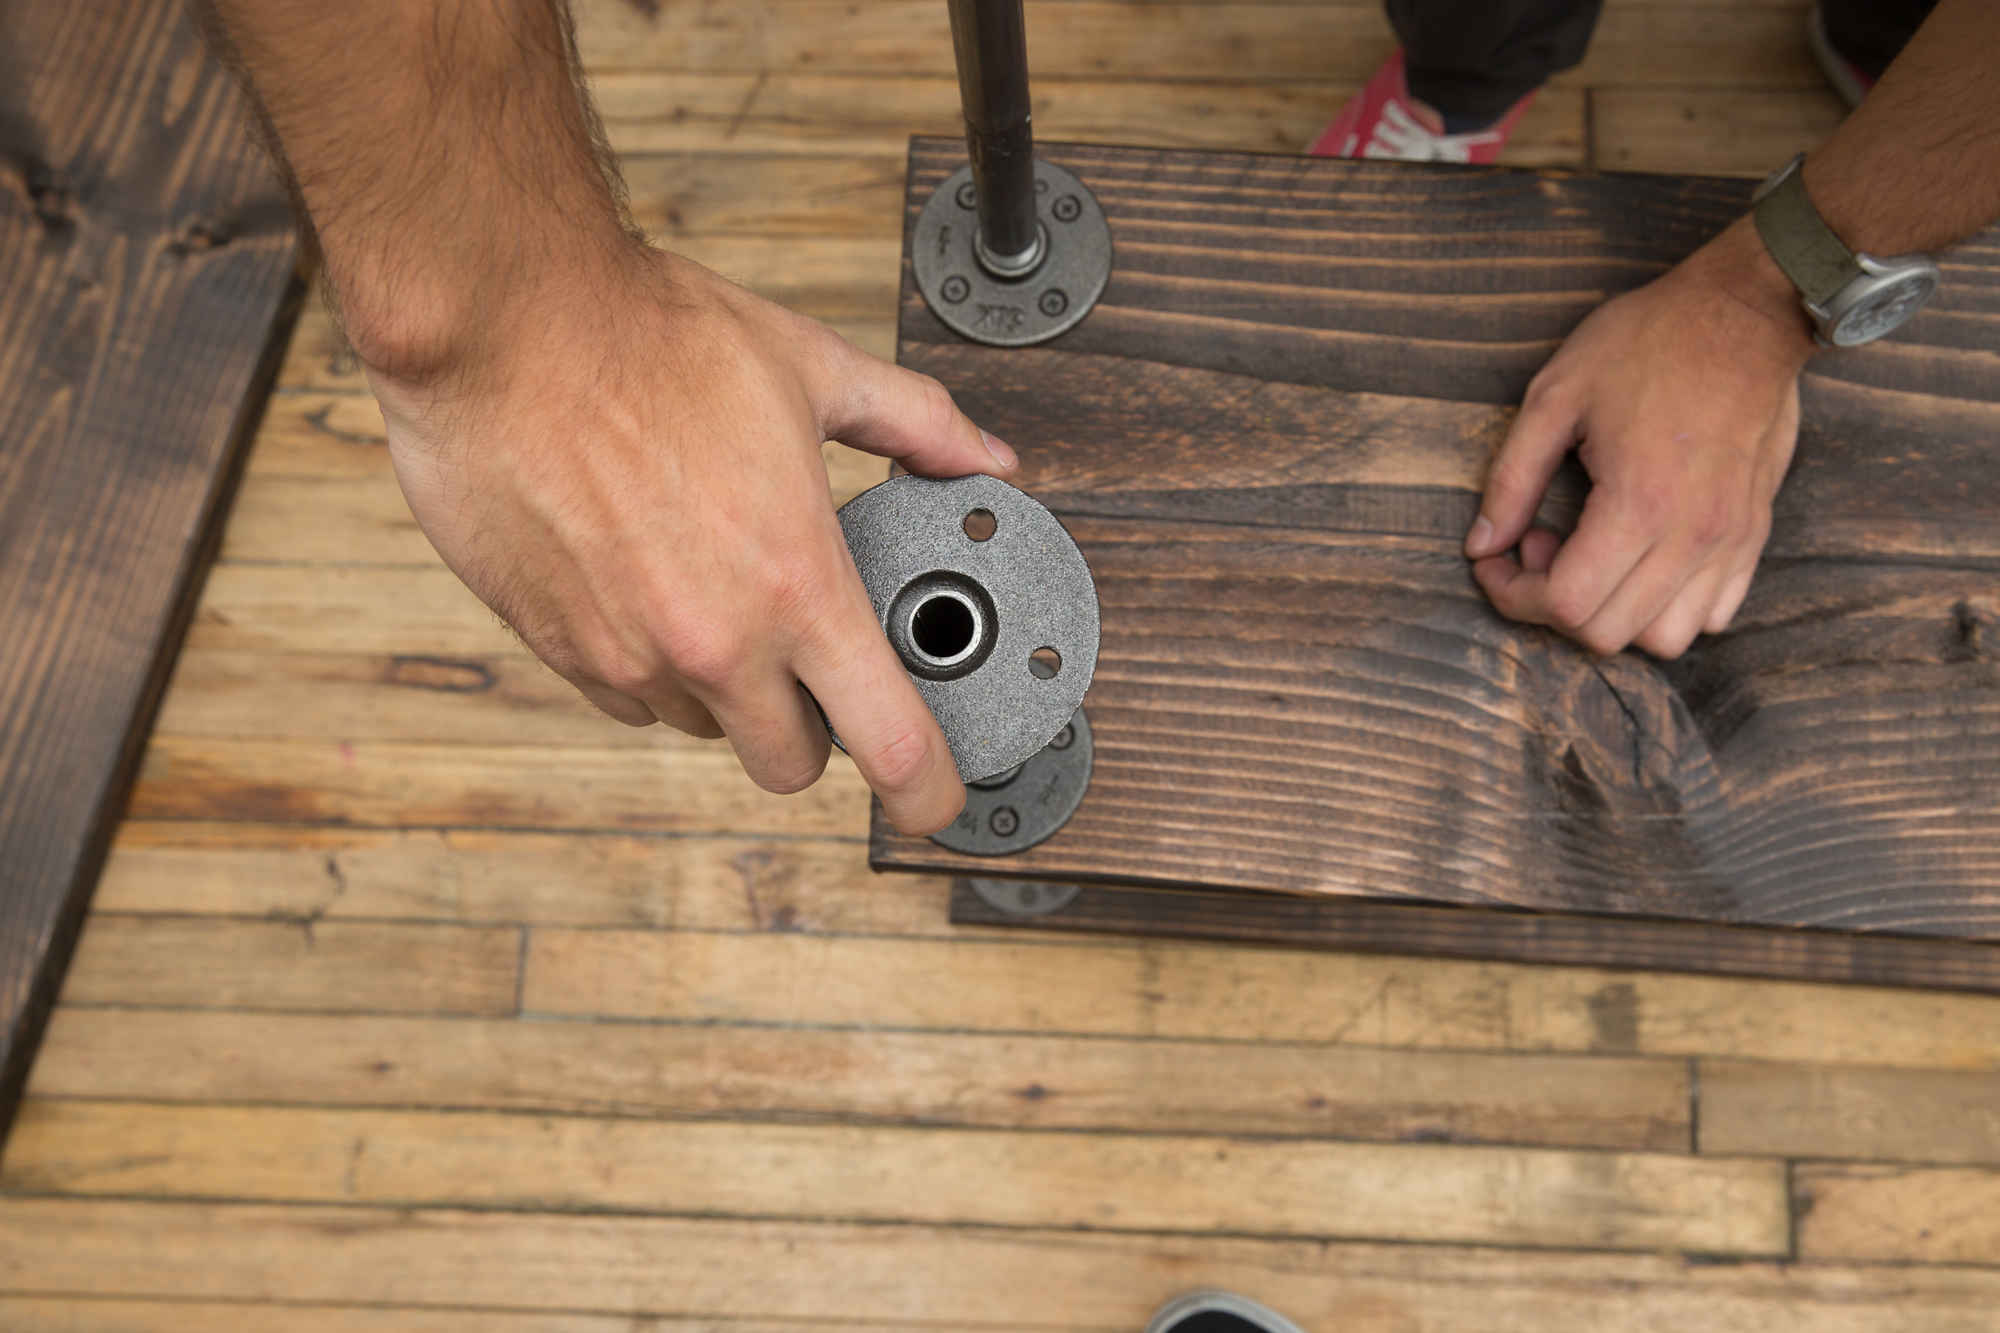
Step 2: Screw in the pipes
With flanges secured and confidence levels reaching 1980's Schwarzenegger, screw your 12" pipes into the flanges, then attach four more flanges (upside down) to the other end of the pipe. No need for a wrench, hand tightening will be a-ok.
Then flip over onto the second board (your middle shelf) and drill down those flanges.
Credit: Cole Saladino/Thrillist
Step 3: Secure flanges on top of the middle board
Once the 12" pipes are all screwed in and flanges attached, you'll want to flip the cart right side up and secure flanges to the top of the middle shelf. (Remember! Make sure the holes don't align with the ones you just drilled in on the bottom.) Once you're confident you won't screw up your screwing, drill baby, drill.
Credit: Cole Saladino/Thrillist
Step 4: Attach the 10" tubes and the top board
After your middle board is attached to the bottom board and all the flanges are in place and properly attached, screw in your 10" tubes, attach the top flanges, and throw on the top board -- ostensibly following the same rules as step three.
More from Thrillist:
Like Thrillist on Facebook: www.facebook.com/Thrillist
Also on HuffPost:
