When you have kids, you accumulate old clothes and little scraps of this and that at an alarmingly rapid rate. T-shirts they've grown out of, ripped-up jeans, hole-ridden sweaters, and old pillowcases lay dormant in your basement for mostly sentimental reasons. Our solution? A little bit of creativity.
Focus Features' The Boxtrolls takes this spirit of creativity and fun to an aesthetically astonishing place. In this film, based on the children's novel "Here Be Monsters" by Alan Snow, a young, orphaned boy raised by underground cave-dwelling trash collectors tries to save his friends from an evil exterminator. The stop-motion animation, produced by Laika (Coraline, Paranorman), is enough to inspire childlike wonder in even the most stubborn grown-ups.
In honor of the DIY spirit of the film, we've partnered with Focus Features and Maggy Woodley of Red Ted Art to create fun crafts that will help you turn trash into treasure.
Don't forget to check out The Boxtrolls, out in theaters on September 26.
Toilet-Paper Roll Boxtroll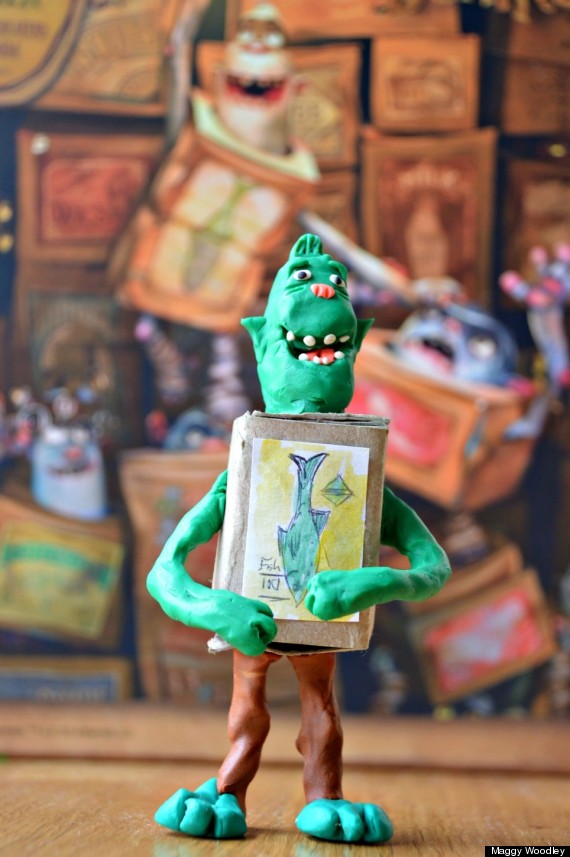
First things first! This is your chance to create your own Boxtroll characters. We challenged ourselves to make one out of a toilet paper roll. We've provided step-by-step instructions, but we hope you will imagine unique details for yourself. Does your Boxtroll have a long or wide head? Does it have a big mouth with lots of teeth or just a few? Will it have big ears or little ears?
What you'll need...
- toilet paper roll
- glue
- wire
- plastecine
- scissors
- paper & watercolors (for the label)
How it's done...
- Take your TP roll and flatten it into a square shape. Make creases on both sides. Open it and squeeze the creases towards each other to flatten the opposite side and make two fresh creases.

Monster Plushies 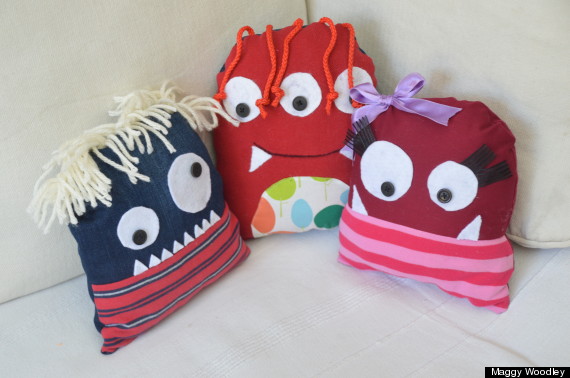
Remember those T-shirts that your kids grew out of? How about those jeans that have holes in the knees? These make for great sewing materials, as you can practice away and not worry about “wasting” new fabric. Turn old clothes and fabrics into a lovable, cuddly monster pillow.
What you'll need...
- Assorted fabrics
- Sewing machine (you can also hand sew)
- Stuffing (you can also use bubble wrap or old pillow filling)
- Buttons (for eyes)
- Felt scraps for teeth and eyes
- Fabric glue (to reduce the hand sewing)
- Bits and pieces such as wool or string (for details such as hair)
- Draw some basic shapes and patterns for your monsters.
Bottle Bugs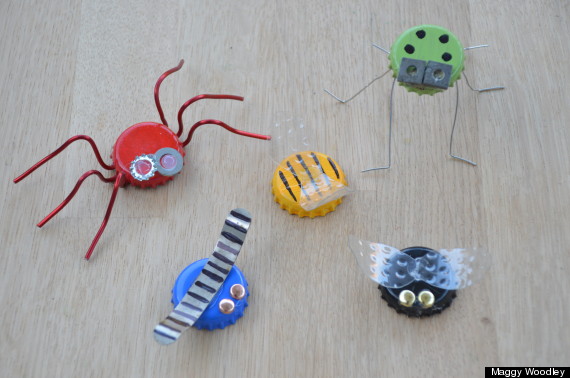
This craft calls for little more than old bottle tops and bits and pieces from the toolbox. Soon you’ll have enough items to make these fun little mini-beasts.
What you'll need...
- bottle tops
- acrylic or enamel paint
- brushes
- wire
- bits & pieces from the tool box (mini-washers)
- anything else you can find (e.g. we use the bubbly side of a plastic coke bottle)
- markers
- hot glue gun
How it's done...
- Begin by painting your bottle tops in your desired colors. Depending on what kind of paint you use, you may need to put on two to three layers. Let dry. Enamel paints dry very quickly, so you don’t have to wait to long to add a second layer if is needed!
Monster Catcher

Take an old milk carton and turn it into a monster ball-catcher. If you want, you can even make your own “throw bags” to go with it out of bits and pieces of fabric.
What you'll need...
- milk carton, washed and dried
- permanent marker pens -- the thicker, the better
- scissors
- googly eyes & glue (optional)
- Mark out where you would like cut out the “mouth” of your monster. You can use the “cut away piece” to test that your permanent markers won’t smudge, as some will.
Matchbox Toy Cameras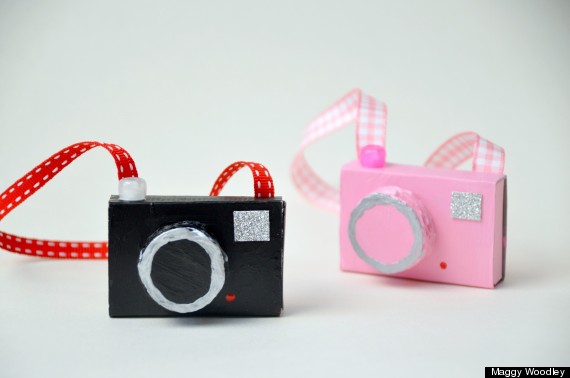
You get to recycle, you get to craft, you get a toy out of it and you have a little miniature art box, too. What more could you want?
What you'll need...
- matchboxes
- cardboard
- glue
- paint
- ribbon
- beads
- anything else you find appropriate; e.g., some silver foil for the camera flash
- Begin your craft by cutting out five or six discs out of cardboard. These pieces will become your camera lens. Depending on how big your lens to be, you will need more or less. We used a large coin as a template. Glue them together in a stack and add to your matchbox, slightly off-center.
Artsy Robots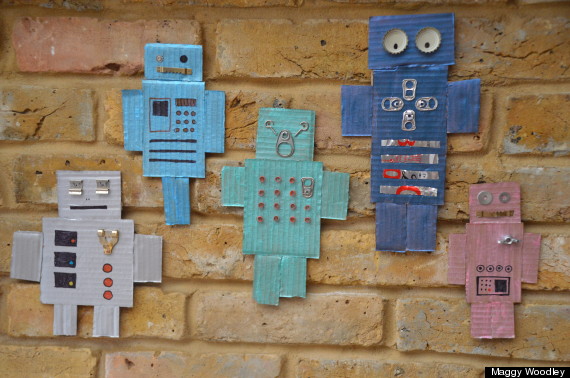
What you'll need...
- cardboard
- paint
- hot glue gun or good white glue
- markers
- small pieces, such as washers, screws, ring pulls, bottle caps, and straws.
How it's done...
- Begin by deciding on the size of your robots. Do you have lots of “medium-sized” or “small-sized” bits and pieces? Cut out rectangular pieces to make your head, body, arms and legs.
Bottle Creatures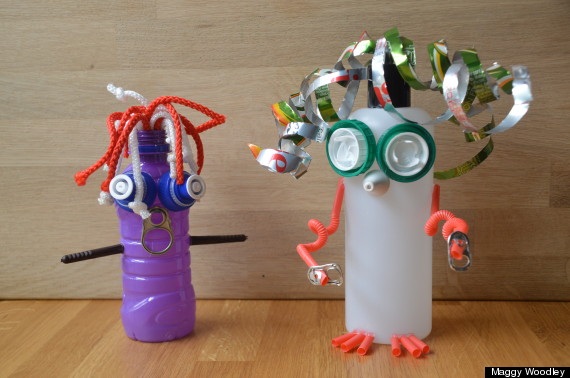
The key thing when making this craft is to constantly look for shapes and patterns in your odds and ends: Does something look like a nose? Can you find some cool eyes? Can something be turned into hair? The quirkier your creations, the better.
What you'll need...
- Sharp scissors
- A hot glue gun
- For bodies and heads: bottles, tins and jars
- For eyes: jar lids
- For mouths, ears and hands: ring pulls
- For noses: curtain pulls
- For arms: bendy straws
- For hands and feet: straws
- For hair: soda cans or rope handles from shopping bags
How it's done...
- Spend time sorting through your junk and placing things together. What looked good together? What could we connect? What was missing? Do we use the big bottle or the small bottle? Or do we use a plastic cup? Or a can...?

The Boxtrolls is out in theaters on September 26.
Have you created your own Boxtroll? Submit a photograph here for a chance to win four tickets to the premiere of "The Boxtrolls."