It's ironic that the first thing we notice about a present (besides its size, of course) is usually the last thing to get our attention during the frenzied gift-giving rush. But wrapping a gift won't ever be the same after you watch this 28-second video in which a Japanese department store employee wraps not one, but two boxes to Martha-Stewart-level perfection.
Game. Changed.
It is the season of giving, however, so our efforts to spread good will (and make you the czar of impeccable first impressions) don't end there. We present you with three more ways to take your gift-wrapping to new heights, excerpted from blogger Sally J. Shim's new book, "Pretty Packages." (Head over here for help with what's inside.)
Handmade Glitter Tape Gift Wrap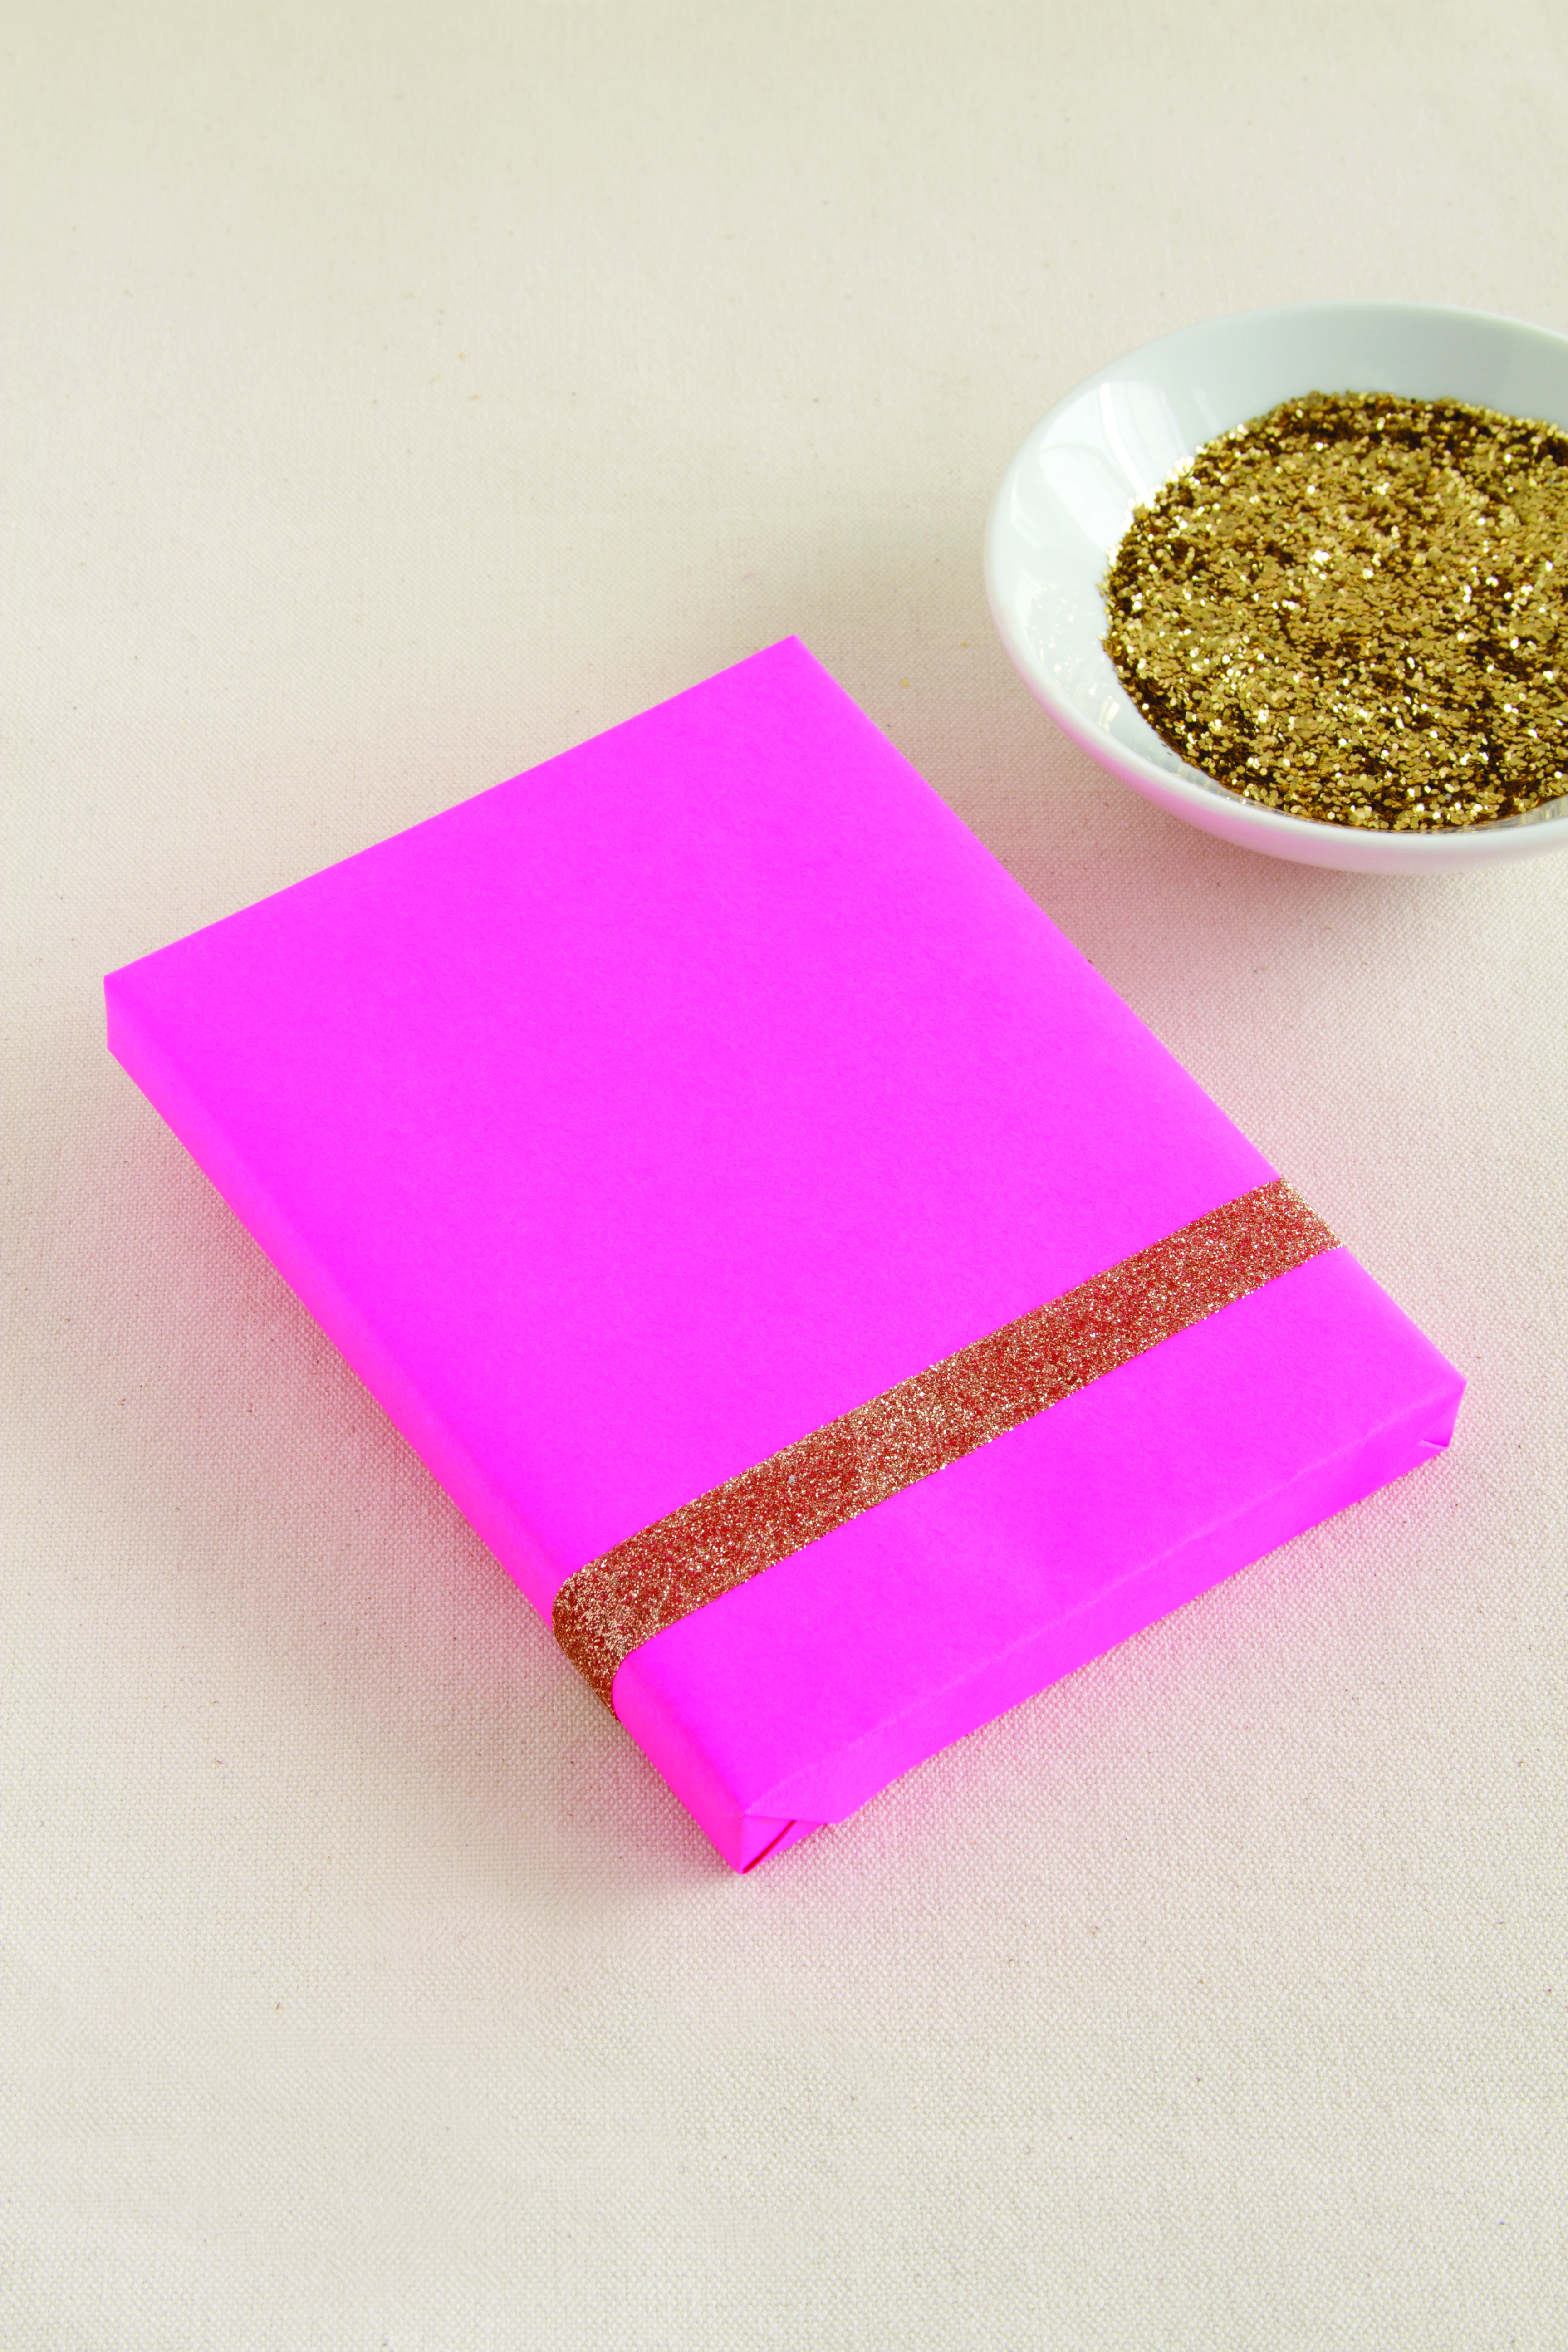
Photo by Madelene Farin
MATERIALS
Dressmaker’s tape measure
Wrapped gift
½-in/12-mm-wide double-sided tape with backing
Fine glitter
TOOLS
2 pieces of paper
Scissors
Small brush (optional)
BRIGHT IDEAS
Cut the glitter tape into shapes and add them to the top of your wrapped gift. You can use patterned washi tape instead of making glitter tape.
- Wrap the dressmaker’s tape measure around your wrapped gift to measure the distance around the gift, or twice its width plus twice its depth.
- Use scissors to cut a strip of double-sided tape 1 in/2.5 cm longer than the total measurement obtained in step 1.
- Place the tape sticky-side up onto one piece of the paper. If the ends of the tape curl up, place a small piece of the tape on each end to secure it to the paper. Sprinkle the glitter on the sticky tape so the entire surface is covered. Remove the tape that is holding down the ends of the sticky tape, if using. Shake off the excess glitter onto the second piece of paper. Use the paper to funnel the excess glitter back into the glitter dispenser.
- Remove the backing from the double-sided tape and place it on your wrapped gift, overlapping the ends on the underside of the gift.
Confetti Gift Tag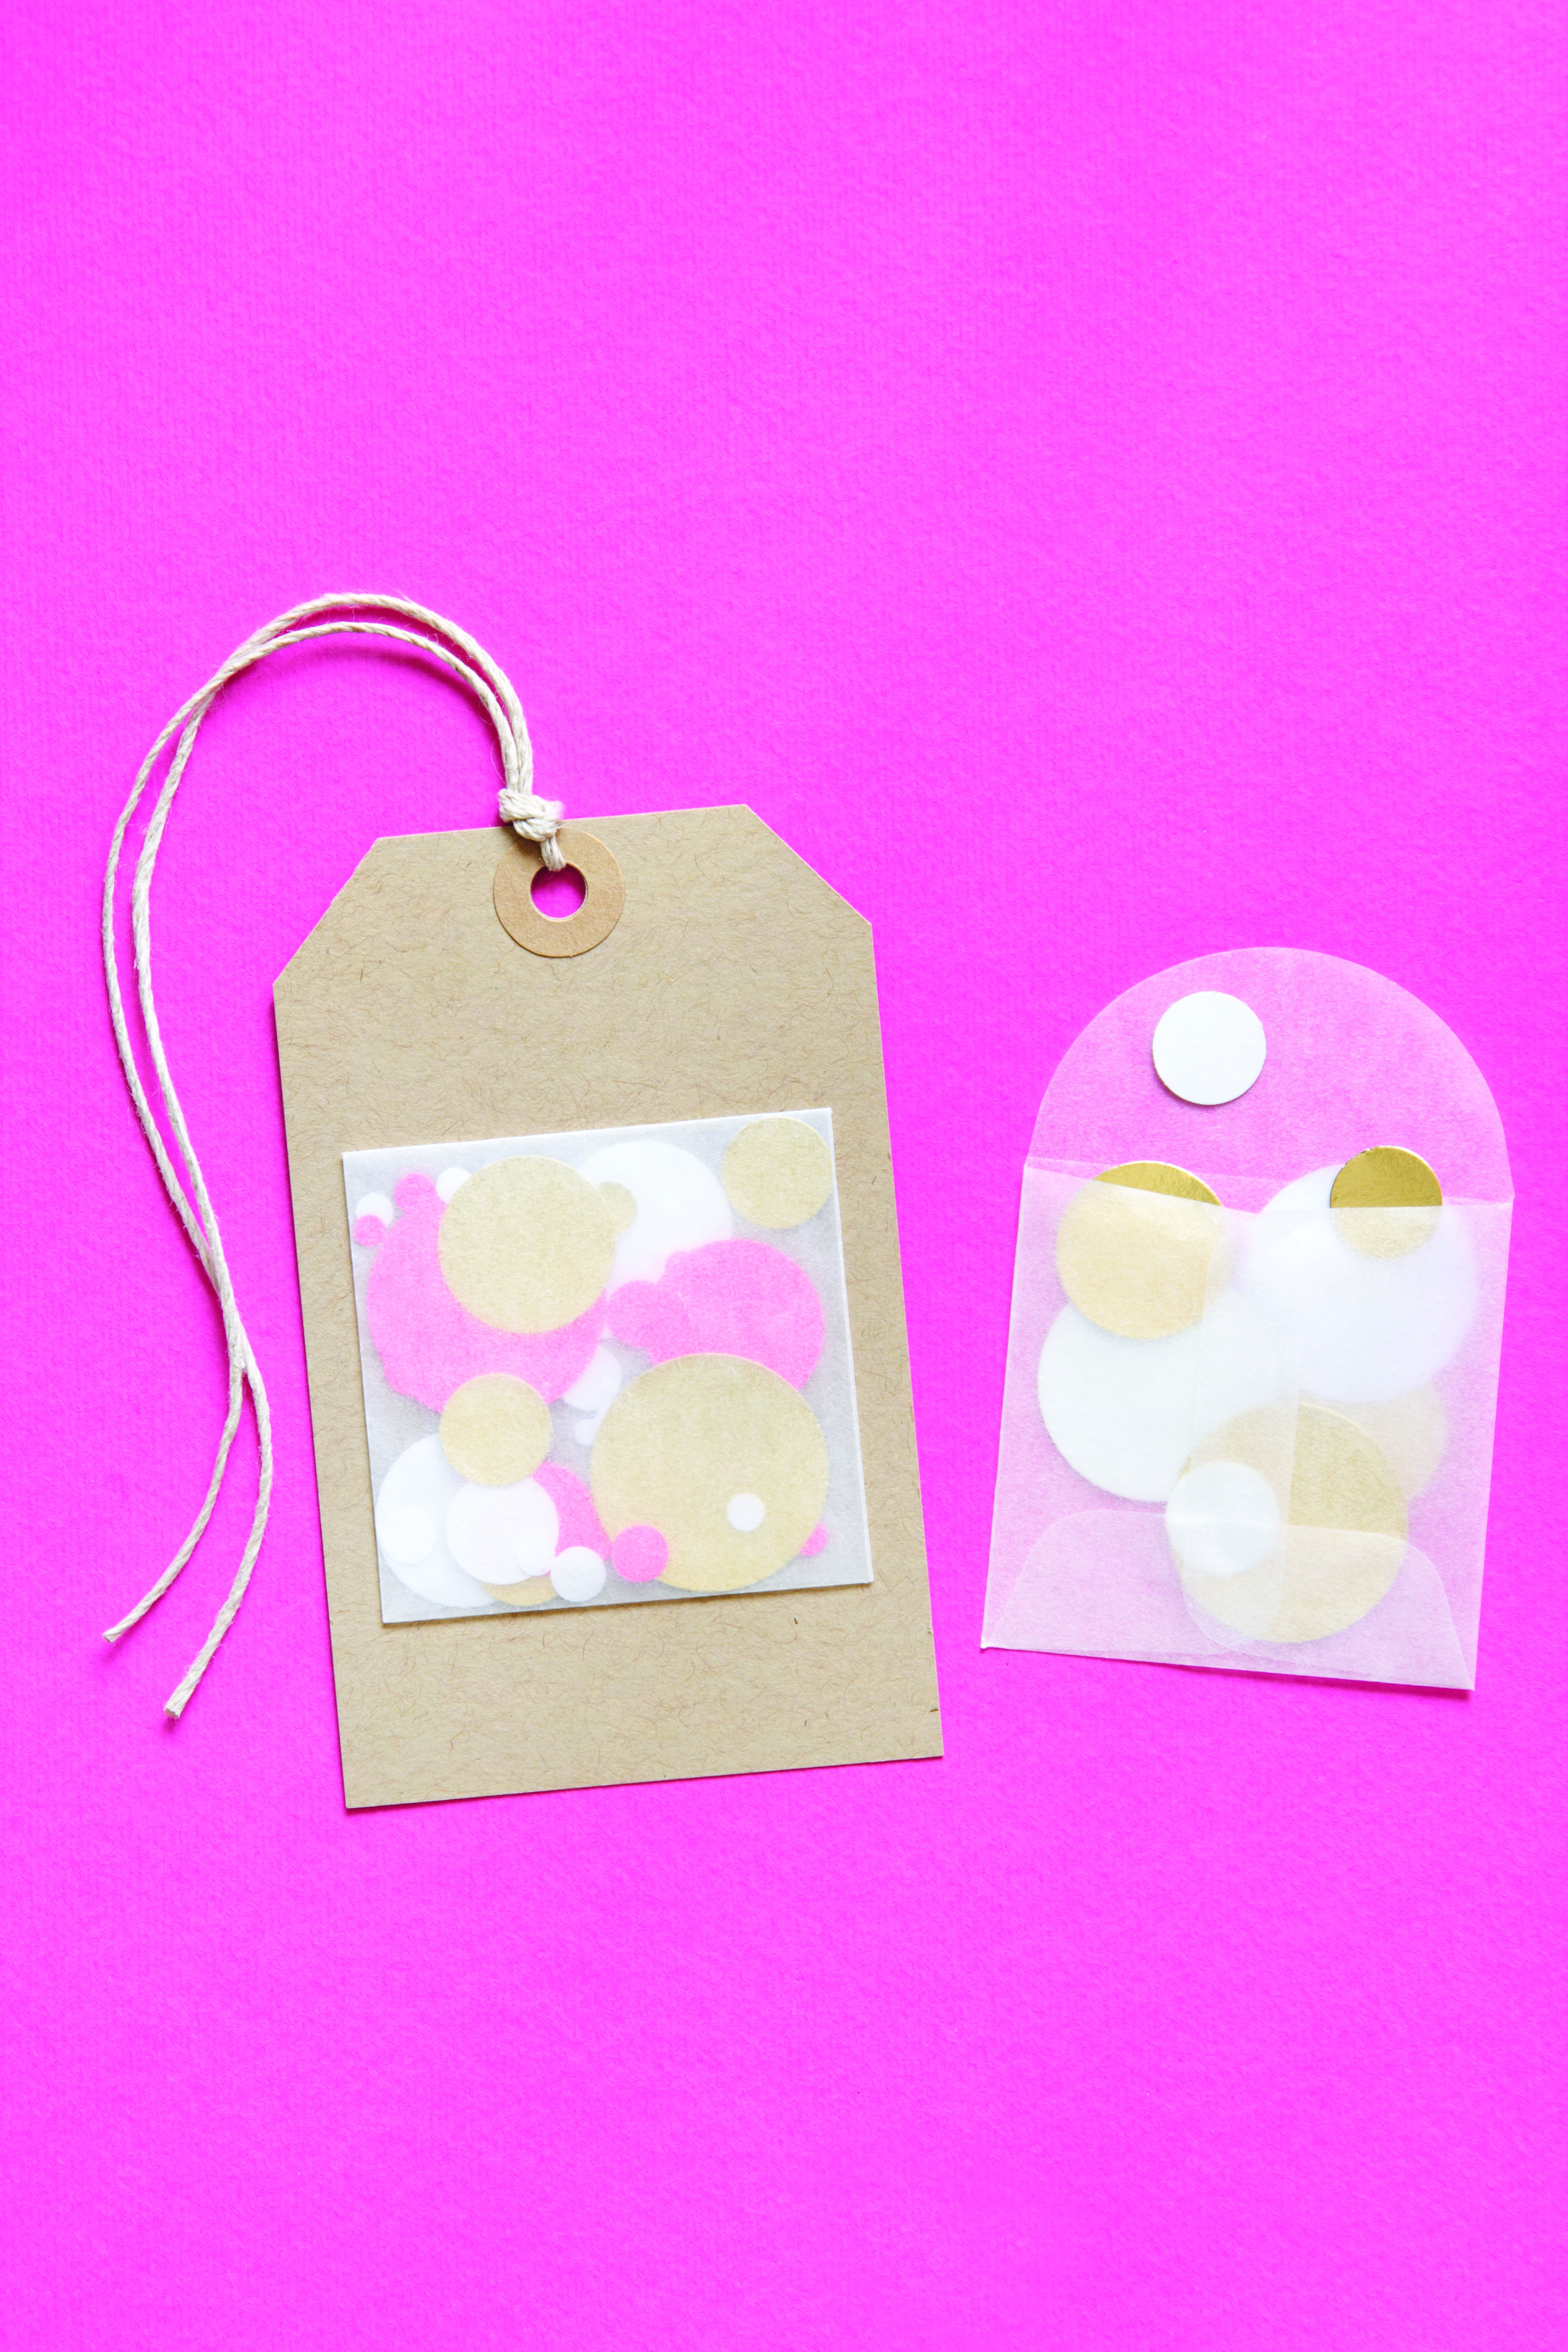
Photo by Madelene Farin
MATERIALS
Scraps of colored paper in a variety of sizes and colors
1 glassine envelope, 2 by 2 in/ 5 by 5 cm
Double-sided tape
1 gift tag, 2½ by 4 in/ 6 by 10 cm
Twine
TOOLS
Paper hole punch
Paper circle hole punches in a variety of sizes
BRIGHT IDEAS
Instead of confetti, place colored candy sprinkles inside the glassine bag. Create a birthday party invitation by printing the party details on a card and adhering the glassine bag of confetti to the invitation.
- Using the paper hole punch and circle hole paper punches, punch at least twenty circles from the colored paper scraps to make confetti.
- Put the paper confetti in the envelope and seal the envelope closed with a piece of double-sided tape. Place four strips of tape on the back of the sealed envelope, one on each edge.
- Place the glassine envelope at the center of the gift tag, and press down to adhere it to the gift tag.
- Thread the twine through the hole and secure in a knot.
Yarn Pom-Pom Topper 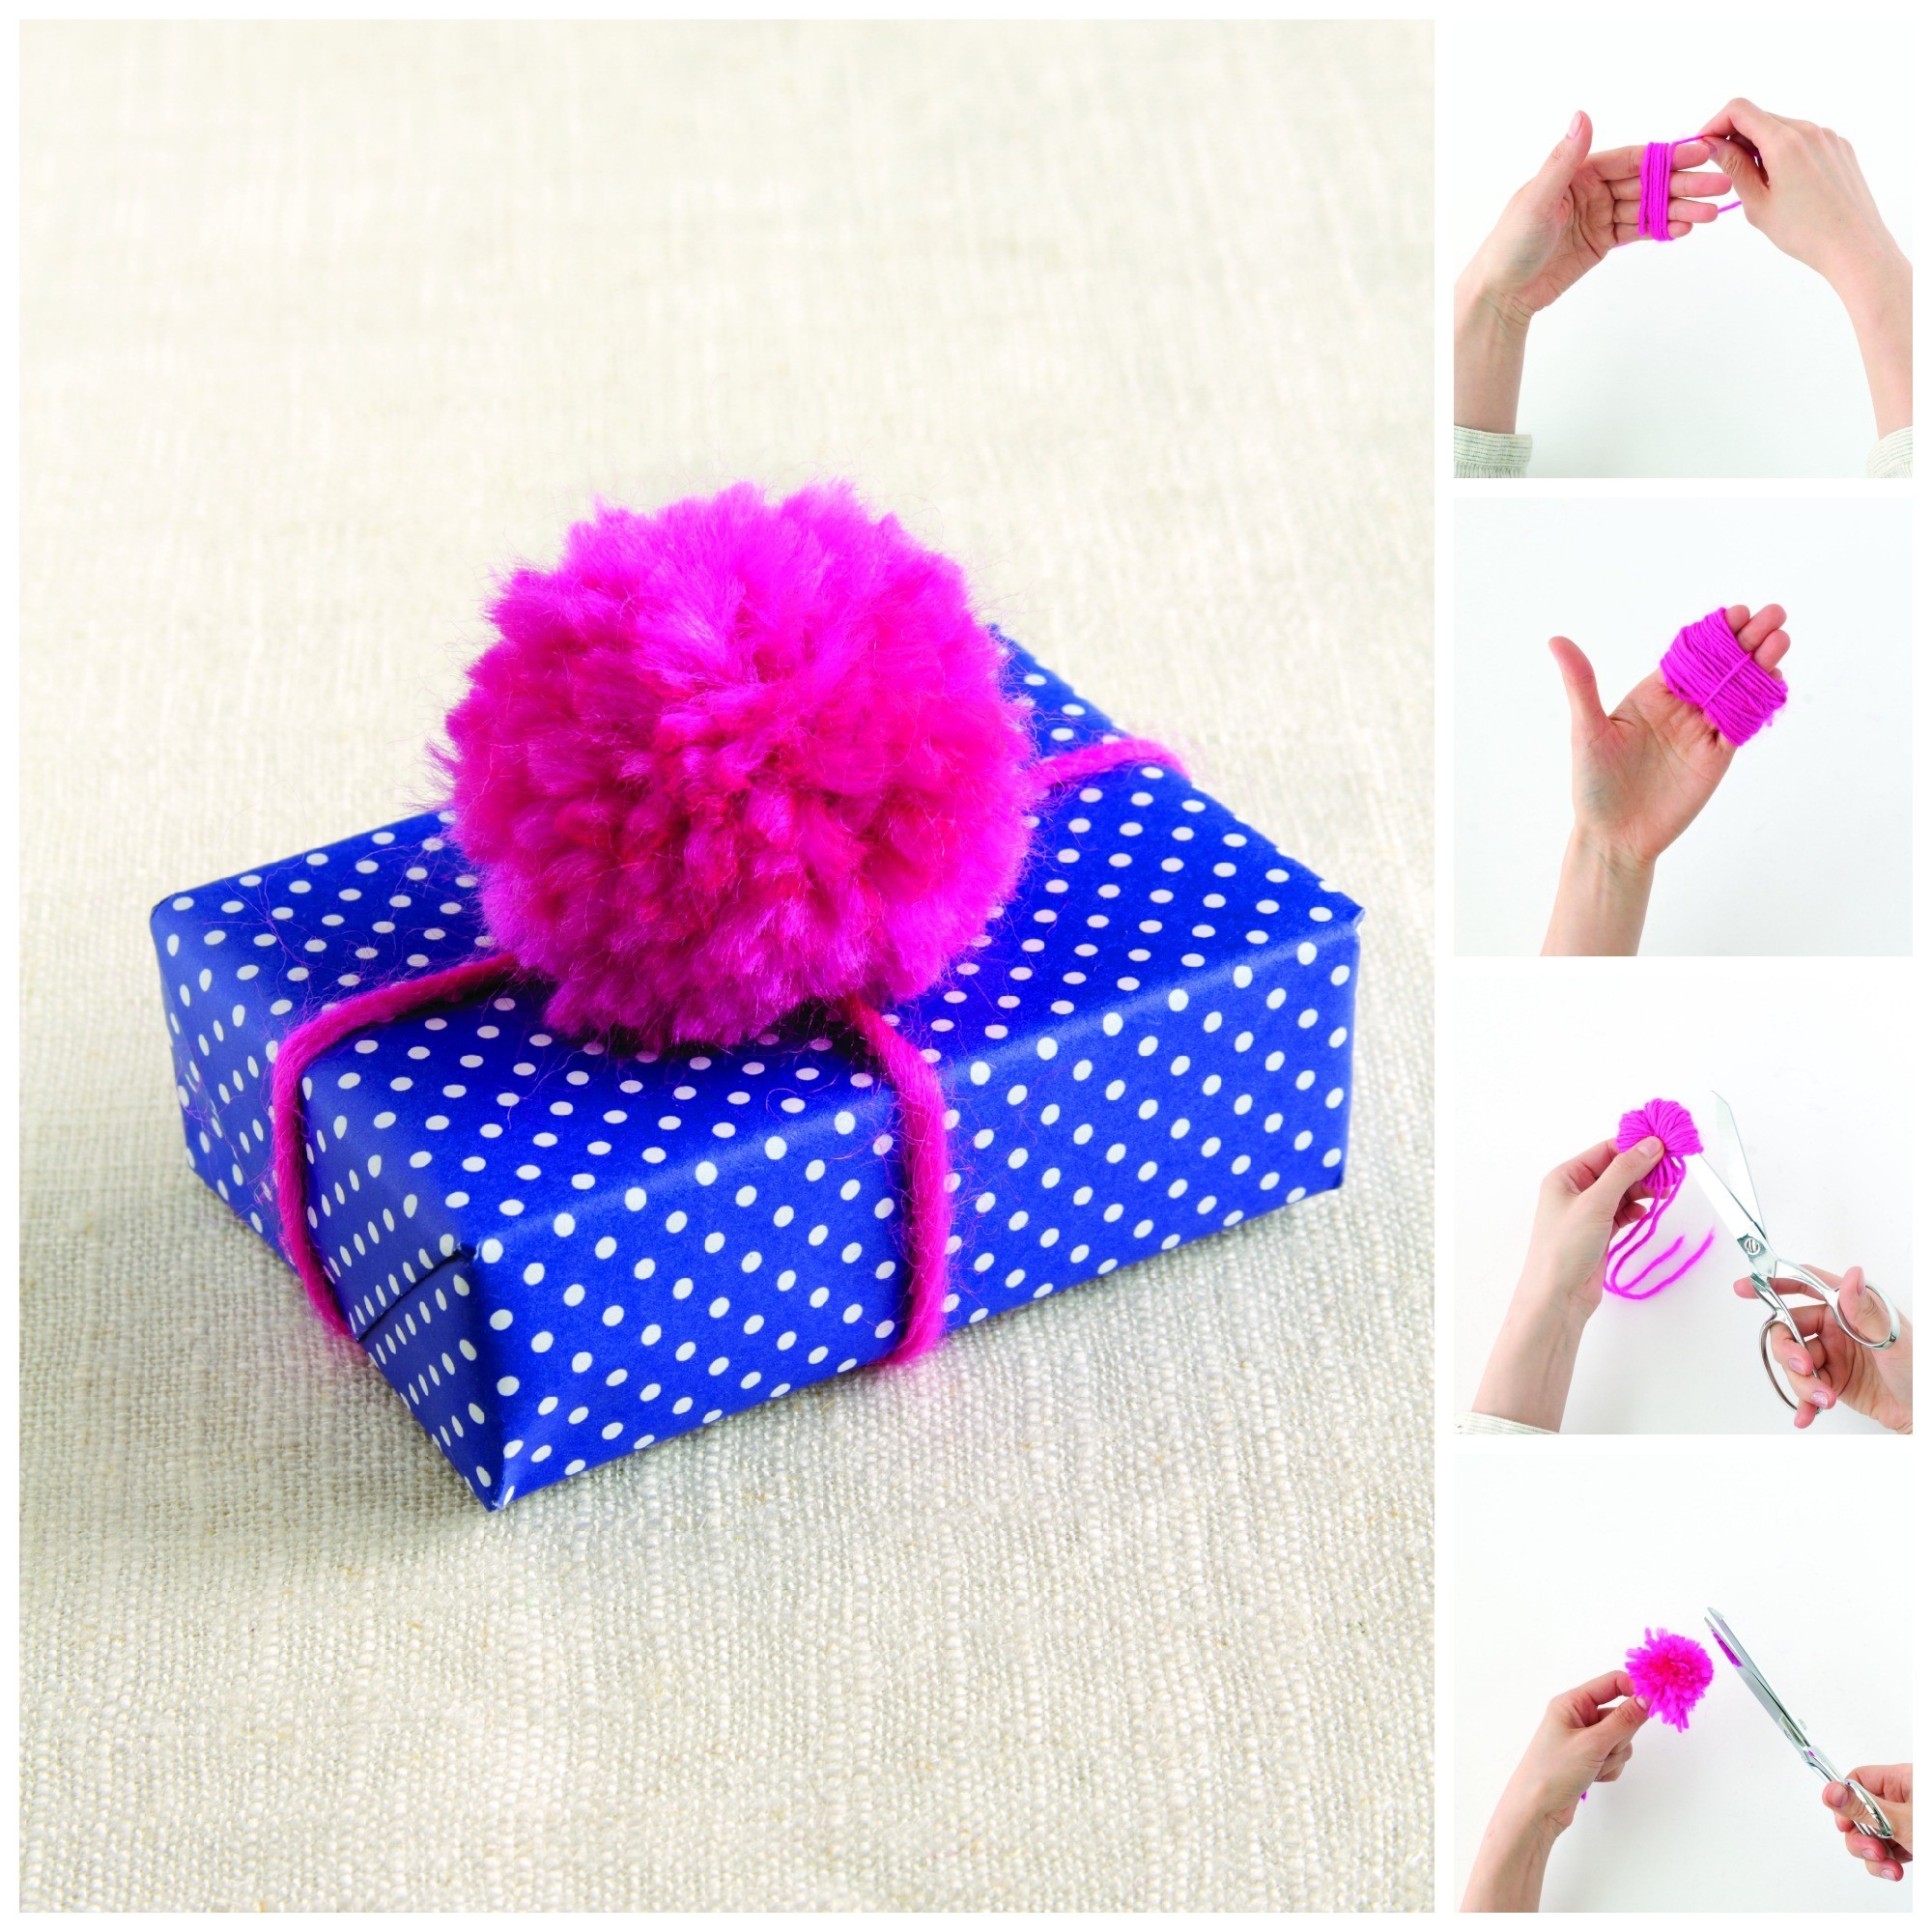
Photos by Madelene Farin
MATERIALS
Ball of yarn
1 piece of yarn, 12 in/ 30.5 cm long
Wrapped gift
TOOLS
Scissors
BRIGHT IDEAS
Make a dozen or more yarn pom-poms and string them together to make a sweet party garland. Try using several different colors of yarn to make a multi-color pom-pom.
- Place four fingers together on one hand and wrap the yarn around them fifty to sixty times (the more times you wrap the yarn, the fuller the pom-pom will be). Use the scissors to cut the end of the wrapped yarn from the ball of yarn.
- Take the 12-in/30.5-cm piece of yarn, slip it in between your second and third fingers, wrap it very tightly around the looped yarn twice, and tie a knot.
- Pull the yarn off your fingers and double knot the yarn. Cut through the yarn loops on each side.
- The yarn ball will be uneven. Fluff up the yarn ball, and trim it so that it is even and spherical in shape, leaving the long yarn ends.
- Use the yarn ends to tie the pom-pom around your gift.
Excerpts reprinted with permission from Pretty Packages, Chronicle Books, 2014.
Related
Before You Go
