When I was little, I remember being entranced by the seductive aroma of the brown liquid that my mother would add to her pound cake batter. Many years later, I am still transported by the sweet richness of a sliced vanilla bean when I do my own baking.
But back then, I had no idea of the complexity of the process that led to that splendid result. And nowadays, there are happily more options for how to introduce vanilla into your culinary conversation. So let's explore...
Origins
The vanilla bean is actually the fruit of an orchid, first cultivated on the East Coast of Mexico in the 14th Century. Pollinated by a local species of bee, it was so greatly valued that it formed a portion of the tribute paid to the conquering Aztecs.
In the 19th Century, after hand-pollination was made possible, the orchid was introduced to the island nation of Madagascar. Most of the world's vanilla now originates there.
It takes up to three years for the orchid plant to produce its first fruits, and each one must be hand-pollinated within a 24-hour window when it is receptive. Once the fruit matures and is harvested, it goes through a lengthy and complicated process of blanching and moistening and drying that can take up to nine months. Labor intensive indeed!
Types
There are three main types of vanilla bean: Madagascar (also known as Bourbon, after the Ile de Bourbon), Mexican, and Tahitian. The Madagascar are the narrowest beans, with a rich sweet flavor. The Mexican are thicker and more robust; the Tahitian are the largest of the beans, also the softest and the most subtle in flavor. Each has its own place in choosing how to enhance your culinary offerings.
Presentations
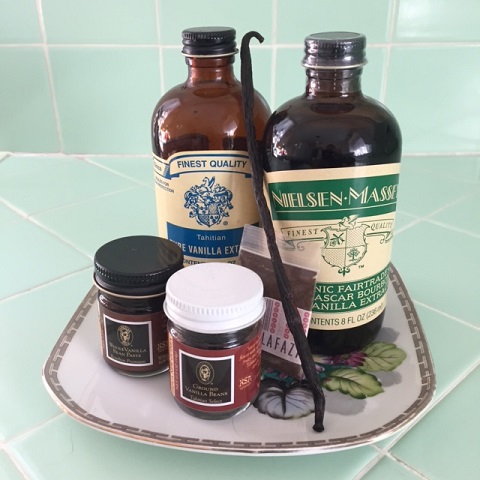
Vanilla can be found in three main forms: whole pods (or 'beans'), powder or paste, and extract. Whole pods are best for non-baking uses, such as infusing liquids or flavoring fruit, and extract is best for baking, added to batters and custards and such. Powder or paste basically split the difference and can be used for either task, eliminating the need to scrape a pod and allowing the tiny flecks of vanilla seed to shine through.
There is also an artificial form of vanilla called "vanillin", which derives from a chemical called guaiacol, or from lignin (wood pulp!), and has only one taste component of real vanilla, as opposed to the hundreds of flavor compounds found in the real deal. Cheaper, yes, but hardly equal, vanillin is often used in large commercial food production. Trust me, you don't want to use it at home.
Choosing & Storing
Choose bottled extract with no additives, and store in a cool dark place - it will last for years, and even improve with age. Choose beans that are plump and moist; wrap them tightly in plastic wrap, store in an airtight container, and refrigerate for up to 6 months. Once you've opened a container of powder or paste, keep it in the fridge and use it up within six months or so.
Environment
As happens in so many scenarios in our accelerating world, large-scale production of vanilla orchids is encroaching on the small farms that traditionally nurtured this delicate plant. Along with that comes deforestation of Madagascar's rainforests, loss of local prosperity, and diminution of the quality of the beans because of mechanized processes.
Seek out vanilla products that come from responsible companies that offer Fair Trade arrangements that perpetuate traditional methods and return a proper share of profits to the community. Products are readily available on-line from sources like Lafaza (www.lafaza.com), which was founded by returning Peace Corps volunteers in Madagascar; they trade directly with farmers who employ organic and sustainable farming practices, and they invest in local cooperatives and help to build libraries and community centers. We all need to support this kind of responsible agrarian model.
So roll up your sleeves, get yourself some beans and paste and extract, and create some goodness.
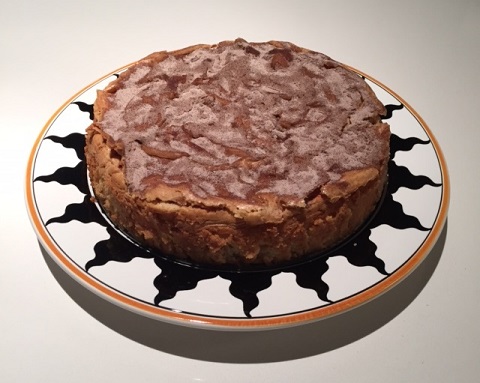
Apple Cinnamon Cake
This moist cake makes a sublime holiday dessert served with caramel sauce & whipped cream, and a perfect simple breakfast treat all on its own...
1 1/2 cups organic all-purpose flour
1 1/2 teaspoons baking powder
1/4 teaspoon salt
1 1/2 cups + 1/4 cup superfine sugar
1/2 cup (4 oz.) unsalted butter, softened
1 8-oz package Philadelphia cream cheese
2/3 teaspoon vanilla bean paste (or 2 teaspoons vanilla extract)
2 large pastured eggs
2 teaspoons cinnamon
2 large Fuji apples, peeled and chopped small
Preheat oven to 325. Pam-spray a 9-inch spring-form pan.
In a small bowl, whisk together flour, baking powder, & salt. Combine 1/4 cup sugar & cinnamon; sprinkle 2 tablespoons of this mixture over chopped apples and toss, reserving the rest to sprinkle on the top of the cake.
In a large bowl, beat butter, cream cheese, 1 1/2 cups sugar, & vanilla on high speed for 4 minutes. Add eggs one at a time, beating thoroughly after each addition. Add flour mixture and beat on slow speed until dry ingredients are just combined. Fold in apples and turn batter into pan; even out but leave some swirls on the top. Sprinkle top with remaining sugar/cinnamon mix.
Bake at 325 for 60-65 minutes, until a toothpick comes out clean. Let cool, then remove from pan.
Perfect Whipped Cream
Whisking by hand creates a lighter, loftier, creamier result -- well worth the extra time and effort!
1 cup heavy whipping cream
2 teaspoons superfine sugar
1 1/2 inch piece of vanilla bean
In advance, place medium metal bowl and a balloon whisk in the freezer to chill for at least 30 minutes.
Pour cream into bowl, add sugar; slit vanilla bean up one side, scrape seeds into bowl, discard pod.
Whisk vigorously until cream thickens into soft peaks; do not over-beat to firm. Refrigerate until ready to use. Give it one last good whisk before serving.
[ Note: A version of this post appears in my "Kitchen Matters" column in Better Nutrition Magazine. ]