
It's an all too common scenario. Your inbox is suddenly full and your boss is asking why her emails keep bouncing back. You need to make space, and fast.
But with so much email, how can you quickly decide what you should delete? If you have Gmail's priority inbox enabled, a system that marks your most important emails and brings them to the top of your inbox, the solution should be simple: just erase your non-priority emails. Sadly, it's not that easy.
Gmail doesn't offer a seamless way to select your non-priority emails and delete them. That's why we've devised these five steps to clean out your Gmail inbox in a jiffy. The results depend on how much non-priority email you have, but when this writer did it, his inbox went from:

Keep in mind this technique is most effective for those people who don't regularly delete emails. If you do, make sure there are no messages in your Trash folder (see step four) before you start.
Here's how it's done:
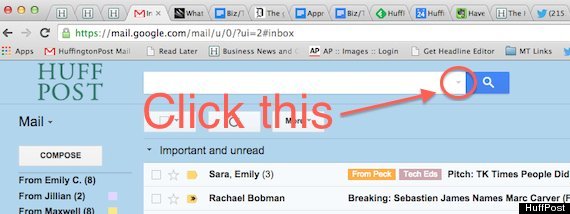
Step 1 - Separate your priority messages from your non-priority messages.
To do this, you'll need to click the little arrow near the right end of the search box:
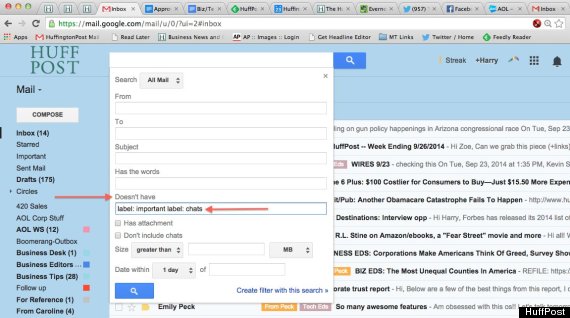
Advanced search options will appear. Now select the "Doesn't have" field and type in "label: important". If you want to save your Gchats too, type in "label: chats" as well.
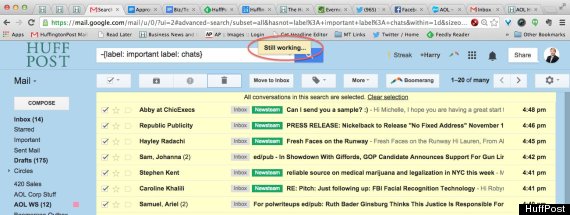
This will supposedly -- we say supposedly for a reason you'll find out below -- select all the messages that aren't marked as important (those are the messages with the little yellow pentagon next to them, in case you didn't know).
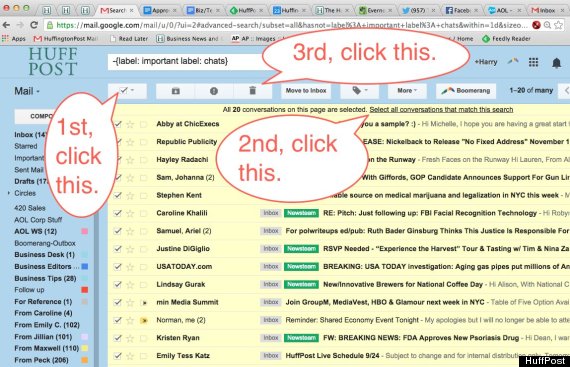
Step 2 - Move to trash.
Once you've searched for all your chats and non-priority emails, you'll want to select them so you can move them to the trash.
To do this, click on the check mark at the upper left. Then click on "Select all conversations that match this search."
Your screen should look like it does below. Next, click on the trash icon:
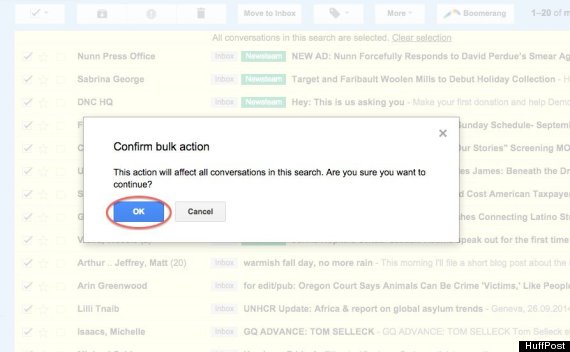
Click OK:
Step 3 - Do something else for a while.
If your inbox is full, chances are you're moving a lot of messages. This is going to take a while. An error message might also pop up, but your emails should still eventually transfer to the trash:
Why not make some coffee? Or call your Mom? She's the best.
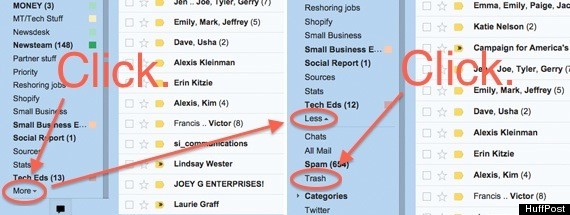
Step 4 - Save your important messages from accidental deletion.
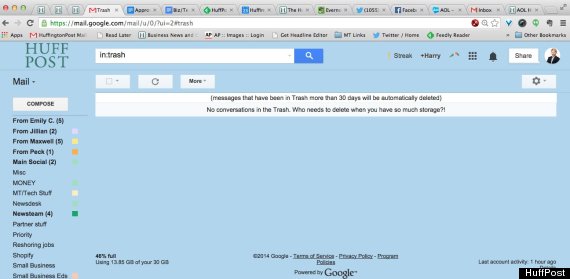
By now, you should be able to find all the messages you wanted to get rid of by going to your "Trash" folder. That's here:
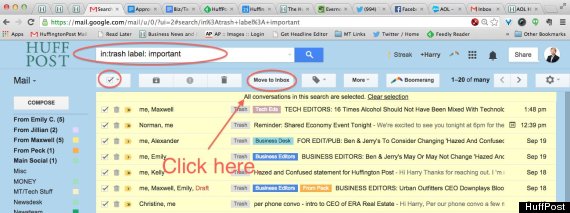
Once you're there you'll probably notice something: a few priority messages! Why this happens to your poor important messages we're not sure, but a few always seem to end up in the trash, and it's up to you to get them out!
In the search field, next to "in: trash," type: "label: important". Select all the messages and move them back to the inbox, where they'll be safe:
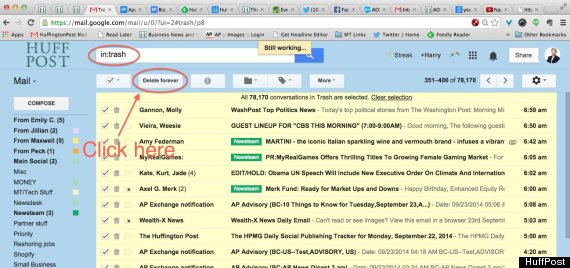
Step 5 - Finally, get rid of all those ugly messages you don't want.
Now with your important messages back in the inbox where they belong, it's safe to delete all the non-priority ones. Select all the messages remaining in Trash and click "Delete forever":
OK, so this might take a while again. Make another cup of coffee, then get some props from the office dog because you're almost done:
Come back to your computer screen and bask in the glory of your tidy inbox:
Ah, nothing like that clean inbox feeling!