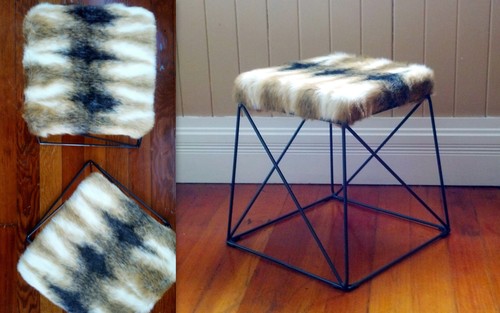
One of my all time favorite DIY projects I've done is this pair of faux fur stools. One day while wandering around Target, I stumbled upon simple metal stools and saw some major DIY potential. I loved the geometric shape of the base but thought the seats left a little to be desired. Piled in the clearance section and priced at $9.98 each, I threw two in my cart and made a pact to reupholster the tops. Target almost always has similar stools in their home section (especially this time of year). If you're game to try this DIY, just look for round or square stools with an upholstered top that's screwed to the base.

With a simple square top secured to the base by four screws, I knew it would be easy to pop off the seat and staple on some new fabric. So, I headed over to the fabric store, unsure of the direction I wanted to go. I considered a variety of prints but settled on faux fur, because it always wins my heart. I bought 5/8 of a yard, which actually turned out to be enough to cover three stools, so I'm planning on doing one more.

Follow the steps below, and you'll need a screwdriver, a staple gun, and about an hour or two to complete this project.
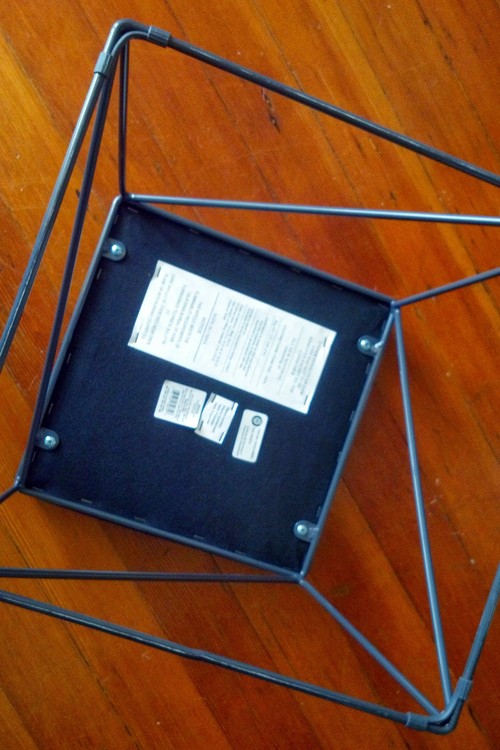
1: Turn the stool upside down and unscrew the seat from the base. Words to live by: righty tighty, lefty loosey (when you turn the screwdriver right (clockwise) it tightens the screw, and vice versa).
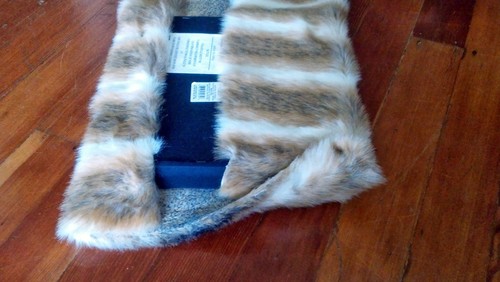
2. Lay your seat on your fabric and trim the fabric to a 3" border around each edge. You'll notice that I had a little more than 3" on one side because I wanted to make sure I the print was centered.
3. Pull one side over the bottom and staple it to the base at the midpoint of that side. Pull the opposite side tight and staple it at the midpoint. Do the same for the two remaining sides.
4. Keep working on opposite ends to pull and staple the fabric, making sure no ripples appear, until you have three staples along each side.
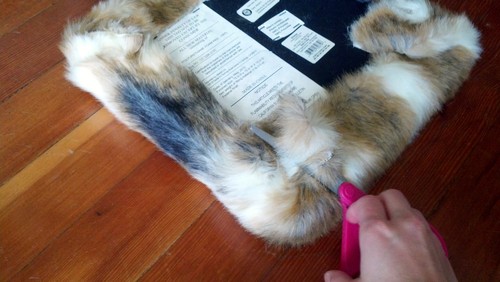
5. Now work on the corners. The best part about using this thick fabric was that I could just pull the fabric around the corners and staple, without having to worry about ripples and bumps. With a lighter weight fabric, you will need to be mindful of keeping even tightness to avoid ripples. My advice: pick out a similar fabric to the one I used. You'll thank me in the end.
6. Once all your corners are stapled, fill in the gaps on all sides so you have 5-6 staples per side. Trim any excess fabric.
7. Screw the seat back to the base.

8. Turn it right side up and take all your glory shots.
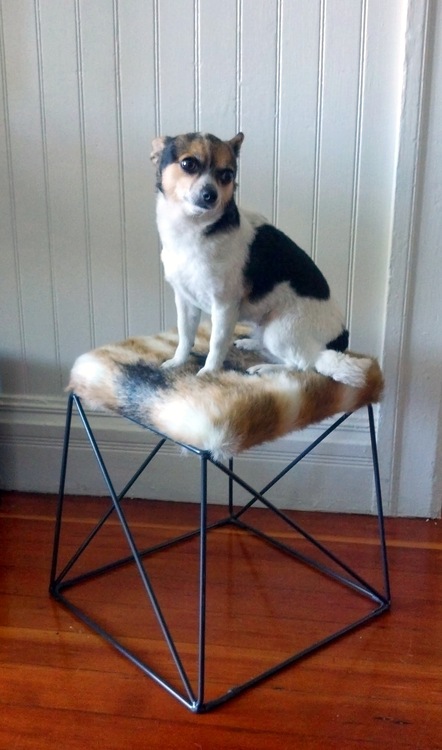
Even Coco loves them! How's that for a quick and easy transformation?