Last week, in this blog's Design Ideas installment, I discussed one of my projects. It's a two-story building renovation in Jersey City. I outlined my thought process while coming up with four versions for a loft kitchen plan. This week, let's take it further and apply the concept of the kitchen work triangle to all of the alternative layouts.
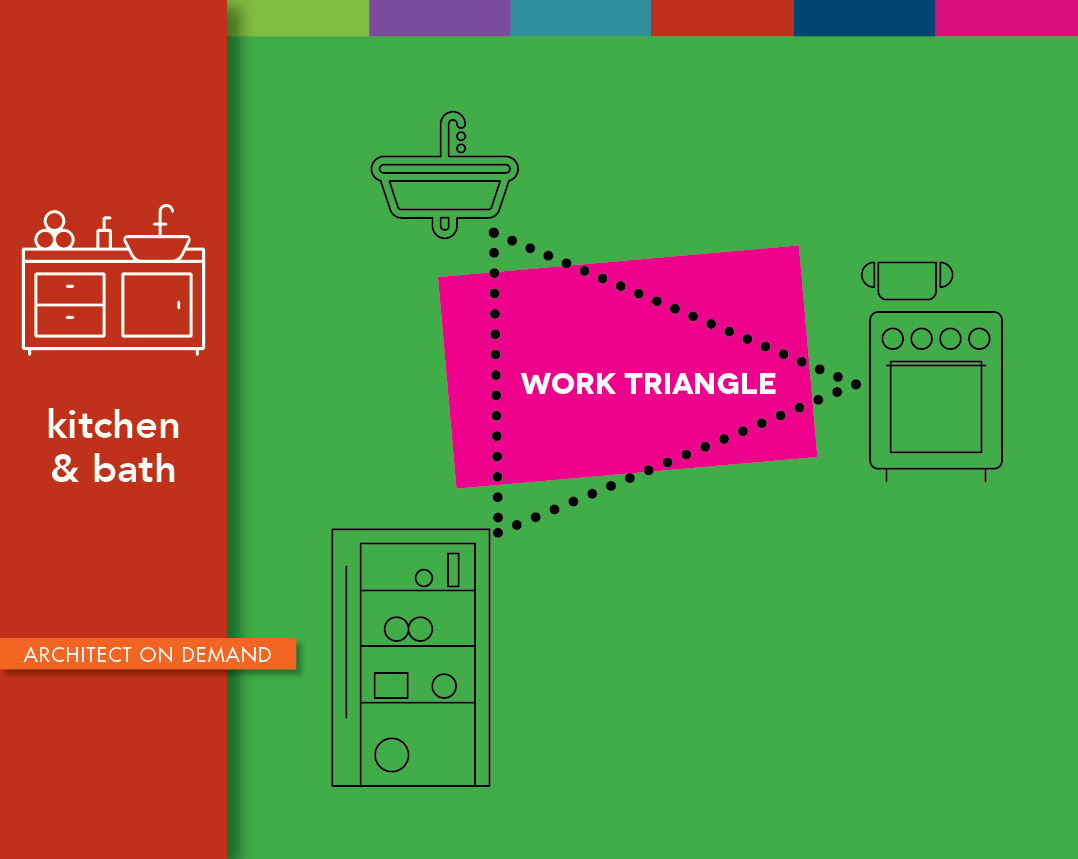
Since 1940's, kitchens have been organized around what's known as the work triangle. Its sides are the imaginary lines connecting the sink, the cooktop, and the refrigerator. For the sake of efficiency, the goal has always been to keep comfortable distances -- from 3 to 9 feet -- between these main components.
The rule of thumb is that nothing should block or obstruct the work triangle's clear path. In addition, general traffic should not interfere with the work triangle, as people not directly involved in cooking often need access to the kitchen, particularly the fridge.
The prep space is not explicitly included in the work triangle. However, it's usually a good idea to have one prep area near the sink and one near the cooktop.
Over the years, the traditional work triangle has evolved into a more practical "work zones" concept of the washing, cooking, and storage and/or refrigeration. In the loft I am designing, the kitchen is an integral part of a multi-purpose and, perhaps, a multiple-cook room. I should consider that carefully.
The logic behind the work triangle
Sink: I place the sink in the central-ish location first and lay out the rest of the work triangle from there. FYI, the optimum position for a dishwasher is on either side of the sink. Minimum counter lengths at the sink are 36 inches on one side and 24 on the other. It seems logical to locate the greatest expanse of counter on the side of the sink closest to the cooking zone, since that is where most foods prepared at the sink are going next.
Storage optimization: Glassware and dishes should be stored in upper cabinets or on shelves near the sink. Base cabinets should be designed to have pullout shelves and drawers. I am working with a consistent module of 18 inches for all the cabinets.
Silverware drawers should be located close to the drying rack or dishwasher but out of the primary work triangle so that someone can set the table without interrupting the cook.
Cooktop: The optimum location for the cooktop is along a wall, rather than on an island or peninsula. With a stove on an exterior wall, it's easy to install an effective hood and ventilation system. The cooktop needs a 30-inch overhead clearance.
Storage optimization: To conserve on moving-around time, frequently used pots and cooking utensils should be stored near the stove. A shelf above the cooktop can transform the space into a cooking workshop, providing a handy resting place for timers and spices. Utensils can be grouped on magnetic wall strips.
Refrigerator: Of the three components of the work triangle, the refrigerator should be located at the triangle's outer corner for easy access. The refrigerator door needs a clear swing and, if possible, enough room for two people to reach in simultaneously.
Storage optimization: It's a good idea to locate a tall pantry cabinet at the end of the cabinet run and to provide an 18-inch run of counter as a staging area for foods going into or coming out of it.
Choosing the right-sized appliances
Since every inch is accounted for, I opt for 18-inch rather than 24-inch dishwasher, 30-inch rather than 36-inch cooktop, 30-inch instead 36-inch refrigerator, and a single-bowl 30-inch sink with integrated cutting board.
5 versions of the layout
There are six basic layouts for the work triangle; I have explored four of them:

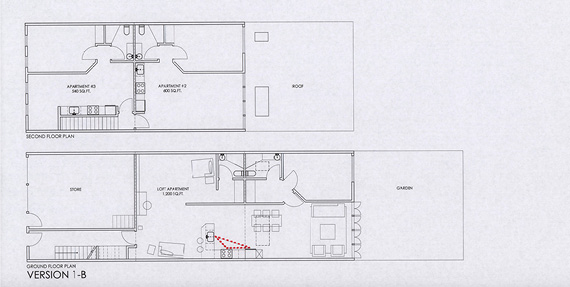
L-shaped (version 1-A &1-B). In an l-shaped kitchen, one element of the work triangle is against one wall with the other two along another.
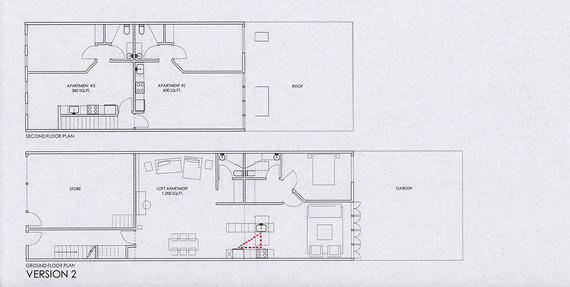
Galley (version 2). In the galley kitchen, the sink element of the work triangle is located on the island with the other two along the exterior wall.
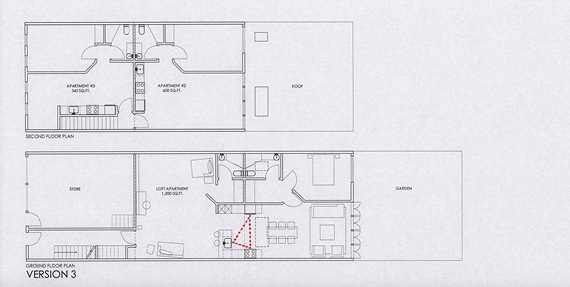
U-shaped (version 3). In the u-shaped kitchen, there's a triangular path from the sink on one wall to the range on another, to the refrigerator on a third.
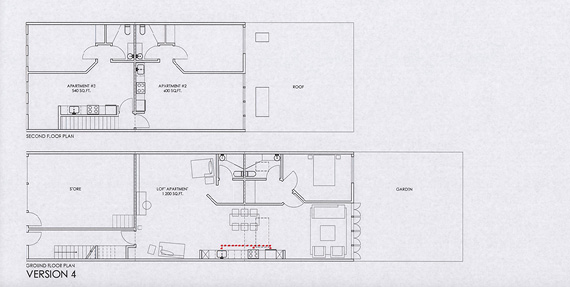
One-Wall (version 4). In the one-wall kitchen, all three points are arranged along the same wall. It's the ultimate space-saver.
In conclusion, I would say that with all of the layouts, it's really important to think big-picture. It would be a grave mistake to look at the kitchen as a set of parts rather than a whole. Following the logic of the work triangle helps make the best use of the space available. Would you agree? Please do not hesitate to contact me with your thoughts and questions here.
Alla is an architect on demand advising DIY home improvement enthusiasts online.
This post originally appeared on allaDIYally.com