
Iceland is not only the land of fire and ice but also the land of photographers. Never in any locations had I seen so many people with big cameras and tripods. But let me reassure you, you do not need professional gear to come back with wonderful pictures of Iceland. And here are 8 tips to help you do so.
Before we go further, here is a proof. I took this shot of Vesturhorn with my iPhone 5 using the panorama function: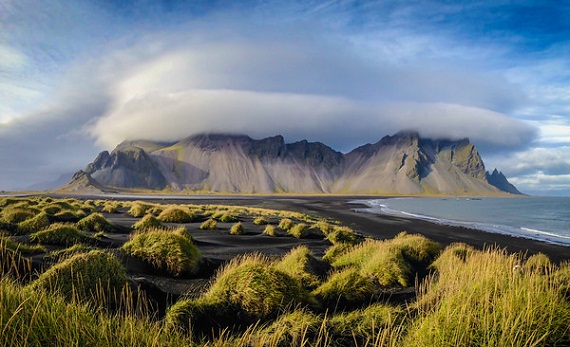
Note: All the locations presented below can be found in the practical guide I wrote to help you plan your road trip around Iceland.
1. Shoot What You See
Iceland is famous for its many waterfalls. At those famous Icelandic natural wonders, many photographers will play with different filters and slow shutter speed to make the water look milky. It can be very artsy but at the end, this is not what you are seeing and isn't the waterfall amazing just the way you see it? So stop worrying and shoot it as it is!
Here is the example of the popular Seljalandsfoss where you can walk behind. The photo was taken with my compact camera.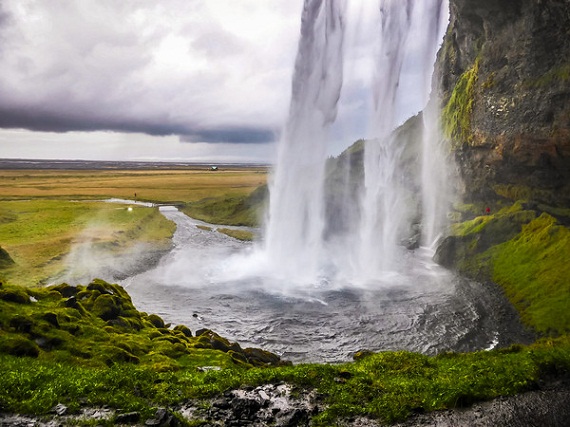
2. Take Pictures on the Road
No amount of fancy tripod and filter will help you get good shots while you are in a moving vehicle. And yet it is possible!
Take the road in front of you or take picture from the side. If you have no windows in the bus, you need to position your camera against the glass to avoid reflections.
Here is a shot taken from the bus as we were driving. It is one of my favorite shots from Iceland because it really shows what driving around Iceland can be. (Taken with my compact camera).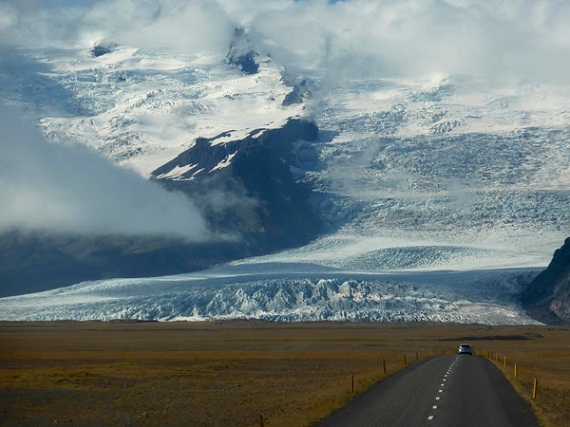
3. Scale: Use People
Landscapes in Iceland are magnificent in terms of beauty but also in terms of size. Photos do not always translate that. So add people in your shot. Plus it will add to the atmosphere, make your photo more real.
Here is the example of the 60 meter high Skogafoss waterfall. (Taken with my compact camera).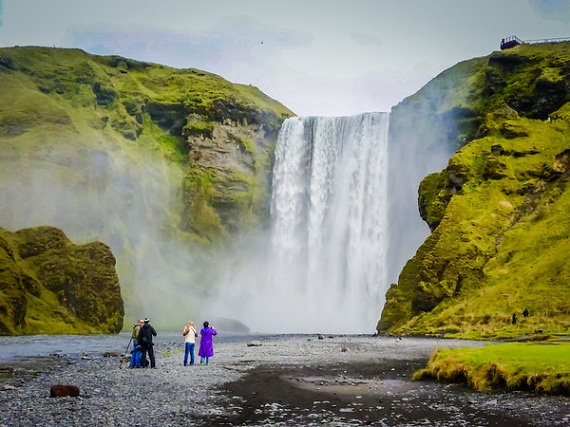
Here is another example from Dettifoss (taken with my DSLR but in automatic mode). Look how the tiny person on the left makes you realize the size of the place!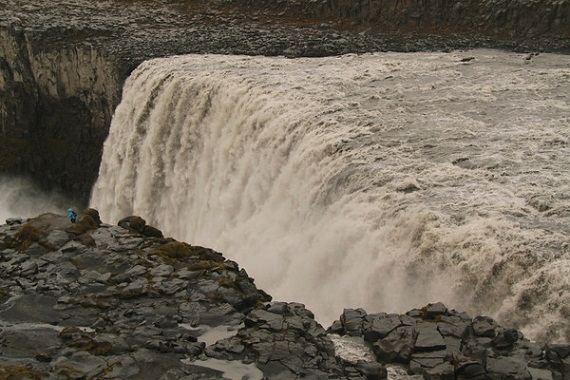
4. Zoom In
I know I know... everywhere is stunning. You want to take pictures in all directions! However at some point I recommend zooming on one specific feature: one rock, one section of water or one mud pools for example. After all, you do spend time looking at details so why not capture them?
I especially recommend this in the geothermal areas with the funny shapes made by mud pools.
This one photo was actually taken with my DSLR (because I did not get the other one out), but you can easily get such a shot with a compact camera. Location: Hverir, North Iceland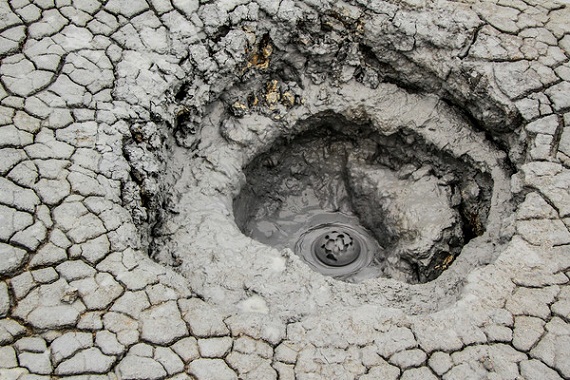
5. Look for Reflections
With many lagoons, ponds and rain, Iceland offers a lot of opportunities for reflections and they create really beautiful pictures.
This photo was taken at the Jokulsarlon lagoon with an iPhone 5. It captured the reflections at low light quite nicely although it did transform the colors towards more blue...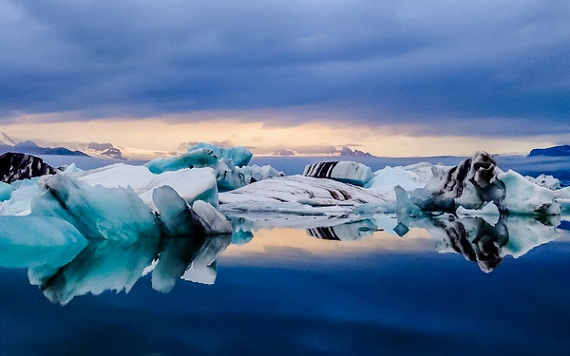
6. Capture Situations Not Only Locations
A good picture is not only a pretty picture. A good vacation picture is also one about which you can tell a nice story. Don't always focus on locations but also on situations.
For example, with this shot I can tell you that the biggest dangers on the Icelandic roads are sheep. They can jump any time under your car. If you hit them in a fenced area, then the farmer owes you money for the damaged car. However if you hit a sheep in an area where fences are not mandatory, then you owe the farmer money for his lost sheep! (or at least, this is what the guide told me)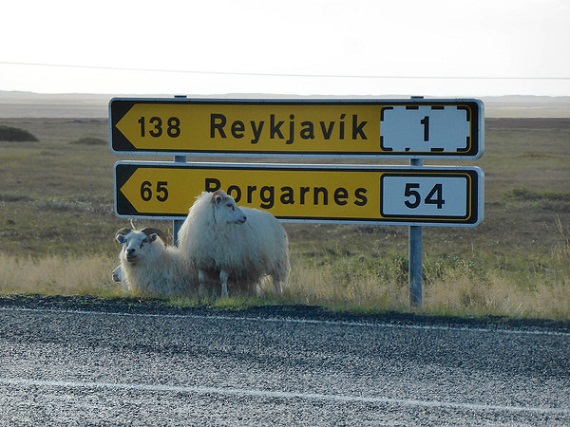
7. Photograph the Context
Sometimes you are so focused on going to see something that you miss capturing what is around.
This photo was taken in Skaftafell National Park. We were going there to see and photograph Svartifoss, the black waterfall. All my fellow photographers rushed to get up close to the waterfall and they took some very nice shots. However, my favorite picture from the place is this one (taken with my iPhone 5) when we were still far away. It reminds me of the hike, of everything that happened (one of us falling in the first few meters...) and what I felt as I approached the waterfall. So much better than just another waterfall!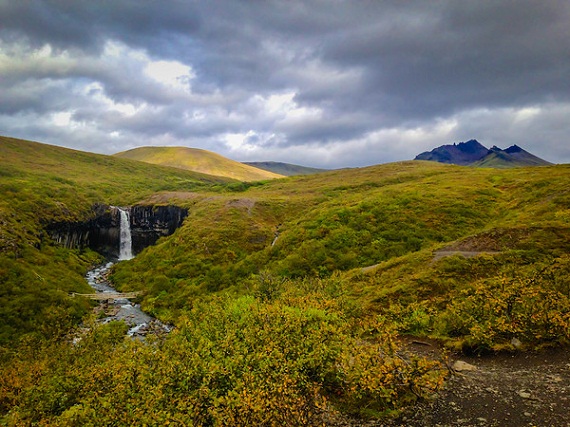
8. Do Some Post-Processing
I strongly insist that you do a little bit of post-processing on your computer or phone. Again no need for fancy software. If you have a Mac you can use iPhoto, on the web you can use PicMonkey and for your phones there are many apps.
There is a trend now with 'nofilter' and I do agree that some people do go too far (I sometimes do too). But the fact is that the raw shot out of your camera is actually not what you saw. Your eyes have far better capabilities than the lenses and the sensor to deal with light and colors. So doing a little bit of editing to improve the photo into what you really saw is totally acceptable.
Just focus on:
- Fixing the tilt - make sure the horizon is straight
- Cropping - it is amazing what a little bit of cropping can do. Just try it. Plus if you forgot your rule of third when taking the picture you can fix it! (Reminder rule of third: never center, always align horizon or objects at one third or two third of the frame)
- Improving the color: often the automatic tool does a good job. Sometimes it will go crazy and you will have to slide those small buttons yourself until you find a nice setting.
This photo was taken in the Trollaskagi peninsula. I fixed the tilt, cropped it as I had too much sky and fixed the colors and shadows to get the green and yellow back as well as details in the mountains. (Taken with my compact camera).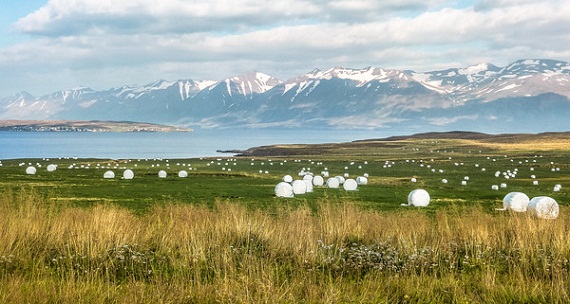
And About the Auroras...
However to capture auroras, you do need a bit more equipment... sorry. Have a look at my dedicated post on how to chase and photograph aurora borealis.
Are you ready to capture the beauty of Iceland?
All photos are from Claire Robinson
This post has been previously published on ZigZag On Earth.