Doughmamma is excited to announce our upcoming one-year anniversary this Valentine's Day. You can check out the very first post here. In honor of our first year of food blogging here and on the Huffington Post, we will be giving away an organic baking care-package to one lucky winner, announced March 1. Please check back next week for official entry rules and details.
If you have been a loyal reader, you know how I feel about Valentine's Day: rather blah. I think I may have been scarred as a single person, and therefore, recovering from an acute form of PTSD. I no longer twitch when I see a Russell Stovers heart shaped chocolate box, though I still get a bit jittery when it's time to choose the "right" pack of Valentine's Day cards for my son's class. Rome wasn't built in a day, so I'm happy with the progress I've made.
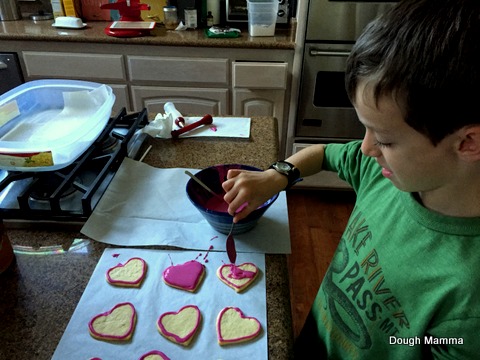
Recently, I noticed, I may be turning a corner. This year, I'm all about the love. Banyan and I decorated cookies for his class, and I even planned a romantic dinner for two for the hubby and me. Maybe I'm getting softer in my old age, or maybe I'm delirious from 10 months of interrupted sleep. Whichever the case, the spirit has got me, so hallelujah for me and my loved ones.
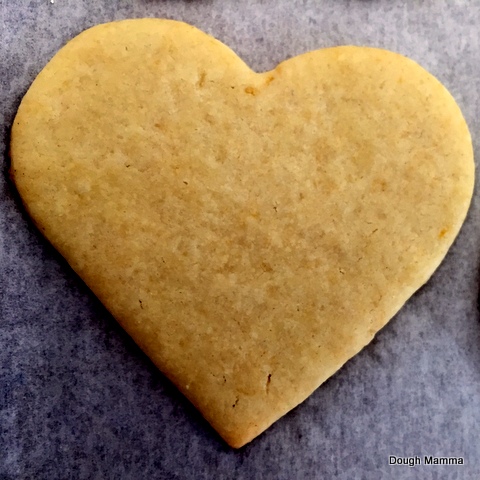
True confession, I hate cookies that require being rolled out. It's messy and the dough is always difficult to work with and worst of all, the result is nothing spectacular. This dough recipe from the Kitchn, however, is a very forgiving dough and actually tastes delicious. Even the re-rolled scraps didn't get tough or dry. This recipe still requires you to make a mess of your kitchen, just do your best to let go, as cleanup will only take 15 minutes or less.
Banyan, who is quite the perfectionist and hates when people color outside the lines, enjoyed making a mess while decorating cookies. When I reminded him, "there is no such thing as a mistake when it comes to creating art," he really let loose. We spent the time idly chatting and it was such a sweet moment. Someone told me the other day, we are only given 940 Saturdays between the time our child is born and the time they turn 18. This really hit me, as I'm almost through half my Saturdays with my little love-bug. As I tucked him into bed that evening, Banyan turned to me, hugged me tight and told me, "Mom, I had the best day with you." Mammas, Pappas, Aunties or Friends, this activity is definitely worth the mess.
Enjoy!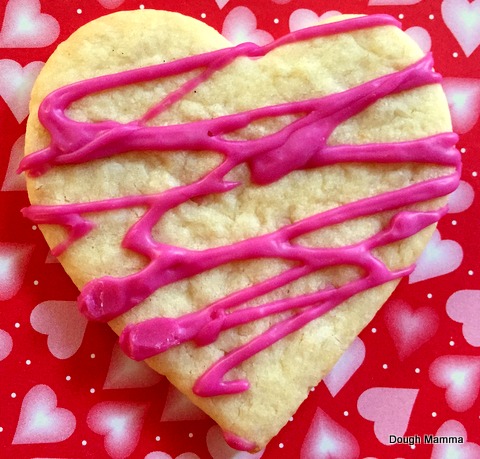

Title: Valentine's Day Baking with Kids
Author: thekitchn.com
Prep time: 24 hours
Cook time: 10 mins
Total time: 24 hours 10 mins
Serves: 24-36
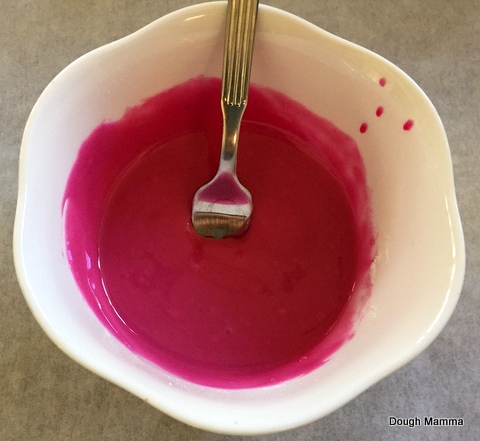
Notes: Before you place your dough between two pieces of parchment paper, take a fine mesh sieve and sprinkle powdered sugar on the bottom piece of parchment, then sprinkle the dough lightly with powdered sugar, cover with the top parchment and roll out to ¼ inch thickness. I used beet juice as my natural food coloring, this did not change the flavor of the icing and created a beautiful color of pink. For more notes, check out thekitchn.com.
Ingredients
The Cookies
1 cup unsalted butter, softened at room temperature for 1 hour
2 ounces cream cheese, at room temperature
1 cup sugar
1 large egg
1 teaspoon pure vanilla extract
½ teaspoon almond extract
1 teaspoon lemon zest
3 cups flour
1½ teaspoons baking powder
½ teaspoon salt
For the border icing:
1 cup powdered sugar
½ teaspoon vanilla or other flavoring extract
2 to 2½ tablespoons milk or water
Beet juice for food color alternative, optional
For the flood icing:
1 cup powdered sugar
½ teaspoon vanilla or other flavoring extract
2½ - 3 tablespoons milk or water
Beet juice for food color alternative, optional
Instructions
The Cookies
In the bowl of a stand mixer (or in a large bowl, using a hand mixer), cream the butter and cream cheese with the sugar. Beat for several minutes, or until light and fluffy. Beat in the egg, vanilla and almond extracts, and lemon zest.
Mix the flour, baking powder, and salt in a separate bowl then gradually add to the butter and sugar mixture until fully incorporated and a soft dough is formed.
At this point the dough can, and should be, chilled or frozen. If making cookies in the near future, divide the dough into 2 balls and roll each out to ¼ to ⅛-inch thickness between large pieces of parchment paper. Refrigerate for at least 1 hour. Or freeze the dough balls, wrapped in plastic wrap and a freezer bag, for up to 1 month. To thaw, leave in the refrigerator overnight then proceed with the recipe.
To bake the cookies, preheat the oven to 350°F and prepare baking sheets by lining them with parchment or a Silpat. Cut cookies out of the rolled dough and place on the prepared baking sheets.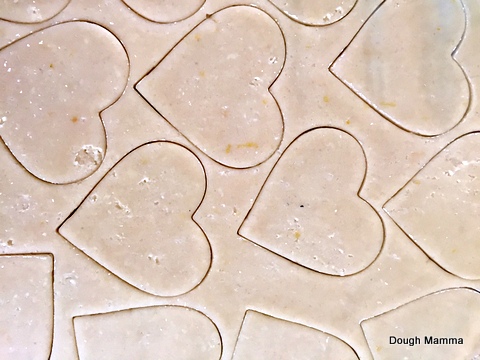
Bake cookies for 8 to 12 minutes, depending on thickness. Let cool for 5 minutes on the cookie sheet, then remove to a wire rack.
Cool completely before icing or decorating, and store in a tightly covered container.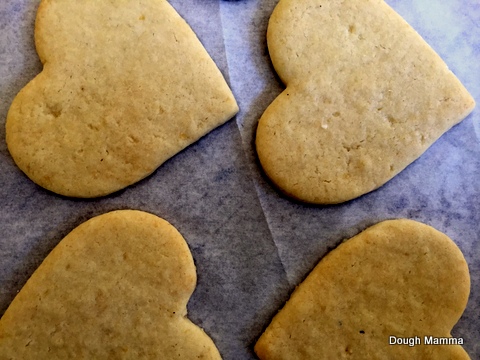
The icing
Clear some counterspace: Iced cookies need at least 24 hours to dry, so clear a good amount of counterspace or tablespace where you can ice the cookies and leave them undisturbed. Cover the counter with parchment paper.
Arrange cookies for icing: Allow fresh-baked cookies to cool completely, then arrange all your cookies over the parchment paper. You might find it helpful to leave a small workspace clear in front of you where you can move each cookie as you're working on it.
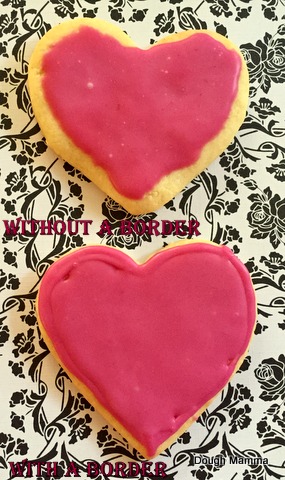
Prepare the border icing: Mix together the powdered sugar, vanilla, and 2 tablespoons of milk or water for the border icing using a spoon or a fork. It should be quite thick, and if you drizzle a little from your spoon, the ribbon should hold for a few second before melting back into the icing. This border icing should be just thick enough to pour easily. If desired, add food coloring to this border icing now.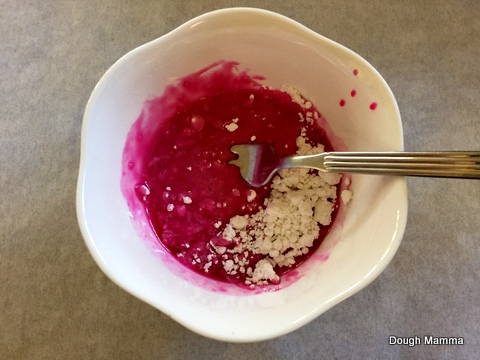
Transfer the border icing to a squeeze bottle: Insert the funnel in the mouth of one of the squeeze bottles. Spoon some of the border icing into the funnel and let it drip into the bottle. Since this icing is so thick, it can be difficult to get it to drop into the bottle -- you can squeeze the bottle to suction the icing and start it flowing. If it still won't start flowing, add more milk or water one teaspoon at a time until just barely thin enough to pour (be careful of adding too much or else the border icing will pool instead of maintaining a border). Once flowing, it can still take a few minutes for all the icing to funnel into the bottle. Prepare your flood icing while you wait.
Prepare flood icing: Mix together the powdered sugar, vanilla and 2½ tablespoons of milk or water for the flood icing using a fork or a spoon. This icing should still be fairly thick, but it should drizzle easily and a bit of drizzled icing should sink immediately back into the icing. If desired add food coloring to the flood icing now.
Transfer the flood icing to a squeeze bottle: Clean your funnel and insert it into a clean squeeze bottle. Pour the border icing into the bottle; this icing should be thin enough to funnel easily into the bottle. If necessary, add milk or water 1 tablespoon at a time until a thin, pourable consistency is reached.
Prepare as many batches of flood icing as needed to decorate your cookies.
Draw the borders around the cookies with border icing: Begin with the border icing and trace the outline of each cookie with icing. Hold the bottle vertical with the tip of the bottle slightly above the cookie. Squeeze gently and with consistent pressure so the border is the same width all the way around. Think of this border icing like drawing lines with a pen. If desired, you can draw inside the cookie -- thicker lines are better than thin lines for separating areas of flooded icing.
Allow border icing to dry slightly: The border icing doesn't need to be completely dry, but the next step (flooding the cookies with icing) works better if the borders are at least dry to the touch. If you draw the borders on all your cookies before moving onto flooding, the first cookies will be dry enough to start flooding once you finish drawing the borders.
Flood the interior of the cookie with flood icing: Using a bottle of the flood icing, begin filling the interior of the cookie with icing. Use the nose of the bottle to push the icing into the corners and against edges. Think of this flood icing like using a paintbrush.
Allow the cookies to dry: Leave the cookies undisturbed for at least 24 hours to fully dry. Depending on the thickness of your icing and the layers on the cookie, it may take longer. When the cookies are dry, the surface of the cookies will be completely smooth, dry, and resistant to nicks or smudges.
Store the dried cookies: Once dry, you can stack the cookies between sheets of parchment paper in an airtight container at room temperature for several weeks.