I love jam. I love it on my toasted baguette in the morning, drizzled through my plain yogurt, over my frozen yogurt and even in my salad dressing. But I can't stand junk, gunk and preservatives in it. I swear I can taste them, and I know they're not good for you.
So a couple of berry seasons ago, armed only with Google and some pent up desire to find my dream jam, I found some spectacular raspberries on sale and went for it.
I wanted to make jam that was just fruit and a little sugar, nothing else, not even pectin (a jelling ingredient found in most jams).
I followed a few no pectin recipes I found, and the jam was pretty good, even the first time. But it was a little too sweet. I experimented with less sugar than recipes called for and finally found a simple combination that I love and I'd like to share it with you now. Making jam, particularly berry jam is not hard at all, but it does require concentration. You have to stay there and stir it so it doesn't burn. I find it relaxing to concentrate on nothing else but raspberries for a couple of hours and it's even more fun if I have a friend to talk to while I'm stirring.
Here's my raspberry jam recipe: (Or substitute your favorite berries, same proportions.)
·5 cups of fresh, perfectly ripe (not over ripe raspberries)
·2 ½ cups of regular granulated sugar
That's it! No gunk, no junk.
Equipment you'll need:
(You can get a starter kit online or at your local hardware or big box store that has most of the stuff below)
·5 or 6, 8oz canning jars
·6 or 8-quart pot stainless steel (aluminum pots change the taste)
·8 inch saucepan or pot (aluminum or steel)
·Pot, aluminum or steel large enough to hold all 5 or 6 canning jars at once (there are canning pots available with a submersible rack that will hold all your jars. It's worth buying once you decide you like making jam)
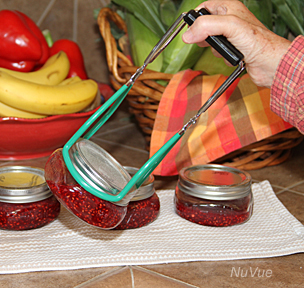
·Pair of jar tongs or tongs big enough to pick up a jam jar
·Jar funnel
·Lid lifter magnet
·Small plate
Steps:
1. Put the small plate into the freezer. You'll use it to plop a drop of your hot jam on when you think it's ready.
2. Unscrew the lids from the jars and pop off the inner lids.
3. Sterilize the jars (lids off) by putting them in your dishwasher about an hour before you use them or by boiling them (lids off) in the large canning pot for about 10 minutes (you can put you jar funnel and lid lifter magnet with the jars to sterilize them too)
4.Fill the 8-inch saucepan or pot about half way with water, bring to a boil and drop the inner lids into the boiling water. Sterilize them for 10 minutes.
5. Wash your berries and crush to taste in a steel pot. If you like fruit-chunky jam, crush them about half way, for smoother jam crush them a little more, (raspberries will disintegrate quite a bit when heated so you don't have to crush them all the way)
6. Once the fruit is crushed, add 2½ cups of granulated sugar and mix it up.
7. Turn the heat to high for the first 5 minutes stirring constantly.
8. Turn the heat down to medium and stir constantly for about 20-25 minutes.
9. At about 20 minutes or when you jam starts to look gooey, test the consistency by taking the saucer out of the freezer and dropping a small dollop of jam on it. If it doesn't run or drip off the plate, it's done.
10. Take the jam pot off the heat, set it aside and let it cool.
11. Using the jar funnel, fill each jar about 90%. Put on the lids and tighten.
12. Fill your canning pot with water enough to cover the closed jars and bring to a boil.
13. Put the filled jars in the rack and lower into the boiling water and let it boil for about 15 minutes.
14. Turn off the heat, remove the rack of jars and let them cool to room temperature,
15. Let it sit overnight.
16. Serve and enjoy.
You can use the jars and screw on lid rings over again, but you can only use the inner lids once. You can get new inner lids where you buy your jars.
Enjoy this summer fruit over and over again for months to come.