I have sort of a weird obsession with trying to recreate foods in cone form. So far I've created Sweet and Sour Chicken in a Wonton Cone, a Chocolate Chip Cookie Cone, Cobb Salad in a Crouton Cone and a Chicken and Waffle Cone among others.
For about a year and a half though one more cone idea has always been in the back of my mind -- an Apple Pie Cone. So what took me so long to try and make one? Honestly, I never thought the idea would work.
I pictured myself putting tons of work into the cone just to watch it collapse as I picked it up to take a bite, and do you know what? That's exactly what happened with the first one I made! The second one though, that one was perfect!
The problem with my first Apple Pie Cone was that the crust was way too thin, and filling it with apple pie filling caused it to break apart. So what's the secret? Just make a really thick cone. Luckily I bought an extra pie crust before I started my little experiment!
To create the cone I took the cone-form -- although any sort of funnel-shaped object should work -- that came along with a waffle cone maker that I bought a while back and wrapped my pre-made pie crust dough around it. I used an 11 inch pie crust, which ended up being able to be rolled around my cone-form twice. During my initial attempt at this I only wrapped the dough around one time, which caused the cone to be much too fragile to stay together when it was filled. I then trimmed the excess dough off the top and saved it for later so I could use it to create the lattice for the top of my Apple Pie Cone.
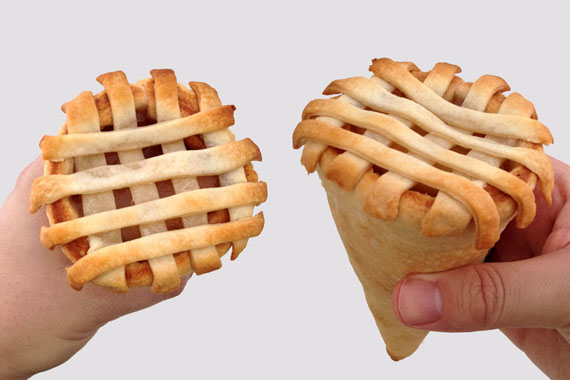
Next, I placed my empty cone upside down on a cookie sheet and baked it for ten minutes at 400°. Once it was done, I let it cool for a bit and then slid the cone-form out so I was left with just the pie crust. After that I filled my pie crust with apple pie filling, topped it with a woven lattice top and placed it right-side up inside of a glass, which was then placed back in my oven for another ten minutes to complete the cooking process.
In the end the edges cooked a little bit more than I would have liked, but I feel like that happens with pretty much any type of pie so it wasn't really a big deal. Aside from that though I really couldn't have asked for the Apple Pie Cone to turn out any better!