I started a two-part series last week on the great feasts of late summer that involve fish and seafood. Oh, it's not that all fish and seafood are at their best in summer...it's just that:
1) Fisherman are active in summer, and the catch is more plentiful; and
2) Piscine treasures seem perfect accompaniments to the cool-off of a lovely September evening.
The first story, posted last week, was a look at the magnificent soft-shell clams, or steamers, of New England and the Mid-Atlantic states. Marvelous late-summer fare!
This week's feature is not so Northeast-centric. In fact, it's about a style of seafood cookery--a style much beloved all over the world.
I'm talkin' 'bout fried fish.
Thoughts of my Dad hovered over these gastronomic deliberations...because the old boy loved to lay it on in late summer, combining numerous types of fish and seafood in the same glorious fried dinner. Man, would he have loved my late-summer trip to Sicily, just a few weeks ago, where, at a seaside cafe in Ortigia, I had some of the greatest fried seafood of my life! Here's a look:
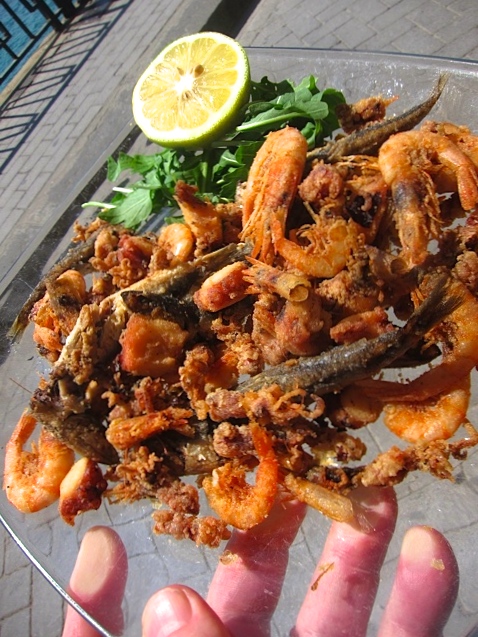
Frittura Mista at Luna Rossa in Ortigia, Sicily, August 2014
As you can see, every one of the items got a customized coating...which exactly echoes my dad's approach to fried seafood. I'll never forget his insistence on scallops getting the most "layers" of coating...because "if the scallops are not well-coated," he'd say, "the large amount of liquid they contain will bleed through the coating, making crispness impossible."
Upon my return to the U.S. in August, I've been thinking manifold fried seafood thoughts. Actually, I've been doing more than thinking--I was on Long Island last week (doing a shoot for Edible East End), where delicious fish and seafood for frying are available. I even ventured over to Shelter Island, where I'd heard a local place--called Commander Cody's Seafood--was frying up some good local stuff, in a kind of South Carolina shack setting:
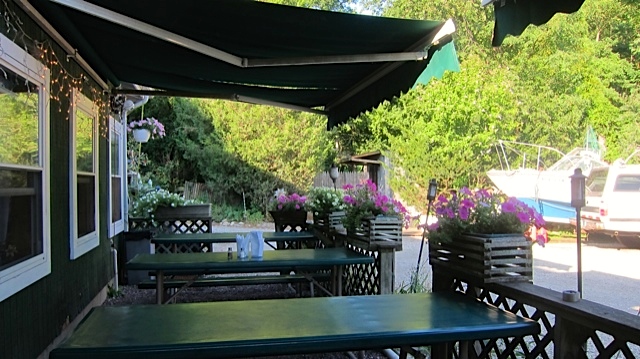
The outdoor porch of Commander Cody's Seafood in Shelter Island, Long Island
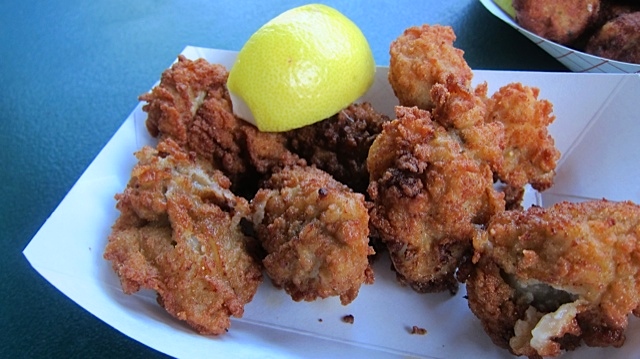
Fried oysters at Commander Cody's
It was good, all right...not great, but a wonderful experience...and, once again, as all good seafood fry chefs do, Commander Cody has a variety of coatings for various fish.
I have my faves, of course, coating-wise. The apple doesn't fall far from the tree of frying specificity! So just in time for your early September fried seafood blow-outs, here are three distinct categories of fish-and-seafood coatings...along with my favorite fish and seafood for each one, as well as cook's tips for bringing it all off perfectly. From Sicily, to Eastern Long Island, to your home...the world is your oyster, if you fry it right!
For me, here are the big three:
Cornmeal Coating
Batter Coating
Panko Crumb Coating
Cornmeal Coating: Great for Oysters
I need to be very emphatic about this coating: generally, I am not a huge fan. Why? Though I like the flavor that the cornmeal brings, the texture of a morsel that is dipped in 100% cornmeal is sandy and dry. (You can see in the Commander Cody fried oyster that he avoided cornmeal, though it's very popular). Years ago, I started mixing my cornmeal with other coating ingredients, and have known for a long time that the true answer lies along that path. And I'm excited to say that my recent experiments brought me to fried-oyster perfection!

My cornmeal-fried oyster with Cajun spices
In this photo, you can see the little grains of extra crispness that the cornmeal brings, but you can also see that the "sandiness" is relieved by a beautiful partnership...with flour!
Ah...but what's the ratio? And is there an order of dipping, or are all things combined pre-dipping?
After many experiments (I could eat oysters all day...and did!), I discovered that the following order brings a perfect fried oyster into the world:
1) Shuck the oysters just before prep.
2) Prepare a plate of flour, by seasoning flour well with a Cajun spice blend (I used Tony Chachere's).
3) Beat enough egg to just contain the oysters. Dip oysters in egg, mix, and hold for 5 minutes.
4) When ready to fry, remove each oyster from egg, let it drip for a moment, then roll lightly in cornmeal.
5) Immediately roll each oyster, a little more heavily, in seasoned flour.
6) Fry (see below for general fish-frying tips).
Batter Coating: Great for Fish Filets
I'm a huge fan of fish & chips, worldwide--though a large percentage of what one finds (even in England!) is heavy and greasy. Knowing how good properly battered fish can be, I set out some years ago to perfect a fish-destined batter that would be light, airy, crisp, dry. I believe I succeeded! I tested it again on this go-round and...though I may have changed in the intervening years...the batter hasn't! The experiment started out, years ago, with beer as a lightening agent, but I came to discover that yeast makes the lightest, crispest batter.
My batter-fried fish filet (in this case, tilapia)
You can see the crispy bubbles in this photo. You can sense the grease-free dryness. You can practically hear the shattering crunch about to come when fish hits teeth.
Here's the order of events:
1) Prepare the batter. Mix a cup of sifted flour in a bowl with 2 teaspoons dry yeast. Carefully stir in 1 1/2 cups of warm water (not too hot!) into the flour-yeast mixture. Do not whisk into a smooth paste; a few lumps are OK.
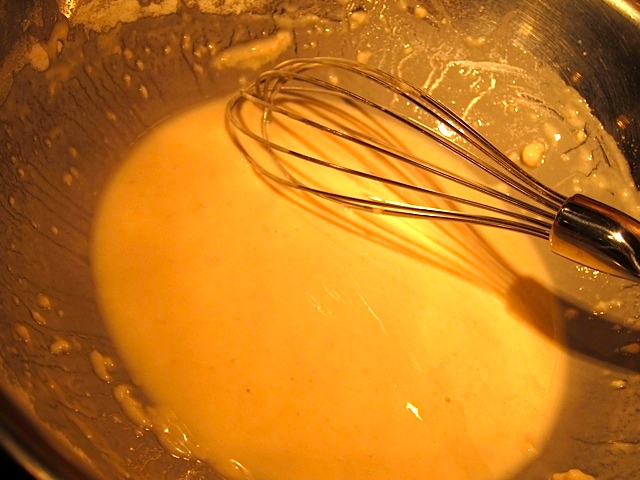
Mixing the yeast batter
2) Hold the batter in a warm, draft-free place (a turned-off oven is good) for about an hour. You should see lacy bubbles forming on top.
3) Select fish filets. Season with salt. (My favorite filets for this dish are turbot, sole, cod and wild striped bass.)
4) When ready to fry, dip filets in batter, coating well. Allow only a little of the batter to drip off. Plunge filets into hot oil. Move them early, to make sure they're not sticking to sides or bottom.
5) Thin slices of battered fish will take about 2 minutes to cook. They should be golden-brown when done.
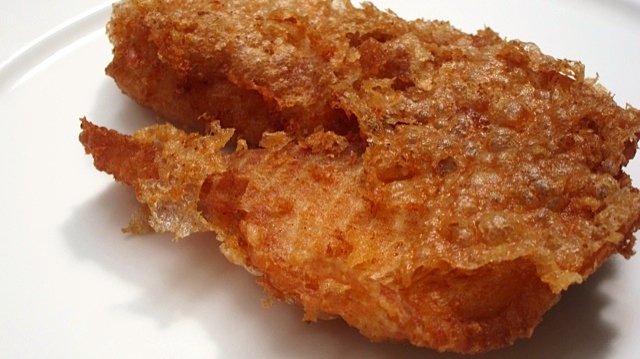
Panko Crumb Coating: Great for Shrimp
And now, we reach the great category of crumb coatings for fried fish--probably the most common of all coatings. I grew up with this stuff, and I love it; even today, most chefs use breadcrumbs for all their frying needs. My Dad went one better: he was especially fond of cracker meal, which creates an especially light, crisp, elegant exterior.
But two things have changed in the modern world. When I discovered Japanese panko crumbs--those little shot-through-with-air wonders--I found my primo crumb. I love the crisp shatter of seafood fried under panko crumbs.
In addition, for my recent experiment I searched half a dozen local markets for cracker meal--coming up empty in every one! Five of the store managers never heard of it; one said "oh yeah, I think it's still made by Nabisco, but it would be a special order;" so I am pretty confident that the days of cracker meal are over.
No matter, I got me pankos. And I love using them for a wide variety of seafood items--scallops, squid, clams. Near the top of that list are soft-shell crabs, quartered. But at the tippy-top is shrimp.
Now, there are two ways to proceed down the shrimp path. One is with shelled shrimp, either with the bottom tail segment removed or attached (in the old days, if the tail was attached it was called "fantail shrimp").
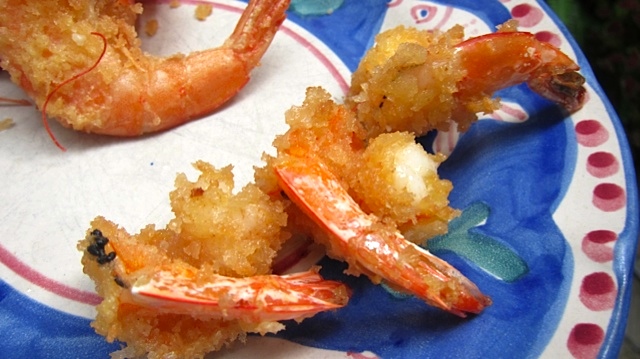
Fried fantail shrimp with panko
Even better, to me, are shrimp that are completely whole--tail, shell AND head still on! And you eat all of it! You can see in the Ortigia photo above that those shrimpers are holding on to everything! But this requires very careful shopping, because the shrimp need to be on the small side--lest the shells are too hard to bite through and enjoy. (Japanese markets are good places to search for small, thin-shelled, head-on shrimp).

Whole shrimp head-on, perfect for panko-frying
Intriguingly, which shrimp you select will affect which coating method you use.
If you pick the headless, shell-less shrimp, the process is very simple:
1) Dip shrimp in beaten egg.
2) Roll lightly in seasoned panko crumbs and fry immediately.
But if you go for the greater challenge of the shell-on, head-on shrimp, you'll find that the same coating method leads to lots of panko crumbs falling off the slick sides of the shell. So...adjustments must be made:
1) Roll the shell-on shrimp in flour.
2) Dip shrimp in beaten egg.
3) Roll shrimp lightly in panko crumbs.
4) Dip shrimp again in beaten egg.
5) Working quickly, roll the shrimp one more time in panko crumbs, pressing more heavily.
6) Fry immediately.
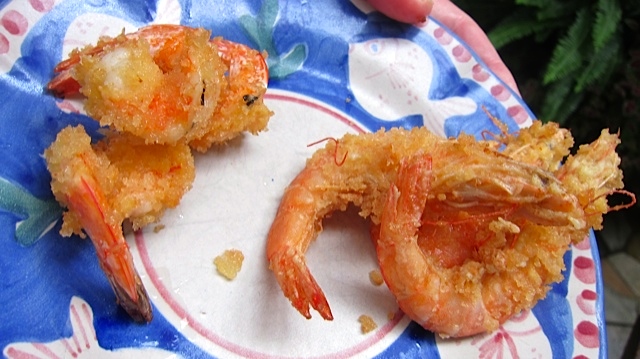
Shrimps together on the plate: shelled to the left, shell-on to the right
General Fish-Frying Tips:
*Temperature is the key to a good fish fry. Use a deep-fry thermometer. Never fry fish at less than 325 degrees, or over 390 degrees. The best general range is 365 degrees to 375 degrees.
*Make sure the fish can "swim" in plenty of oil. The worst thing that can happen is a sudden drop in oil temperature by adding too much fish to the oil. Make sure you have a lot of hot oil, in a large vessel, and that you don't overcrowd.
*As soon as the fish come out of the fryer, drain them on paper towels. Salt to taste (salted well is my taste).
*Serve quickly.