
Is there anything more delicious than a summertime stone-fruit dessert recipe? I think not! I absolutely love strawberry cobbler, and adding seasonal peaches takes this recipe over the top. This recipe uses some advanced techniques (like making the cobbler biscuits by hand) but rest assured, it is incredibly simple to make, and inexpensive to boot. You don't need a fancy mixer, or even a rolling pin! I'm going to put your hands to work to show you exactly how to make the best strawberry-peach cobbler of your life! The best part? Your kitchen will tease you with the amazing smell for hours!
How to Make the Best Strawberry-Peach Cobbler of Your Life
Equipment needed: cobbler baking dish (we used a 10″ pie dish), 2 mixing bowls, rubbert spatula, spoon, whisk, gloves (optional but recommended), small cookie scoop, baking sheet lined with foil or parchment (optional but recommended), measuring cups and spoons, microplane, two working hands, one giant smile.
Yield: 1, 10″ pie. About 8-10 servings
Ingredients:
For the filling
- 6 cups strawberries (roughly chopped) (1 1/2#)
For the biscuit topping:
- 1 1/2 cup AP flour (all-purpose flour)
Instructions:
1) Preheat your oven to 375 degrees Fahrenheit. Prepare your strawberries and peaches by removing the pits from the peaches and slicing, and rough chopping the strawberries. Combine both into a medium size bowl.
2) Measure everything. Yes, I mean that. Get all of your measuring out of the way at once. Here is how I did it:
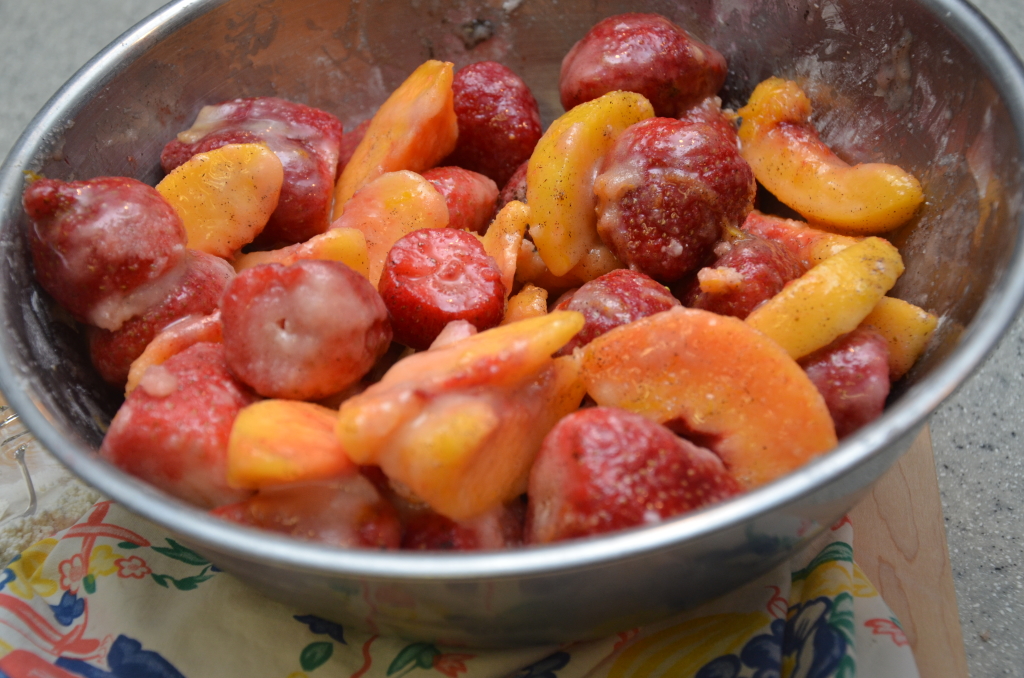
3) Grab a medium sized mixing bowl. Literally, measure EVERYTHING for the "filling" (the strawberries, peaches, sugar, cornstarch, lemon zest, lemon juice, vanilla extract, vanilla powder, ginger, and salt) into one bowl. Grab a big spoon and stir it up. Set aside while you work on the topping.
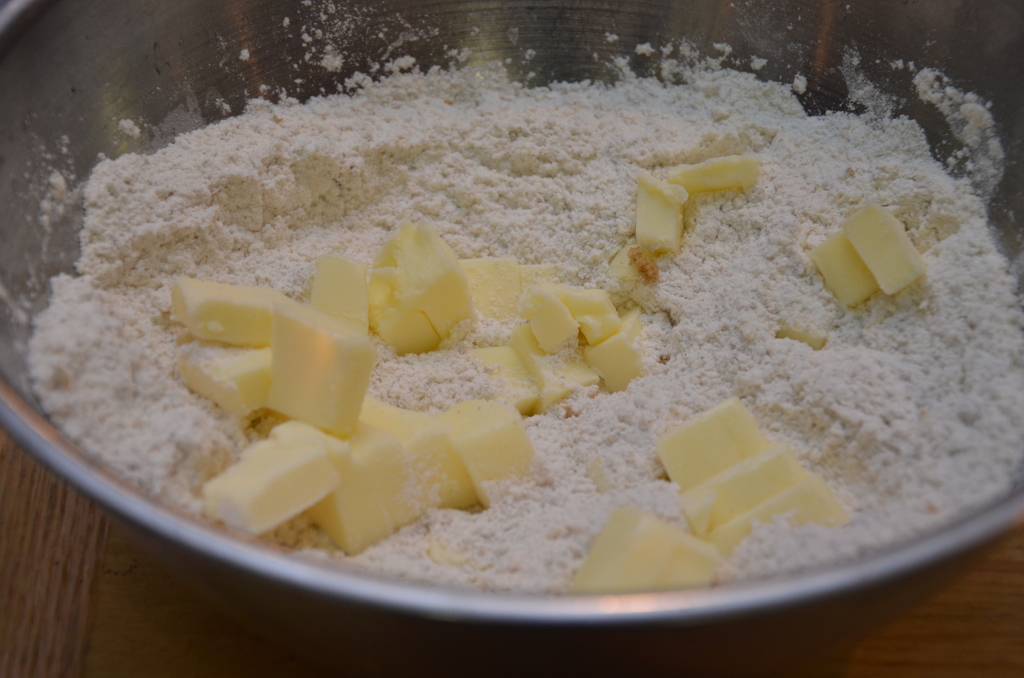
4) Fantastic. You're doing great. Now, look at the "biscuit topping" recipe. Grab yet another, medium sized mixing bowl. Measure all of your dry ingredients (AP flour, brown sugar, baking powder, salt, lemon zest, vanilla powder) into this bowl.
5) Using a whisk, mix all the dry ingredients together. You want it to be very well combined and look homogenous. Next, cut up your stick of cold butter into small pieces, and add into the dry ingredients.
I like to use my hands and toss the butter around into the flour. I feel like it makes the next step easier if the butter is entirely coated in the flour mixture.
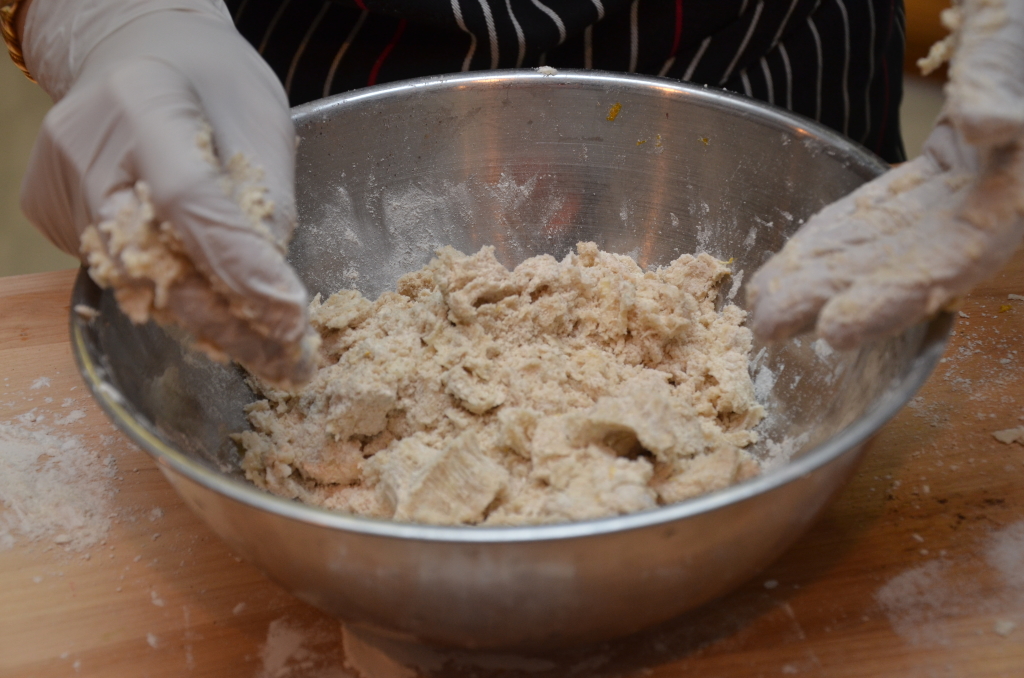
6) Here is where we put our hands to work. Literally. I gloved up (which I recommend, but you don't have to if you don't want to) and immediately grabbed two handfuls of the butter/flour mixture.
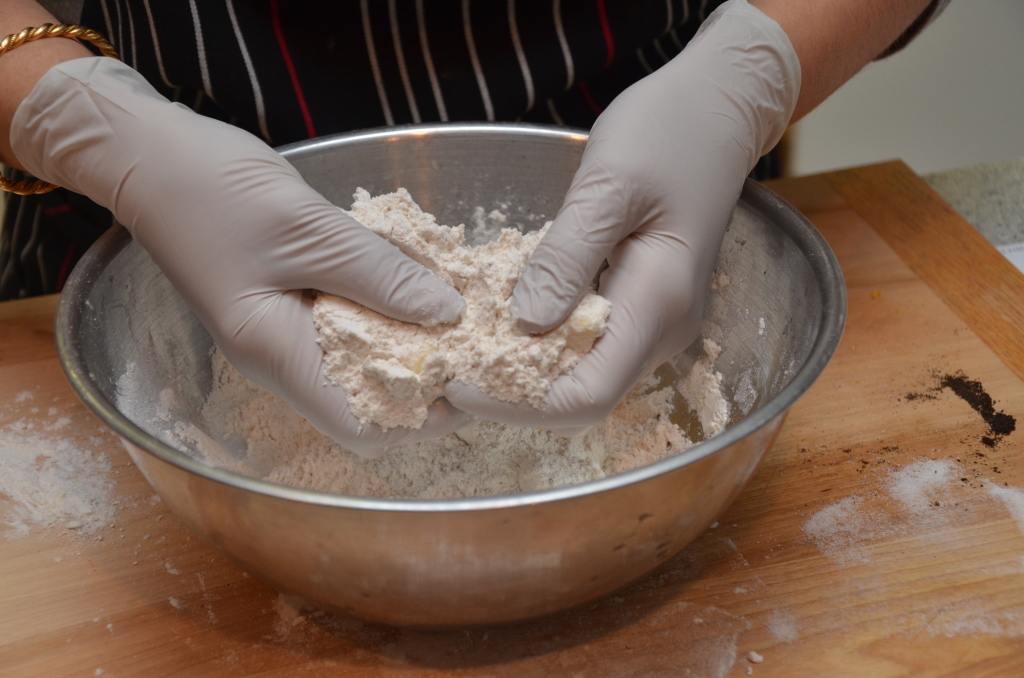
Push the butter through your hands like counting cash. Pretend like you are counting money. Using your thumbs as the driving force, push the butter and flour together and forward.
Push the butter through your hands.
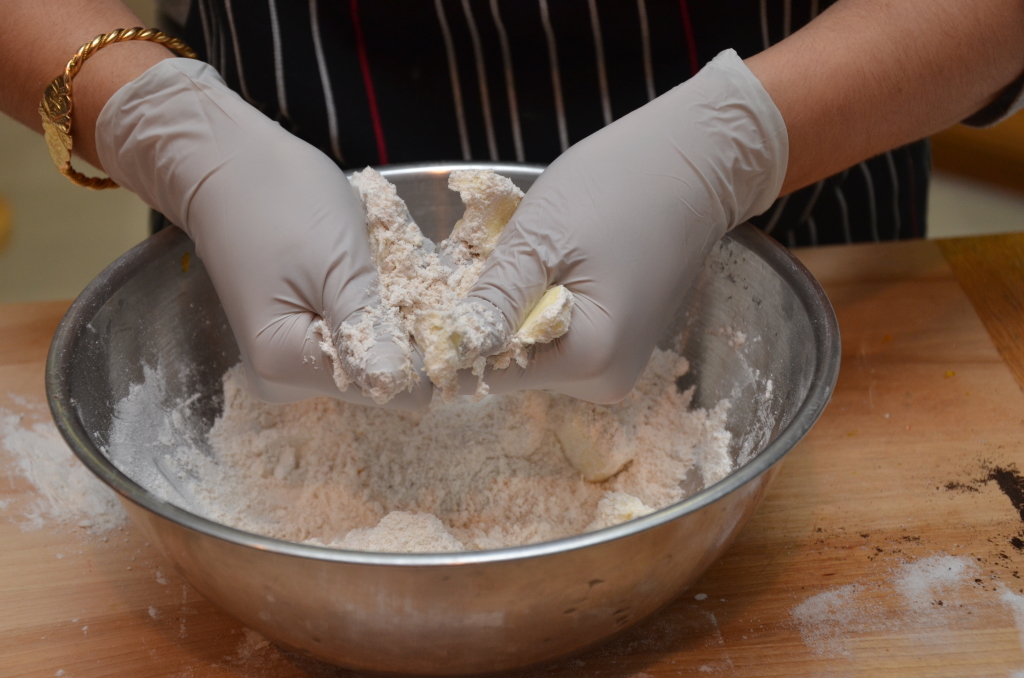
Thumbs up! It should look something like this. Continue to do so, over and over again, until your dough starts to come together (about 2 minutes).
7) When your dough resembles course, chunky meal, and when you can pick it up and form a ball within your hand without it breaking apart, you know it's time to add the cream. So, add the cream, and mix it together. For this step, you can either continue to use your hands, or, like I prefer, use a large spoon. I would advise you not to use a whisk for this step. Your dough should be too thick for that and will only result in a messy headache. Just to recap: spoon, or hands. I recommend spoon.

8) Next, check on those berries. Stir them up, tossing them evenly in all the yummy flavors you added. It's totally fine if there are some natural juices that have developed. In fact, I can almost promise you that there WILL be natural juice. Essentially, our berries our macerating, which means they are breaking down within the natural (and extra) sugars. Just to be clear, maceration is delicious. When the berries and peaches are evenly coated, toss them into your baking dish. We used a 10″ glass pie dish. You can also use a square baking dish, or make individual cobblers in smaller ramekins, whatever you're in the mood for!

9) Using a small cookie scoop (we love those for all sorts of different uses!), scoop the biscuit topping over the top of the cobbler. Space them out as you please, there should be enough to cover almost the entire pie. You'll want some space between each scoop so the end result will have some color peaking through!
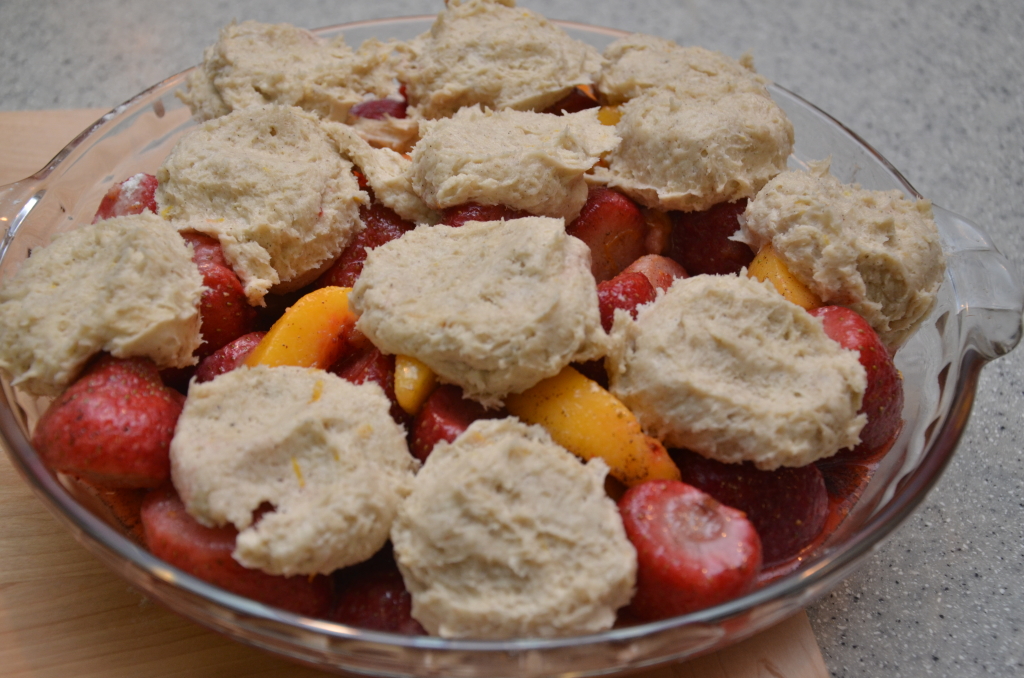
If you don't have a cookie scoop yet, don't fret. You can also use a spoon or your hands. Just get the biscuit topping on the cobbler, for cryin' out loud!
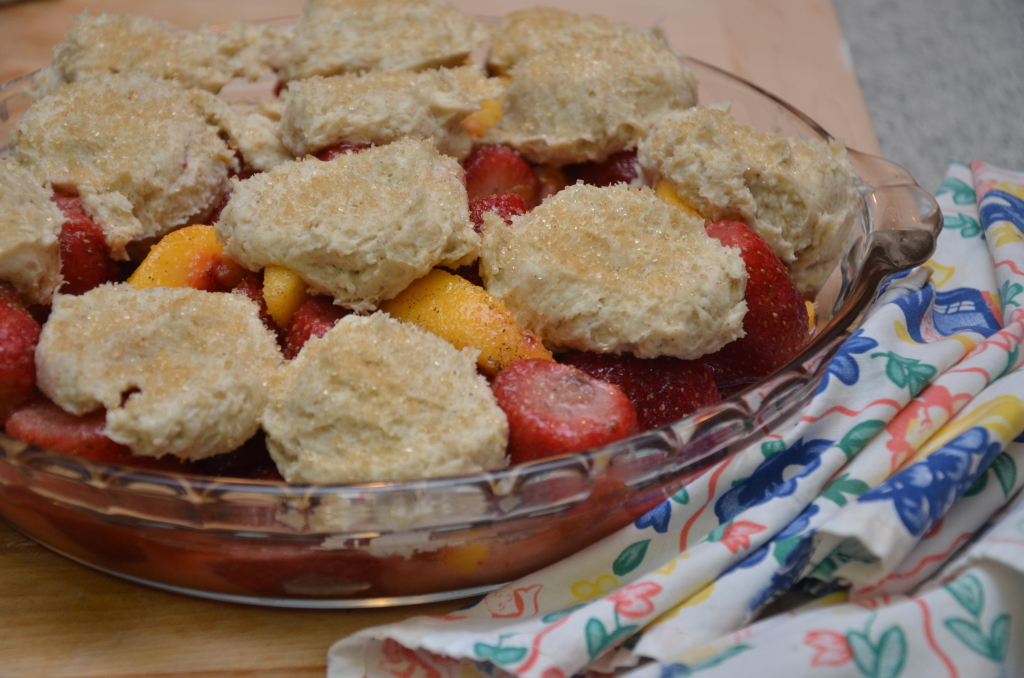
10) This final step -pre oven - is optional, but I think it adds a nice touch. Do you have any sugar in the raw lying around? I like to sprinkle some on top of the biscuits before putting the cobbler in the oven. It adds a beautiful sparkle and a little bit of texture.
11) Throw that bad boy in! I like to put mine on top of a baking sheet covered in foil, just in case it should bubble over and get hot, sticky, strawberry juice all over the place. With the oven at 375, I set the timer for 20 minutes. After 20 minutes, I rotate the cobbler around, and put it back in for another 30 minutes.
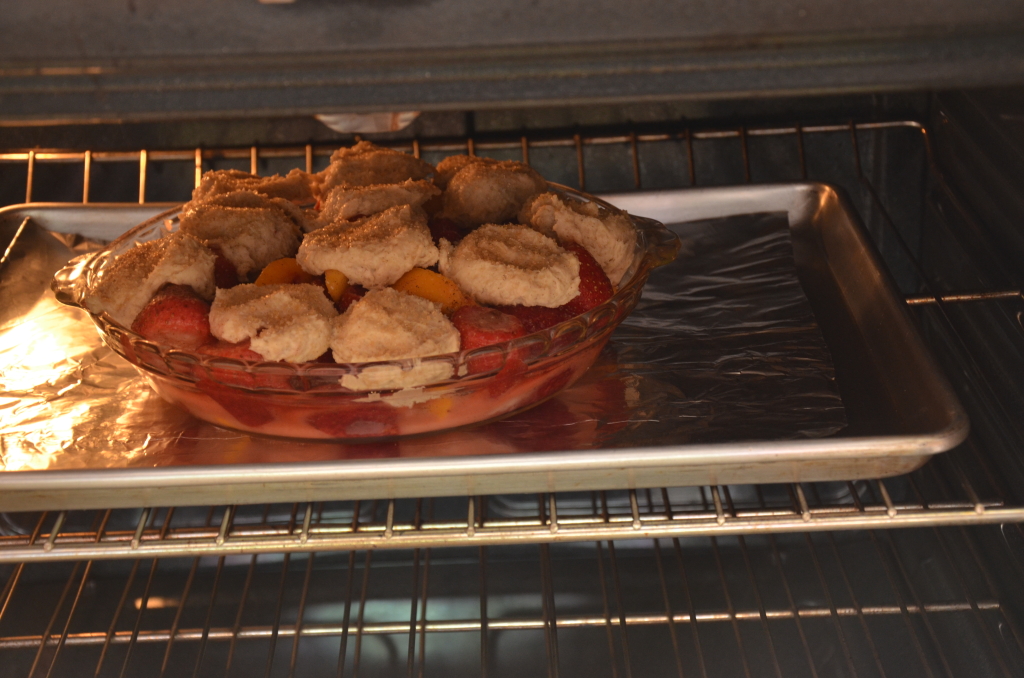
After 30 minutes, the biscuits have started to bake, the fruit is warm, but not bubbling yet. It may look like your biscuits are sitting on top of a fruity swimming pool. That is because the cornstarch has not been activated yet. Cornstarch is activated by heat, and in this case, the fruit is not hot enough yet to activate it. Rotate the cobbler around, to ensure even baking, and set the timer for 30 more minutes.
12) After 30 more minutes (1 hour and 20 minutes total), you should have noticed that the fruit is bubbling consistently, the strawberry-peach mixture appears to be much thicker, and your biscuits are golden brown all around! Crunchy on the top, but soft and fluffy on the inside.
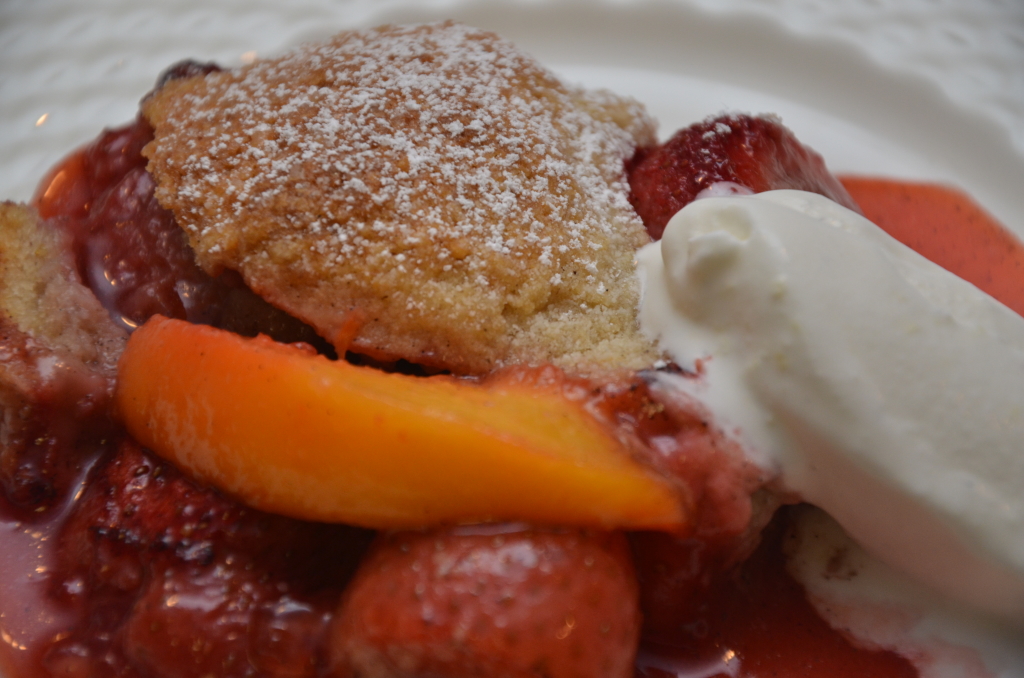
13) Take the cobbler out of the oven and let cool on a cutting board or baking rack for at least 30 minutes before serving. It was still perfectly warm inside before I served it (to myself), but the rest time allowed the fruit to cool and begin to gel. Also, no one likes to burn their mouths on boiling fruit sugar. Anyways, I gave this gorgeous cobbler a light sprinkle of powdered sugar and served it up!

It goes perfect with this Toasted Almond and Ginger Homemade Ice Cream Recipe!
This recipe and photos are from my food blog, Kat's Kitchen Collective!