I always loved Alexander McQueen because he designed so many styles that obscured and showcased the shoulders. I also always loved to wear the right puff vest for fall. This tutorial takes the futurism of McQ and combines it with a simple puff cover up. It requires light pattern making and a little bit of sewing.
Supplies:
1) The fabric of your choice
2) Sewing Machine
3) Pattern Paper
4) A synthetic comforter filler like the one pictured below from Ikea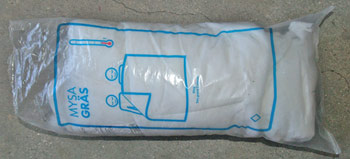
5) Screen Printing Ink
6) Silk Screen Squeegee
7) Brand New/Unburned Silk Screen (that has been taped off on the inside so that paint doesn't get lodged in the cracks and make it difficult to clean your screen).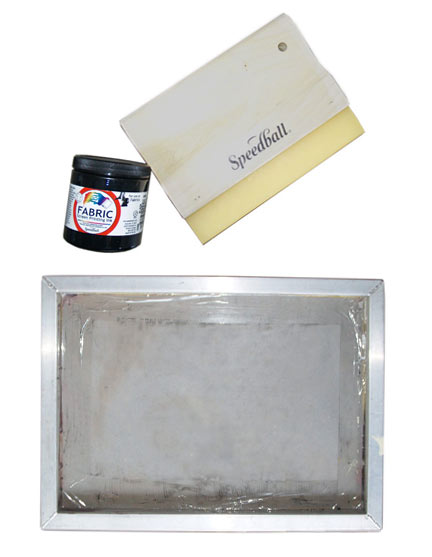
8) Tape
9) News Paper
The first thing you will need to decide is what type of fabric you are going to use. I chose nylon rip-stop. Nylon Rip-stop is great because there is a woven grid in the fabric which allows you to cut straight lines and right angles without a pattern.
If you choose a different fabric you will need to make patterns for the puff filler and the outer covering. I always choose to make patterns because I have found that the extra step saves time in the long run. When both of your patterns have the correct angles and dimensions it is always easier to sew. However, you can take a short cut and use a disappearing ink pen (available at most fabric stores) to draw the dimensions from the diagrams below directly onto the fabric and fiber filler.
First diagram: pattern for the synthetic fiber filler.
Second diagram: pattern of the outer covering/self fabric for the Puff Scarf.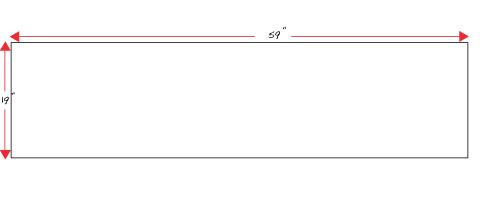
Sewing Directions:
1) Cut out one piece of filler and one piece of self fabric from your patterns
*The "Self Fabric" refers to the main fabric of a garment.
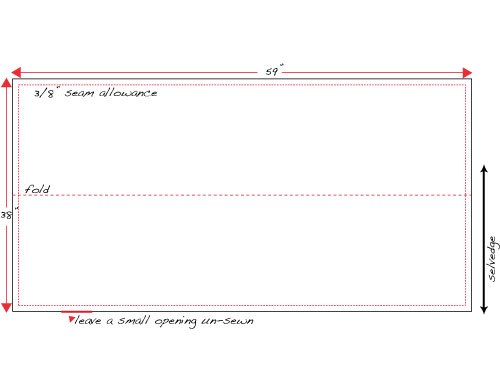
2) Fold the self fabric on itself inside out and sew around the edges with 3/8" seam allowance.
3) Leave a 4" to 5" inch spot on the scarf open.
4) Turn the fabric inside out through the 4" to 5" opening and stuff the synthetic fiber filler into the sewn rectangle.
5) Iron the seam allowance of the open segment of your scarf inward.
6) Top Stitch or hand stitch the remaining open segment as neatly and close to the edge as possible.
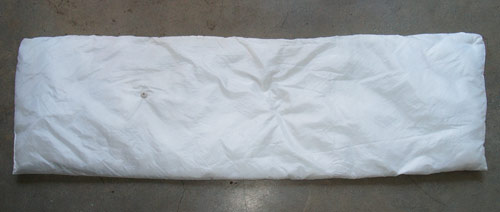
Image of the Puff Scarf before it is decorated.
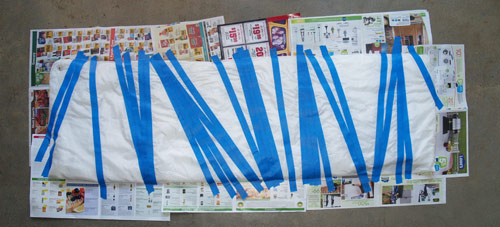
7) Now it's time to decorate the scarf. Put news paper under your scarf so that you do not make a mess. Tape a design onto your scarf like the one shown above.
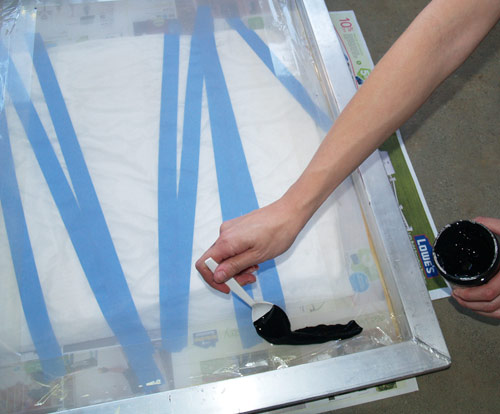
8) Place your silk screening paint along one side of your silk screen
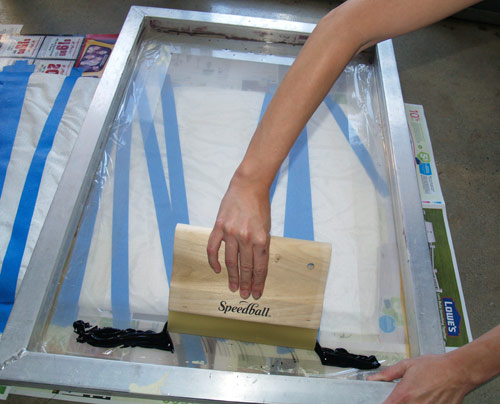
9) Use your silk screen squeegee to pull the paint across the fabric
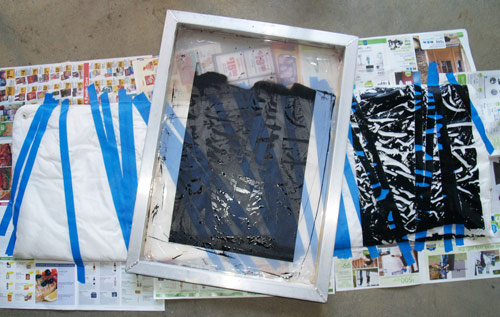
10) Lift silk screen off the first segment.
* Clean screen between pulls for best results and do not place the silk screen on wet paint.....it will destroy your design and get paint everywhere.
11) Remove the tape
12) Silk screen ink is cured with heat. Once cured the paint is permanent and will not come off in the wash. You can either wait until the paint is completely dry and then throw it in the clothes dryer or you can cure it quickly with a hair dryer.
13) Finish the scarf by attaching closures. Wrap the scarf around yourself and pin it the way you would like it to fit when it is clasped.
14) I chose covered snaps for my closures but you can use any thing from buttons to velcro. It's your choice.
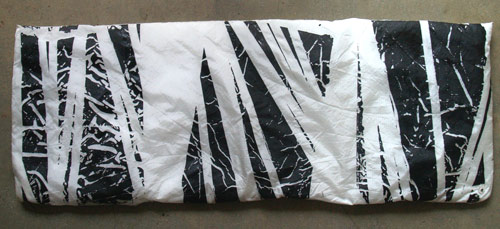
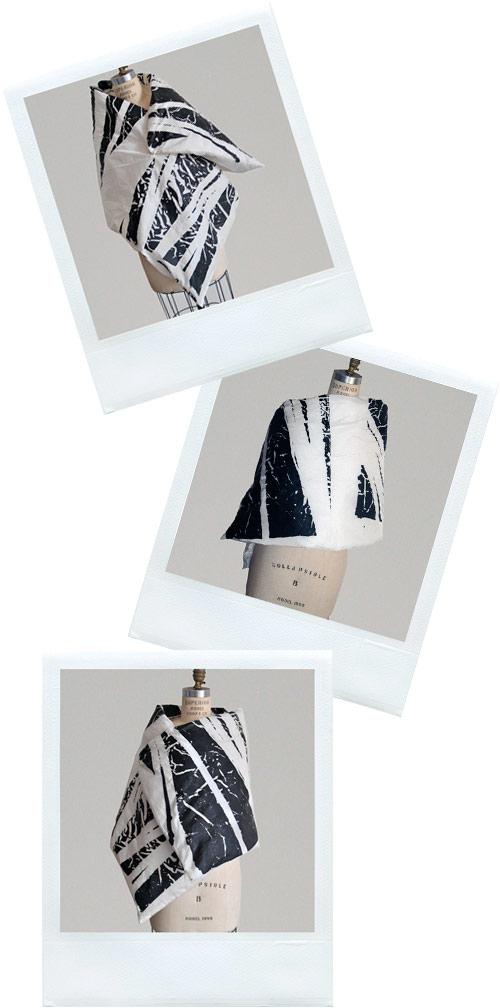
View of the finished scarf.
The great thing about this scarf is that you can use any fabric you want and any color paint...even several different colors of paint.
So, get creative and go for it!
For more about Jennie Taylor visit: www.jennietaylor.com or www.diyrenegade.com
You can also follow Jennie on twitter: www.twitter.com/diyrenegade