
Gallipoli: The August Offensive
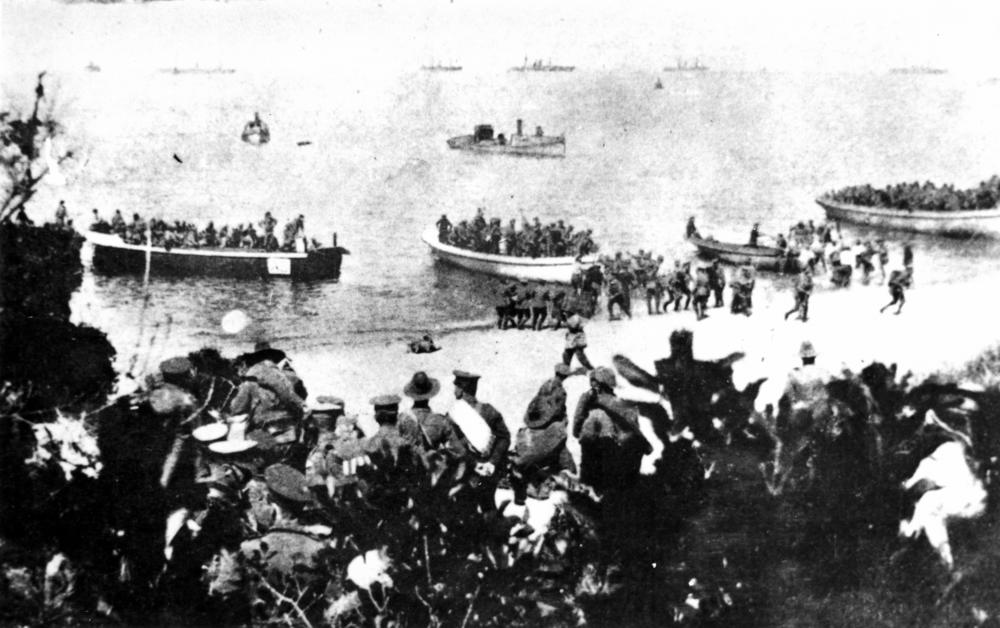 British Troops Landing at Suvla Bay, August 6, 1915
The August Offensive in Gallipoli during the summer of 1915, also known as the Battle of Sari Bair, was the last attempt by the British to break the stalemate in Gallipoli and seize control of the peninsula in preparation for a final push to Constantinople. The initial invasion of the Gallipoli peninsula had occurred in two principal locations: at the very end of the peninsula at Cape Helles and at a small cove, since renamed Anzac cove, about a quarter of the way up the peninsula on the Aegean side. The cove was almost directly opposite the Narrows at Canakkale where the Ottomans had placed heavy artillery and an extensive series of minefields to prevent Allied ships from proceeding further up the Turkish straits.
The landings at Anzac Cove had gone nowhere, with the Australian and New Zealand troops unable to advance in the face of murderous fire from Turkish infantry entrenched in the heights looking down on the landing beach. British and French forces at Cape Helles had attempted to advance up the peninsula. While their beachhead was more extensive, they too failed to make appreciable progress, and what little forward advance was achieved came at a high cost in dead and wounded.
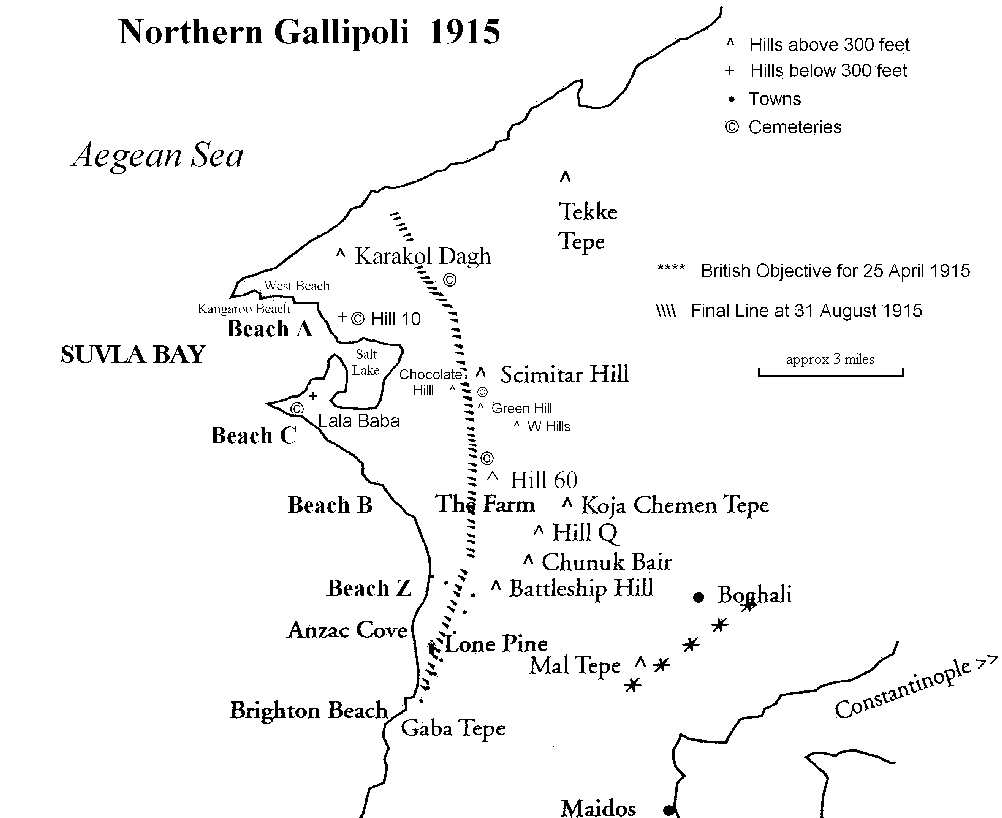 Allied and Ottoman Positions in Gallipoli, August 1915
The August Offensive was designed to break through to the Turkish lines on the Sari Bair ridge, which overlooked Anzac cove, then drive across the narrowest portion of the Gallipoli Peninsula trapping Ottoman forces between Allied troops in the south and the Anzac forces. In addition, the advance would have allowed Anzac Forces to outflank the Ottoman fortifications at Canakkale and cut them off from supplies and reinforcement.
The first phase of the operation began on August 6, with a new landing at Suvla Bay, approximately five miles north of the current Anzac position. Simultaneously, Anzac forces launched an attempt to breakout from their position by beginning a new drive to the northeast into the rugged country parallel to the Sari Bair ridge. The plan was to link up with the British forces landing at Suvla Bay and outflank the Ottoman forces by capturing the high ground behind them further up on the Sari Bair ridge. Anzac forces were further supported by the British 13th Division and a number of other Brigade formations.
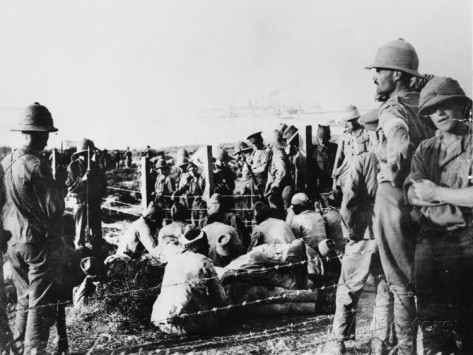 Turkish Soldiers Captured During the Landing at Suvla Bay
Three new British divisions would carry out the landings at Suvla Bay: the 10th Irish Division, the 11th (Northern) Division and the 13th (Western) Division. These divisions were considered "New Army" in that they had been created from new recruits following the virtual annihilation of the British Expeditionary Force that had been dispatched to France in August 1914.
They were untested in battle and had received only the most rudimentary training. In addition two Territorial Army Divisions, the 53rd (Welsh) Division and the 54th (East Anglian) Division were to provide reinforcement. Tasked primarily for home defense, these territorial divisions were better trained but equally untested in battle. In addition there was also one division of dismounted yeomanry, the 2nd Mounted Division. The yeomanry were cavalry units of the Territorial Army that were being deployed as an infantry division.
In the meantime, Allied Forces at Cape Helles staged an attack on an isolated farm known as Krithia Vineyard in the hope of drawing Ottoman troops to the south and away from the Sari Bair ridge. The diversionary attack failed to draw any significant Ottoman troops.
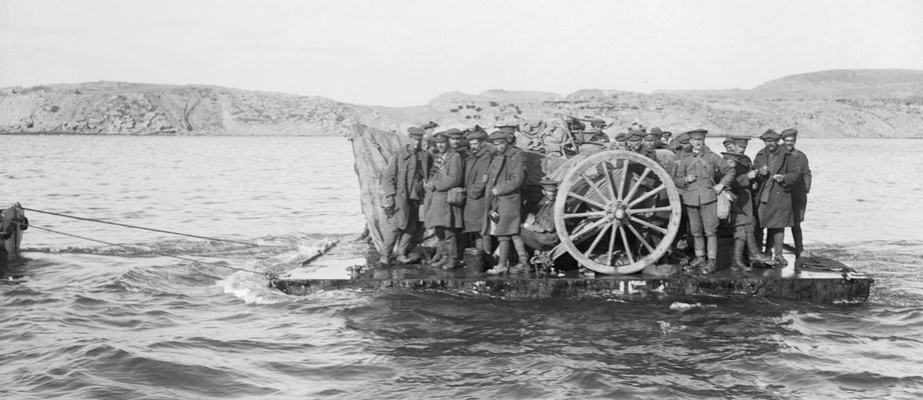
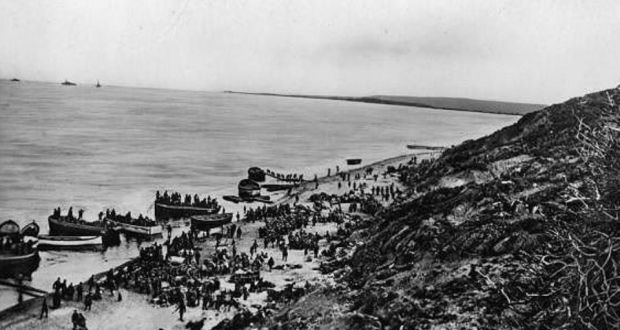 British Beachhead at Suvla Bay, August 1915
The landing at Suvla Bay was a disaster. None of the troops had received any training in mounting amphibious operations. Landing at night, many of the boats ran aground on sand bars forcing the men to disembark into the surf and wade, in some cases as much as 200 yards, ashore. There was an absence of reliable reconnaissance or maps of the landing area. Many troops became intermingled and officers, who traveled in separate craft, became separated from their units.
Nothing had been learned from the disastrous landings at Anzac cove four months before. Little forward progress was made and British forces suffered 1,600 casualties during the first day from sniper file and artillery bombardment from the high ground overlooking the bay.
Attempts to seize the high ground above the landing zone proved ineffective. British forces were reinforced by the 53rd Division on August 9 and the 54th Division on August 10, but by then heavy Ottoman reinforcement had matched the initial British advantage in troop strength.
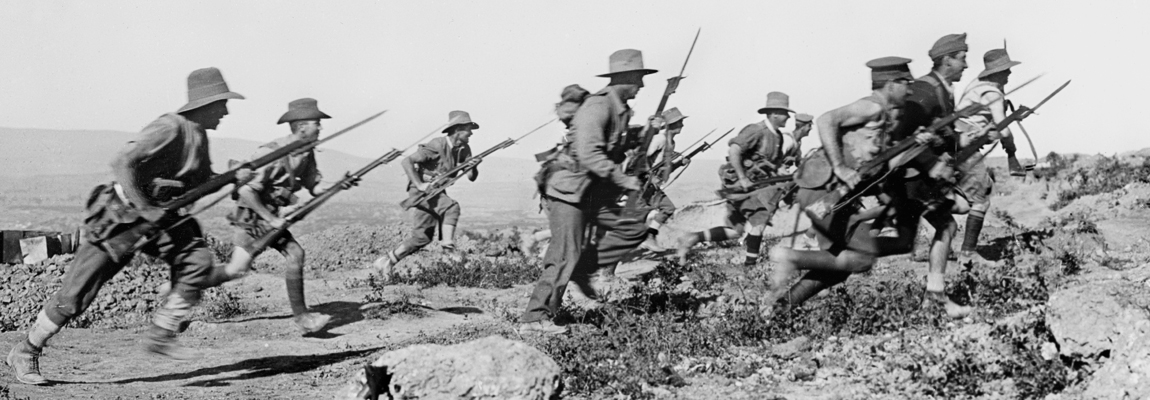 Anzac Troops Advancing Against Ottoman Positions Along the Sari Bari Ridge, August 1915
On August 15, the Commander of the Allied Forces in Gallipoli, General Sir Ian Hamilton, replaced the British Commander at Suvla Bay, Lt. General Sir Frederick Stopford, and a number of his subordinate commanders. Lt General Sir Julian Byng was transferred from France to assume control of the operation.
There were a number of repeated attempts to break through the Ottoman lines above Suvla Bay and to link up with the Anzac force attempting to break out from Anzac cove between August 20 and the 29. Initially, all of these attempts failed.
 Allied Troops Being Evacuated from Gallipoli, January 1916
By the end of the month, however, Allied forces had manage to gain control of Hill 60 creating a solid front line from Suvla Bay to Anzac Cove. While the new front line represented a significant improvement over the previous Anzac position, it fell far short of cutting off the southern portion of the peninsula. The line represented the furthest advance of the operation and was the last pitched battle of the Gallipoli campaign. Five months later Allied forces withdrew bringing the Gallipoli campaign to an inglorious end.