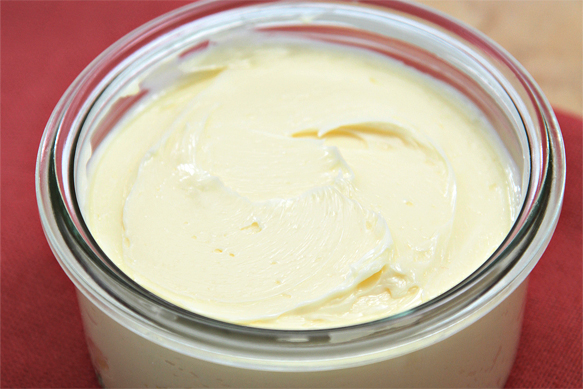
My love affair with making my own dairy products started with my first batch of ricotta -- an event that changed my cooking life. Until then, I just hadn't realized how effortless it is to make fresh cheeses, crème fraîche or butter. But more importantly, it was a revelation to the taste buds -- the flavor surpassed anything I'd ever bought in stores... even gourmet stores. And this homemade butter is no different. It is absolutely enchanting!
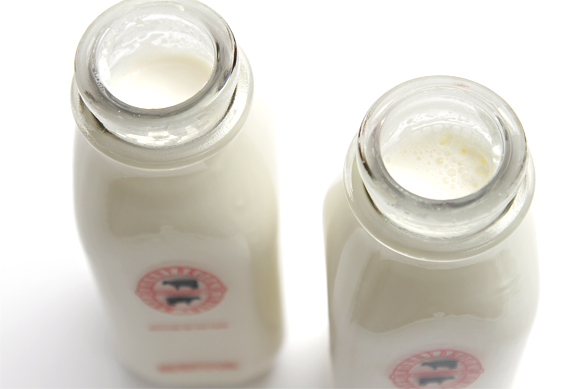
Of course, it all starts with the milk -- or in this case, the cream. While testing this recipe, I tried creams from five different local dairy farms and the one that yielded the best results (in both flavor and texture) was from Ronnybrook Farm Dairy. Their pasteurized and un-homogenized cream is bursting with sweet, grassy aromas that are truly spectacular. I also found that using un-homogenized cream cut the churning time by at least half -- one of the reasons I don't give any times for this step, lest you get confused if your butter doesn't form in a specified time. In fact, all the creams I tested took different times to churn. So in the video, I stop the machine at each stage to show exactly what the process looks like, rather than giving a time.
As a reminder, this recipe is for cultured butter, the kind that is highly aromatic and a bit sweet. And that means the cream has to be fermented before the butter is churned (see step 1).
You'll be able to enjoy your fresh, homemade butter as soon as you've made it. But eating 12 ounces of butter does take a bit of time, so I recommend packing it in small jars and freezing what you won't be consuming within a few days. This way, the awesome flavor and freshness of your beautiful homemade butter will be preserved.
And let's not forget that you'll also end up with 2 cups of fresh buttermilk! It'll stay fresh in the refrigerator for two weeks, and you'll be able to make many delicious recipes with it... here are a few to inspire you.
Happy churning!
Homemade Cultured Butter
makes 12 oz (340 g) sweet butter & 2 cups buttermilk
active time: about 20 min
4 cups heavy cream -- pasteurized and un-homogenized (See Viviane's tip)
1 package buttermilk culture C21
6 to 8 cups iced spring water
butter muslin
Step 1: Place the cream in a medium heavy-bottomed non-reactive saucepan and warm over low heat until it reaches 68 degrees F (20 degrees C). Remove pan from heat and sprinkle the culture over the whole surface of the cream. Let stand for 5 minutes to re-hydrate the culture. Then whisk the cream for 20 seconds to distribute the starter evenly. Transfer to a clean glass jar, cover and let stand undisturbed at room temperature for 12 to 24 hours until the cream has thickened. (Ambient temperature should be around 70 degrees F (21 degrees C). The cream will take longer to thicken at cooler temperatures.) Then refrigerate the cream for 12 to 24 hours.
Step 2: Remove the fermented cream from the refrigerator and let stand at room temperature until it reaches 55 degrees F (13 degrees C) (about 1 hour). Place the cream in the bowl of a food processor and process at high speed until the butter forms. First the cream will thicken and its volume will increase. Then the cream will start looking grainy, and very soon after that, the butter will start to come together and separate. Stop the machine when you hear a splashing noise in the bowl -- that's the buttermilk that has separated from the butter. Pour the butter and buttermilk into a fine-meshed sieve suspended over a bowl and, using a silicone spatula, press as much buttermilk out of the butter as you can. Place the buttermilk in a glass jar or bottle and refrigerate. Place the butter in a medium bowl and add enough iced spring water to almost cover the butter. Knead the butter with your fingers for about 1 minute. The leftover buttermilk will be released and the water will become cloudy. Discard the water, pour fresh iced water over the butter and knead for another minute. Discard the water and repeat this process two more times (4 times total), until the water comes out clear. Place the butter in the fine-meshed sieve again and knead a few times to remove any excess water. Then shape the butter into a long log and place it on top of the butter muslin. Flatten it with your hands and wrap it in the muslin to blot out the last drops of water. Unwrap the butter and store it in glass jars, or shape it and wrap it in wax paper. Refrigerate for up to 2 weeks or freeze for up to 2 months.
Viviane's Tip
Making butter is easy -- in fact, extraordinarily easy! But you need to pay very close attention to the process. First you need fresh cream. This is most essential. Un-homogenized cream will give you the very best results in both texture and flavor. Homogenized is second best, but will still give you a very good butter. Do not use commercial cream that's been ultra-pasteurized or ultra-homogenized.
Although a food processor is the best tool for making butter at home, you can use a stand mixer... but it will splatter a lot and get droplets of cream all over your kitchen counter. So if you end up using a mixer, make sure to use a splatter guard.
* * *
Now, how about making fresh goat cheese?